• stem+node ceramics
  • HOME
  • Food Recipes
  • About
  • Contact
Menu

The Lovely Crazy

Street Address
City, State, Zip
Phone Number

Your Custom Text Here

The Lovely Crazy

  • stem+node ceramics
  • HOME
  • Food Recipes
  • About
  • Contact

Celeriac Puree With Crispy Lentils

October 12, 2019 Colleen Stem
IMG_2848.jpg
IMG_2859.jpg

Every now and then I make something for me. All for me. This is one of those dishes that was not destined to be shared with anyone. That I had no one else in mind to eat besides me. No worring about what anyone else with think. Just a simple little dish that I was craving and wanting.

So I made it and man, was it so freaking satisfying. Cooking for oneself is very much a gratifying experience.

Celeriac, or also know as celery root. Have you ever had it? If not, well duder, you need to. It is in my top 3 favorite vegetables and that is saying a lot. So anyway, celeriac, has a slight celery taste, but also kind of earthy and nutty. It pairs well with anything that a potato might, but also is amazing on it’s own. Roasted, steamed, raw. Just really fantastic. And it is in season so get on it and go find yourself some.

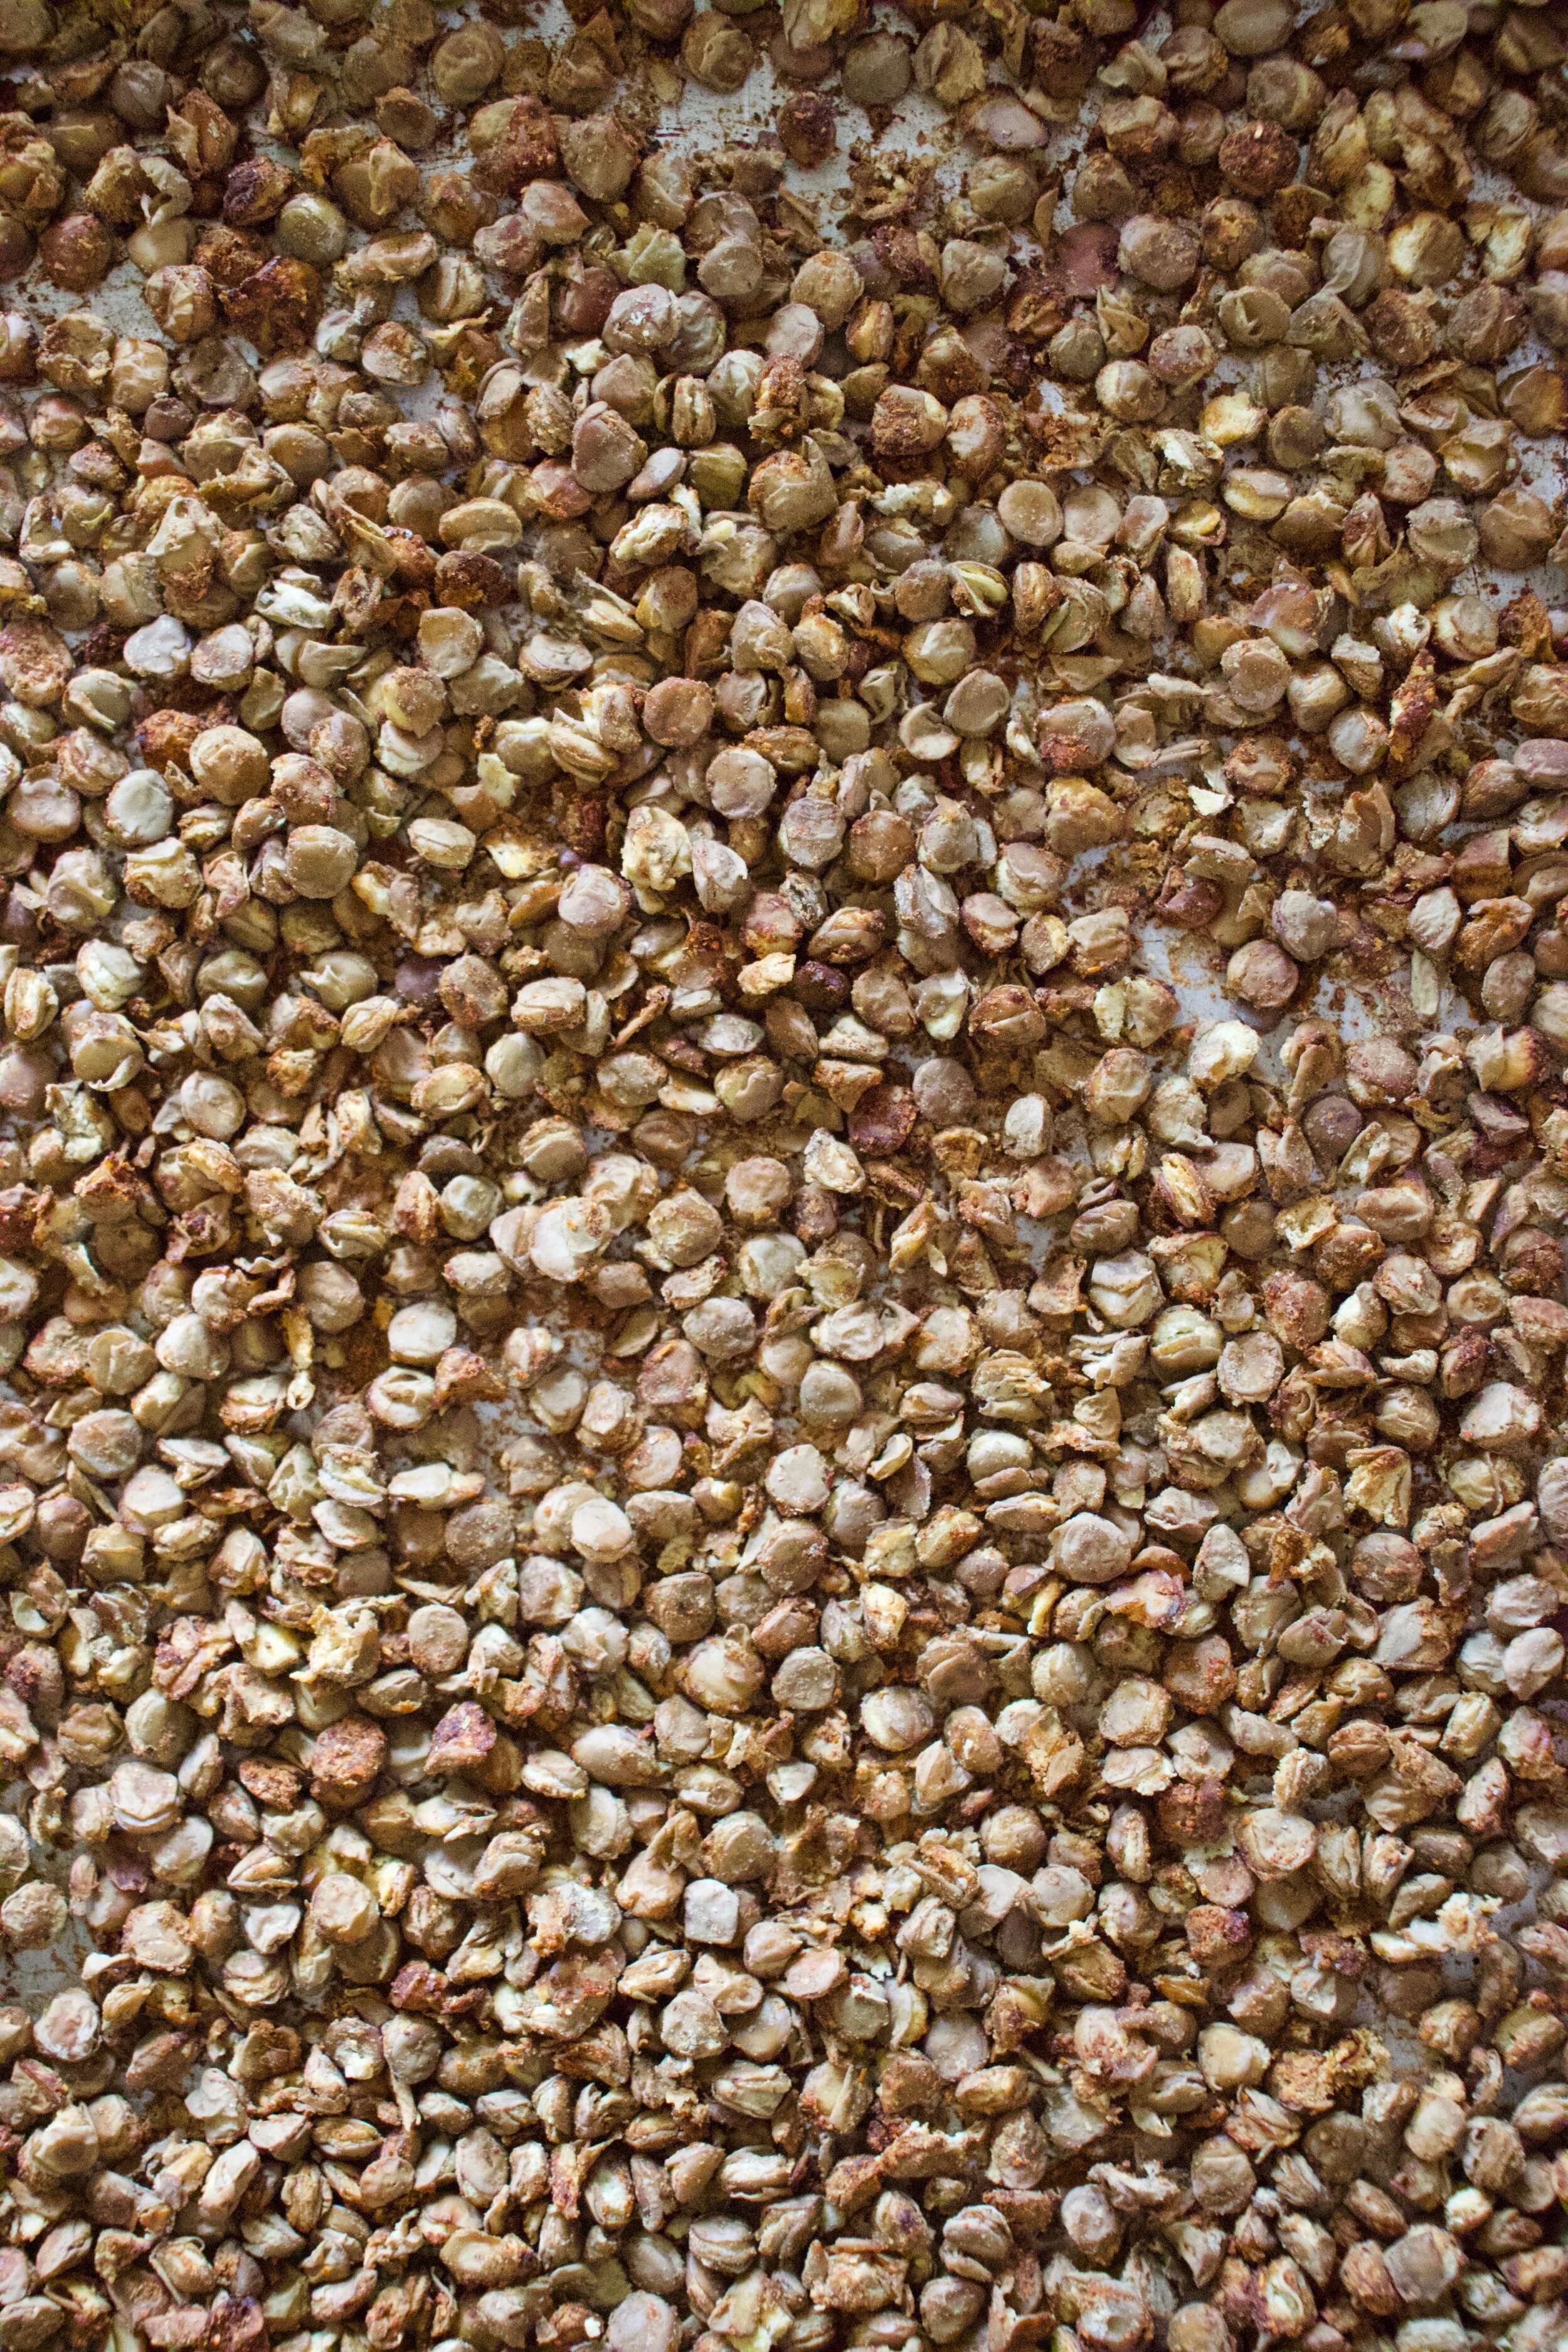
And lentils. In my top 3 favorite foods. Made them crispy because pureed celeriac and crispy lentils just sounded right and I love me crispy things. Again, I was making this dish fo me so crispy was happening.

Together, the creamy, delicious pureed celeriac covered with a bunch of spiced, crispy lentil….Amazing. Eating it, I couldn’t have been happier. I did myself one good with this one.

I might even have to make it to share someday.

Now to the celeriac and lentils!

The stuff. A bulb of celeriac, some cooked lentils, salt and pepper, chili powder, garlic powder. mustard powder, and oil. (oil is optional)

The celeriac. Ok, so most people peel it. I actually get weird looks from people when I tell them I don't , but let me do me, you know. So anyway. Peel it if you want, or not, just cut it up into chunks.

IMG_2815.jpg
IMG_2841.jpg

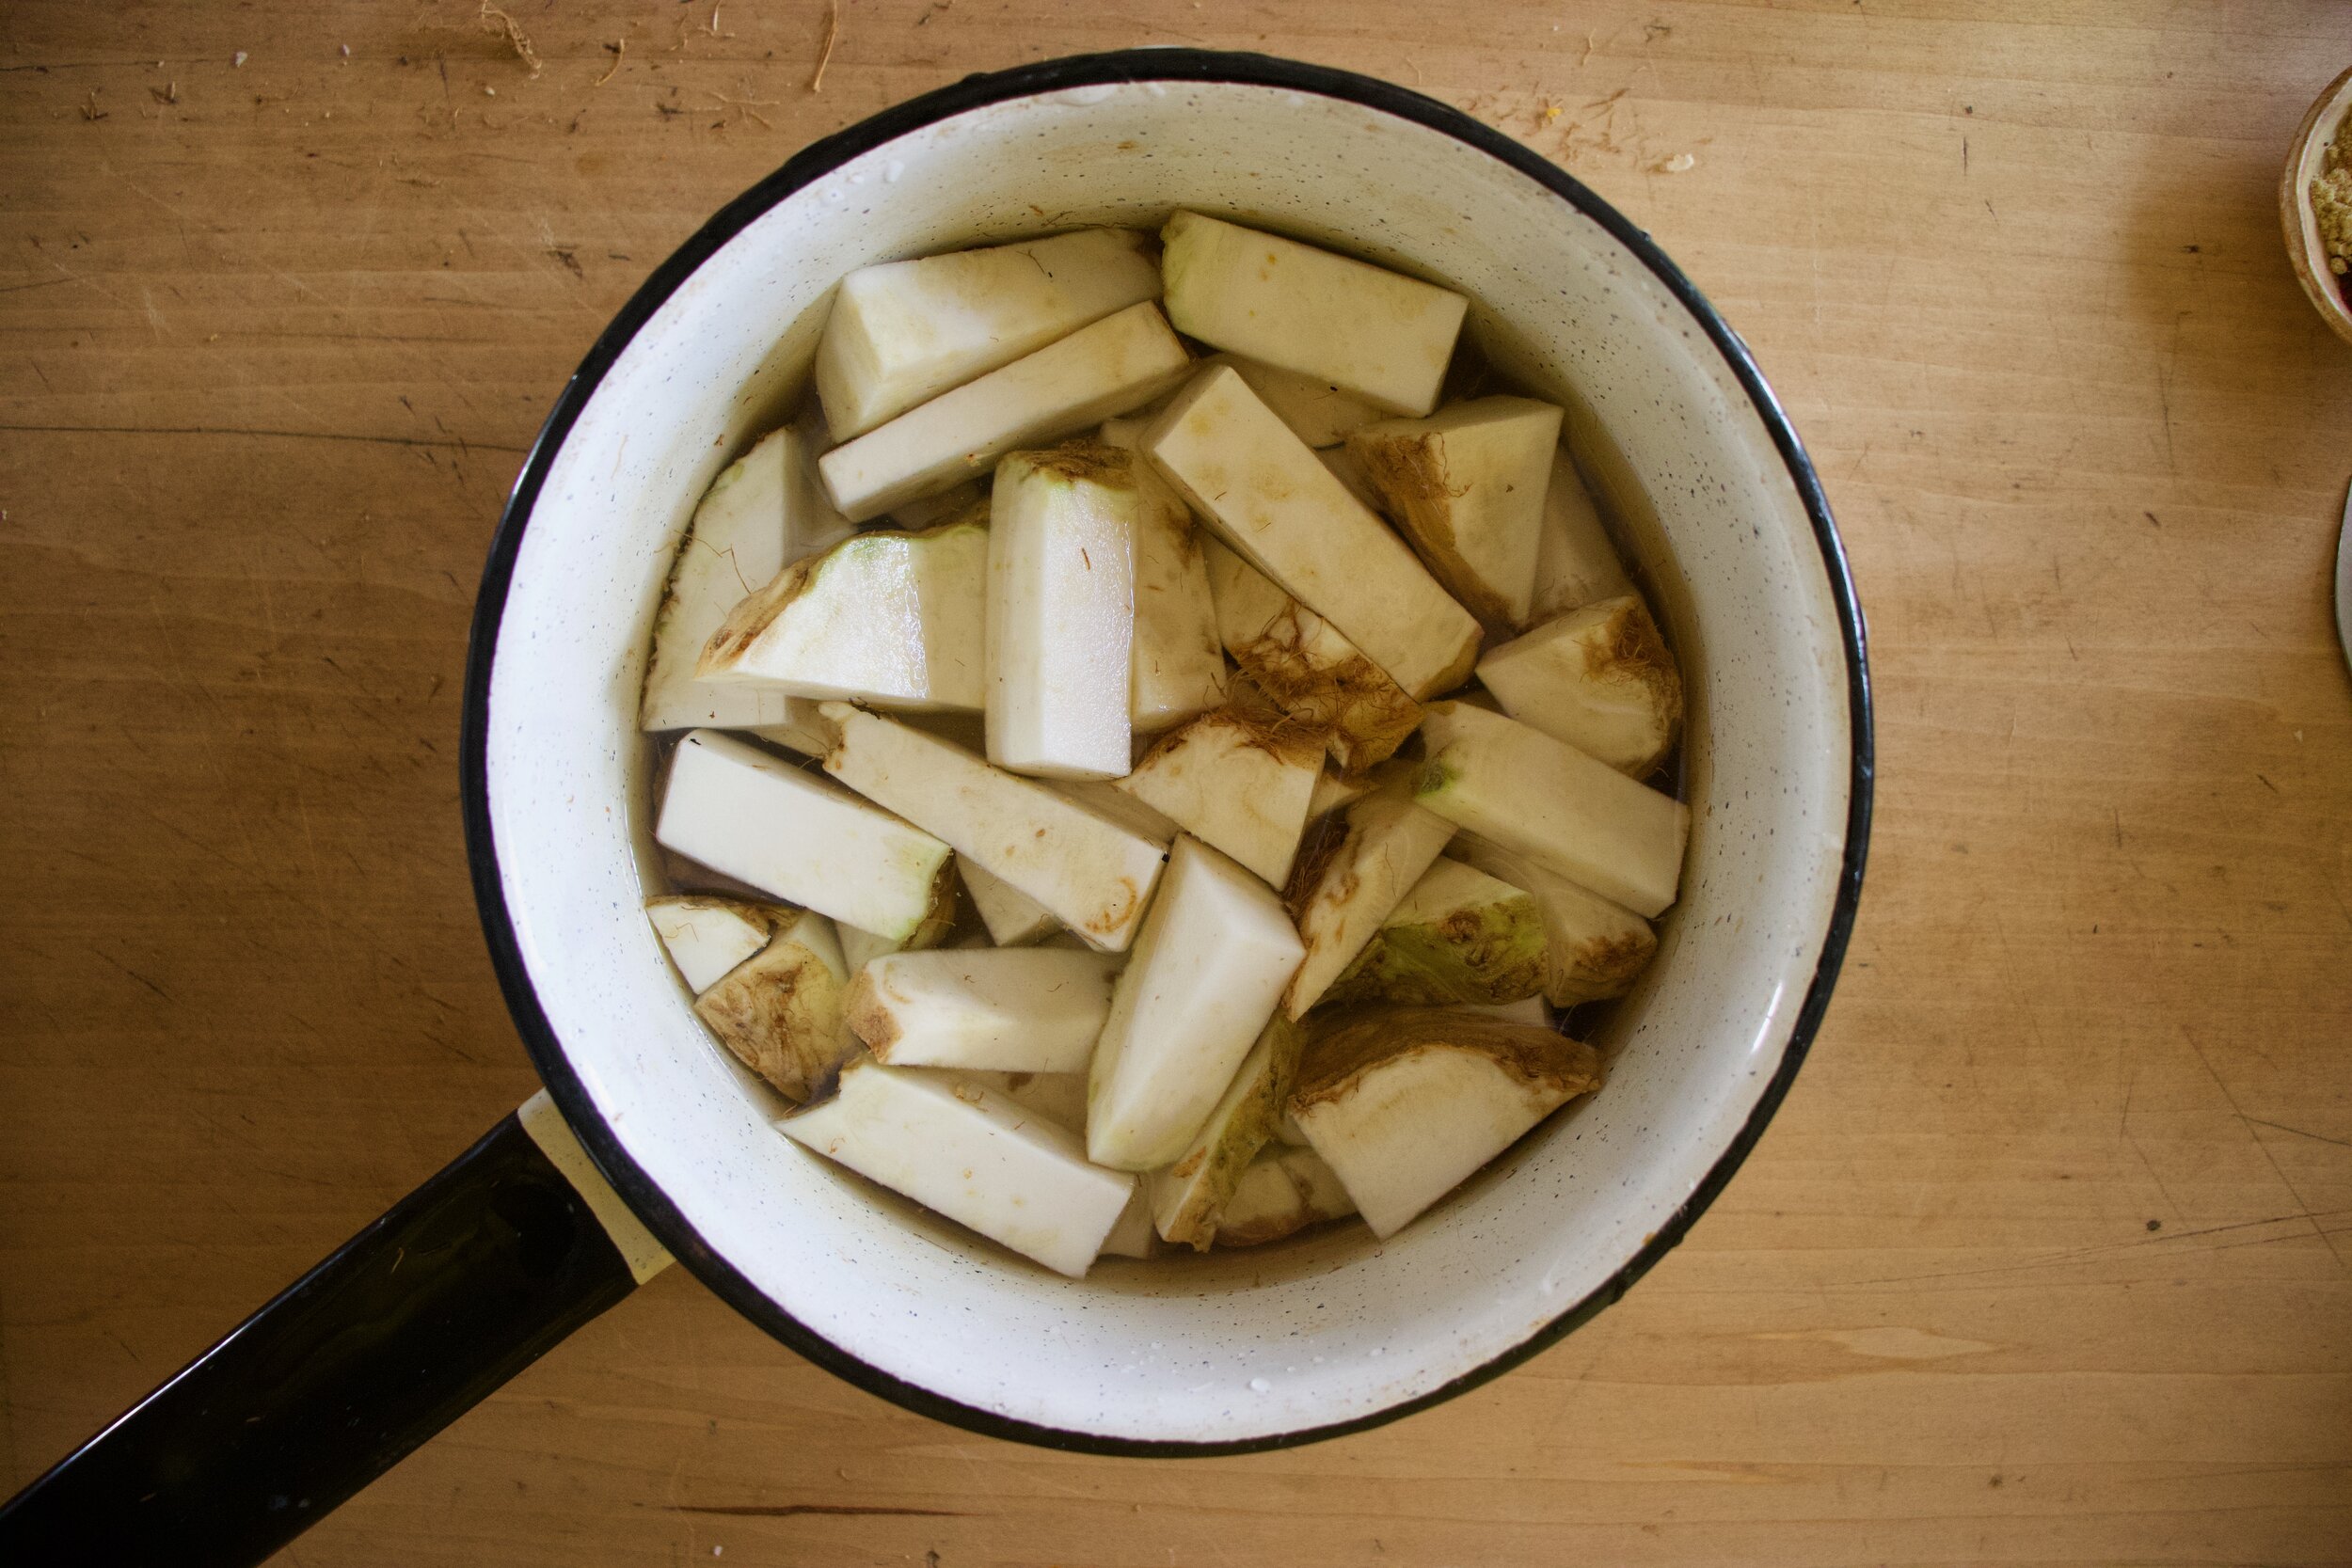
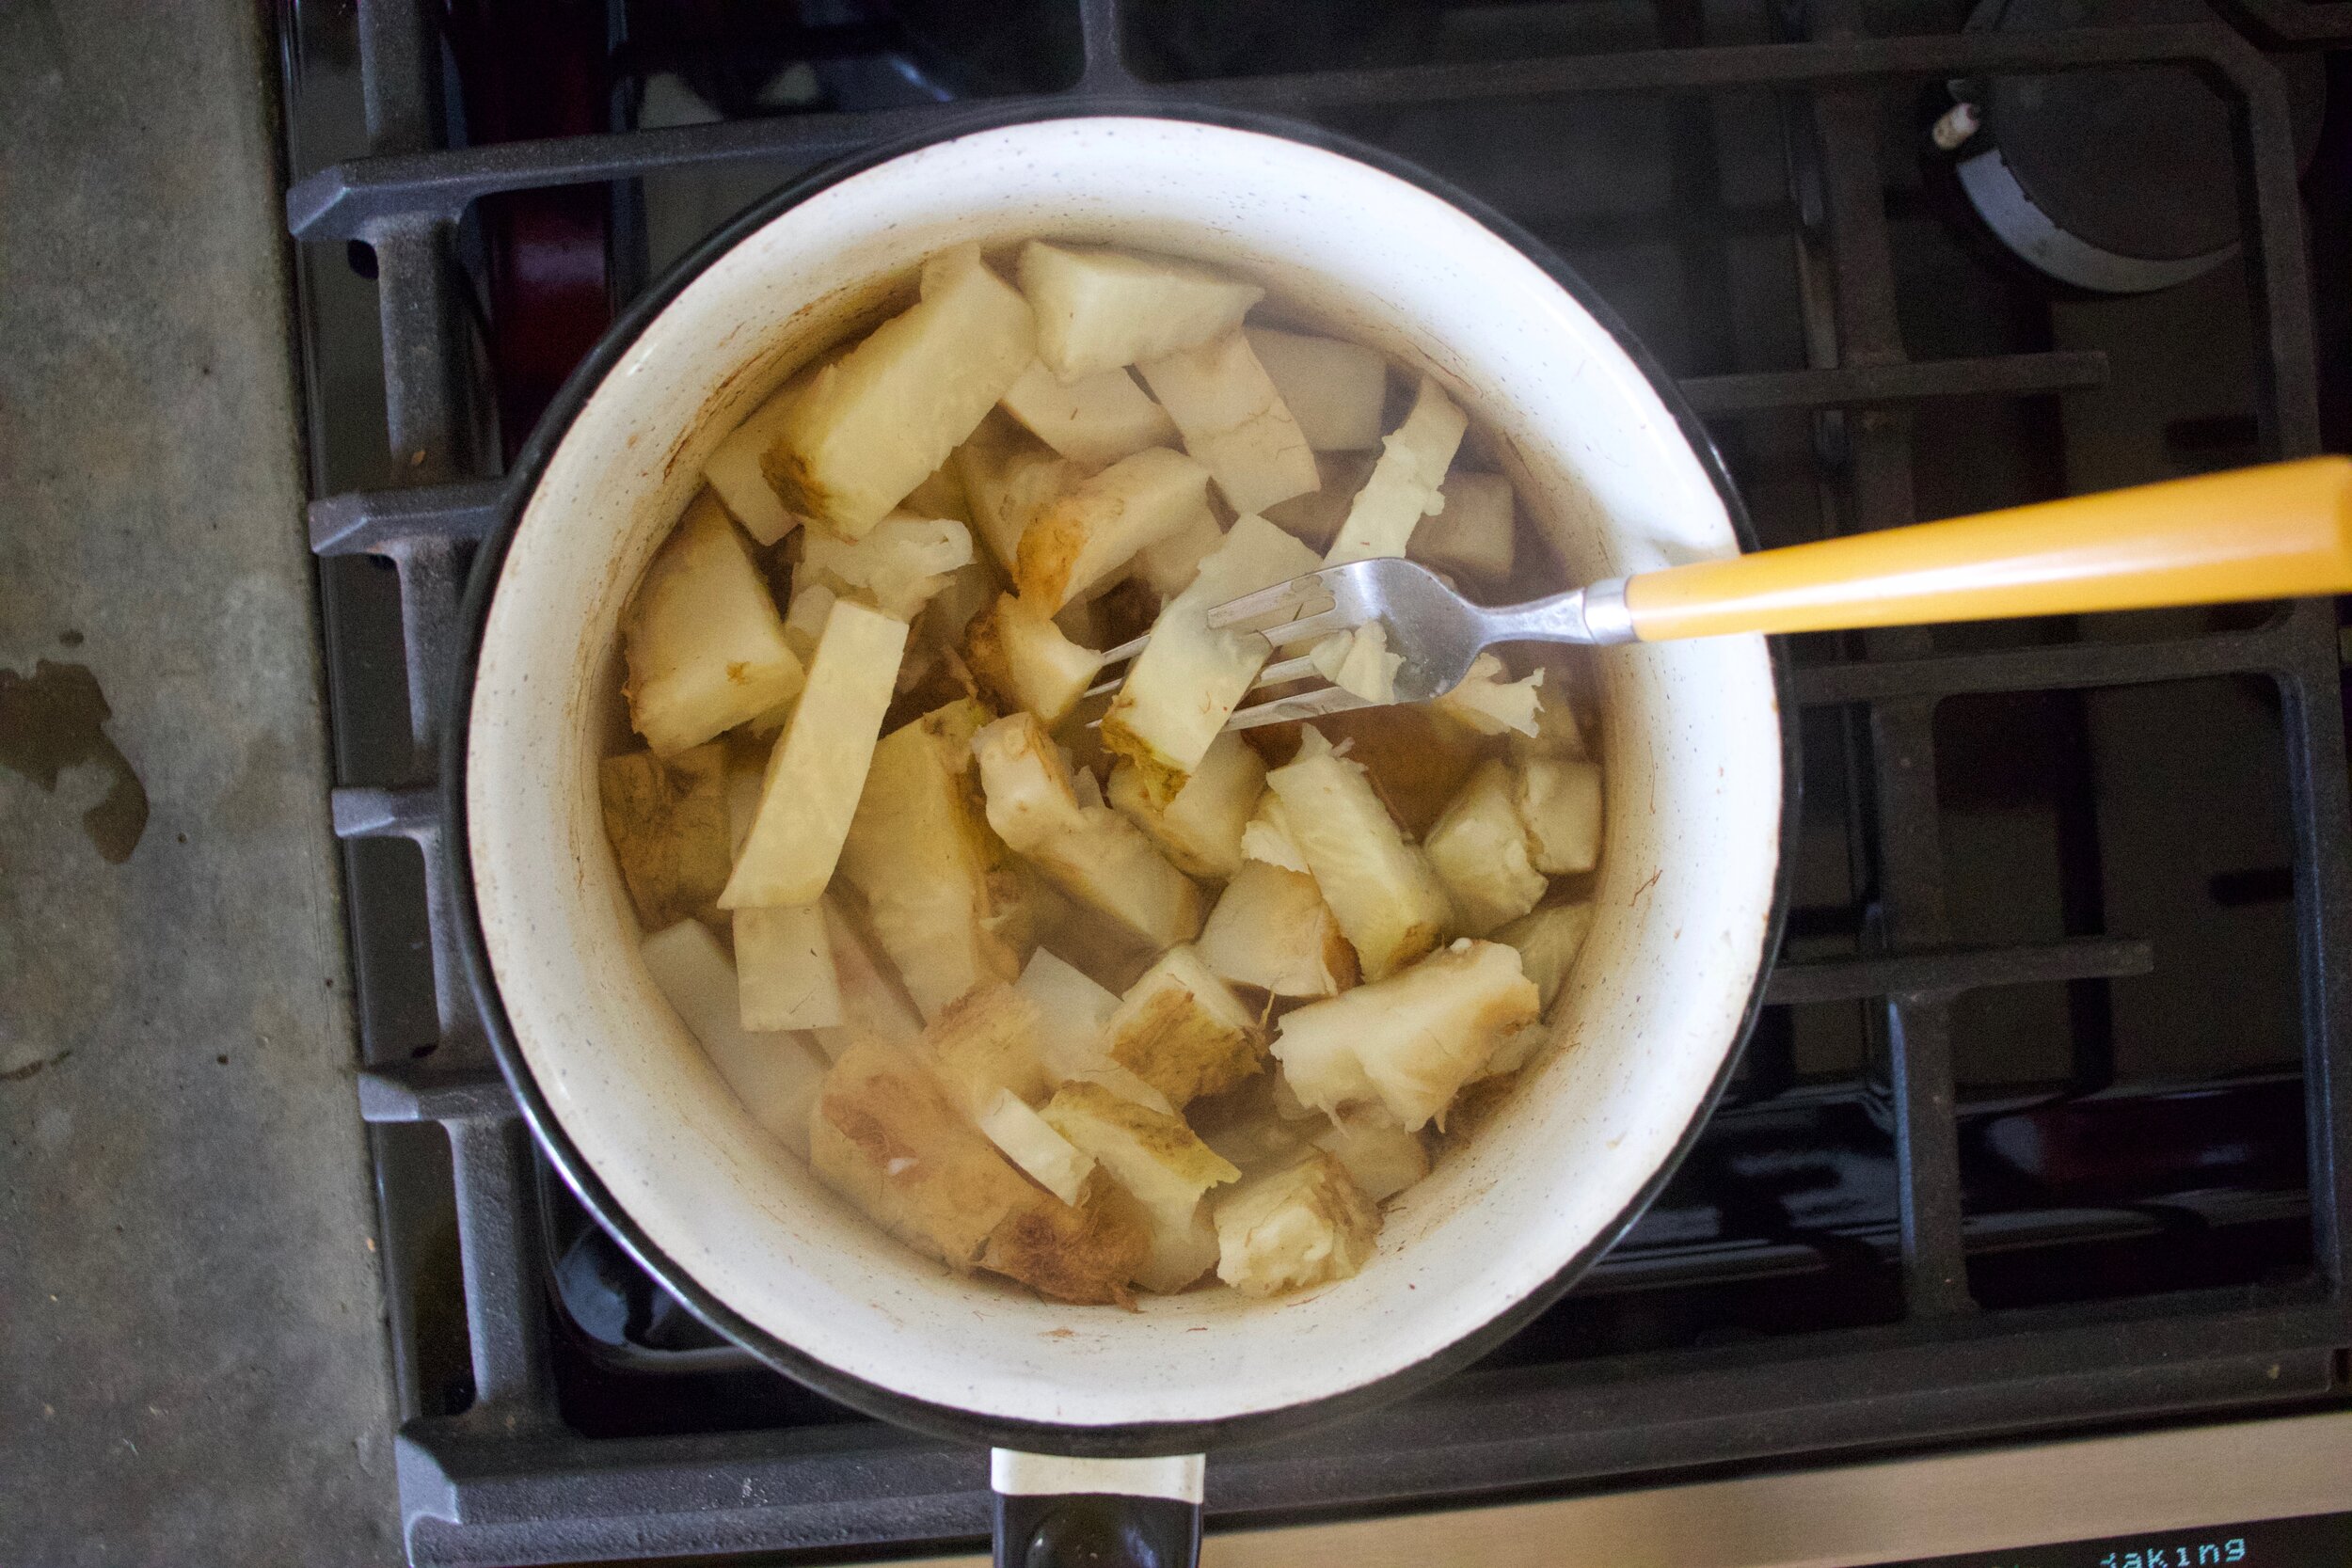
Place cut up celeriac into a pot and cover with water. Place on stove on medium heat and cook until fork tender.

IMG_2816.jpg

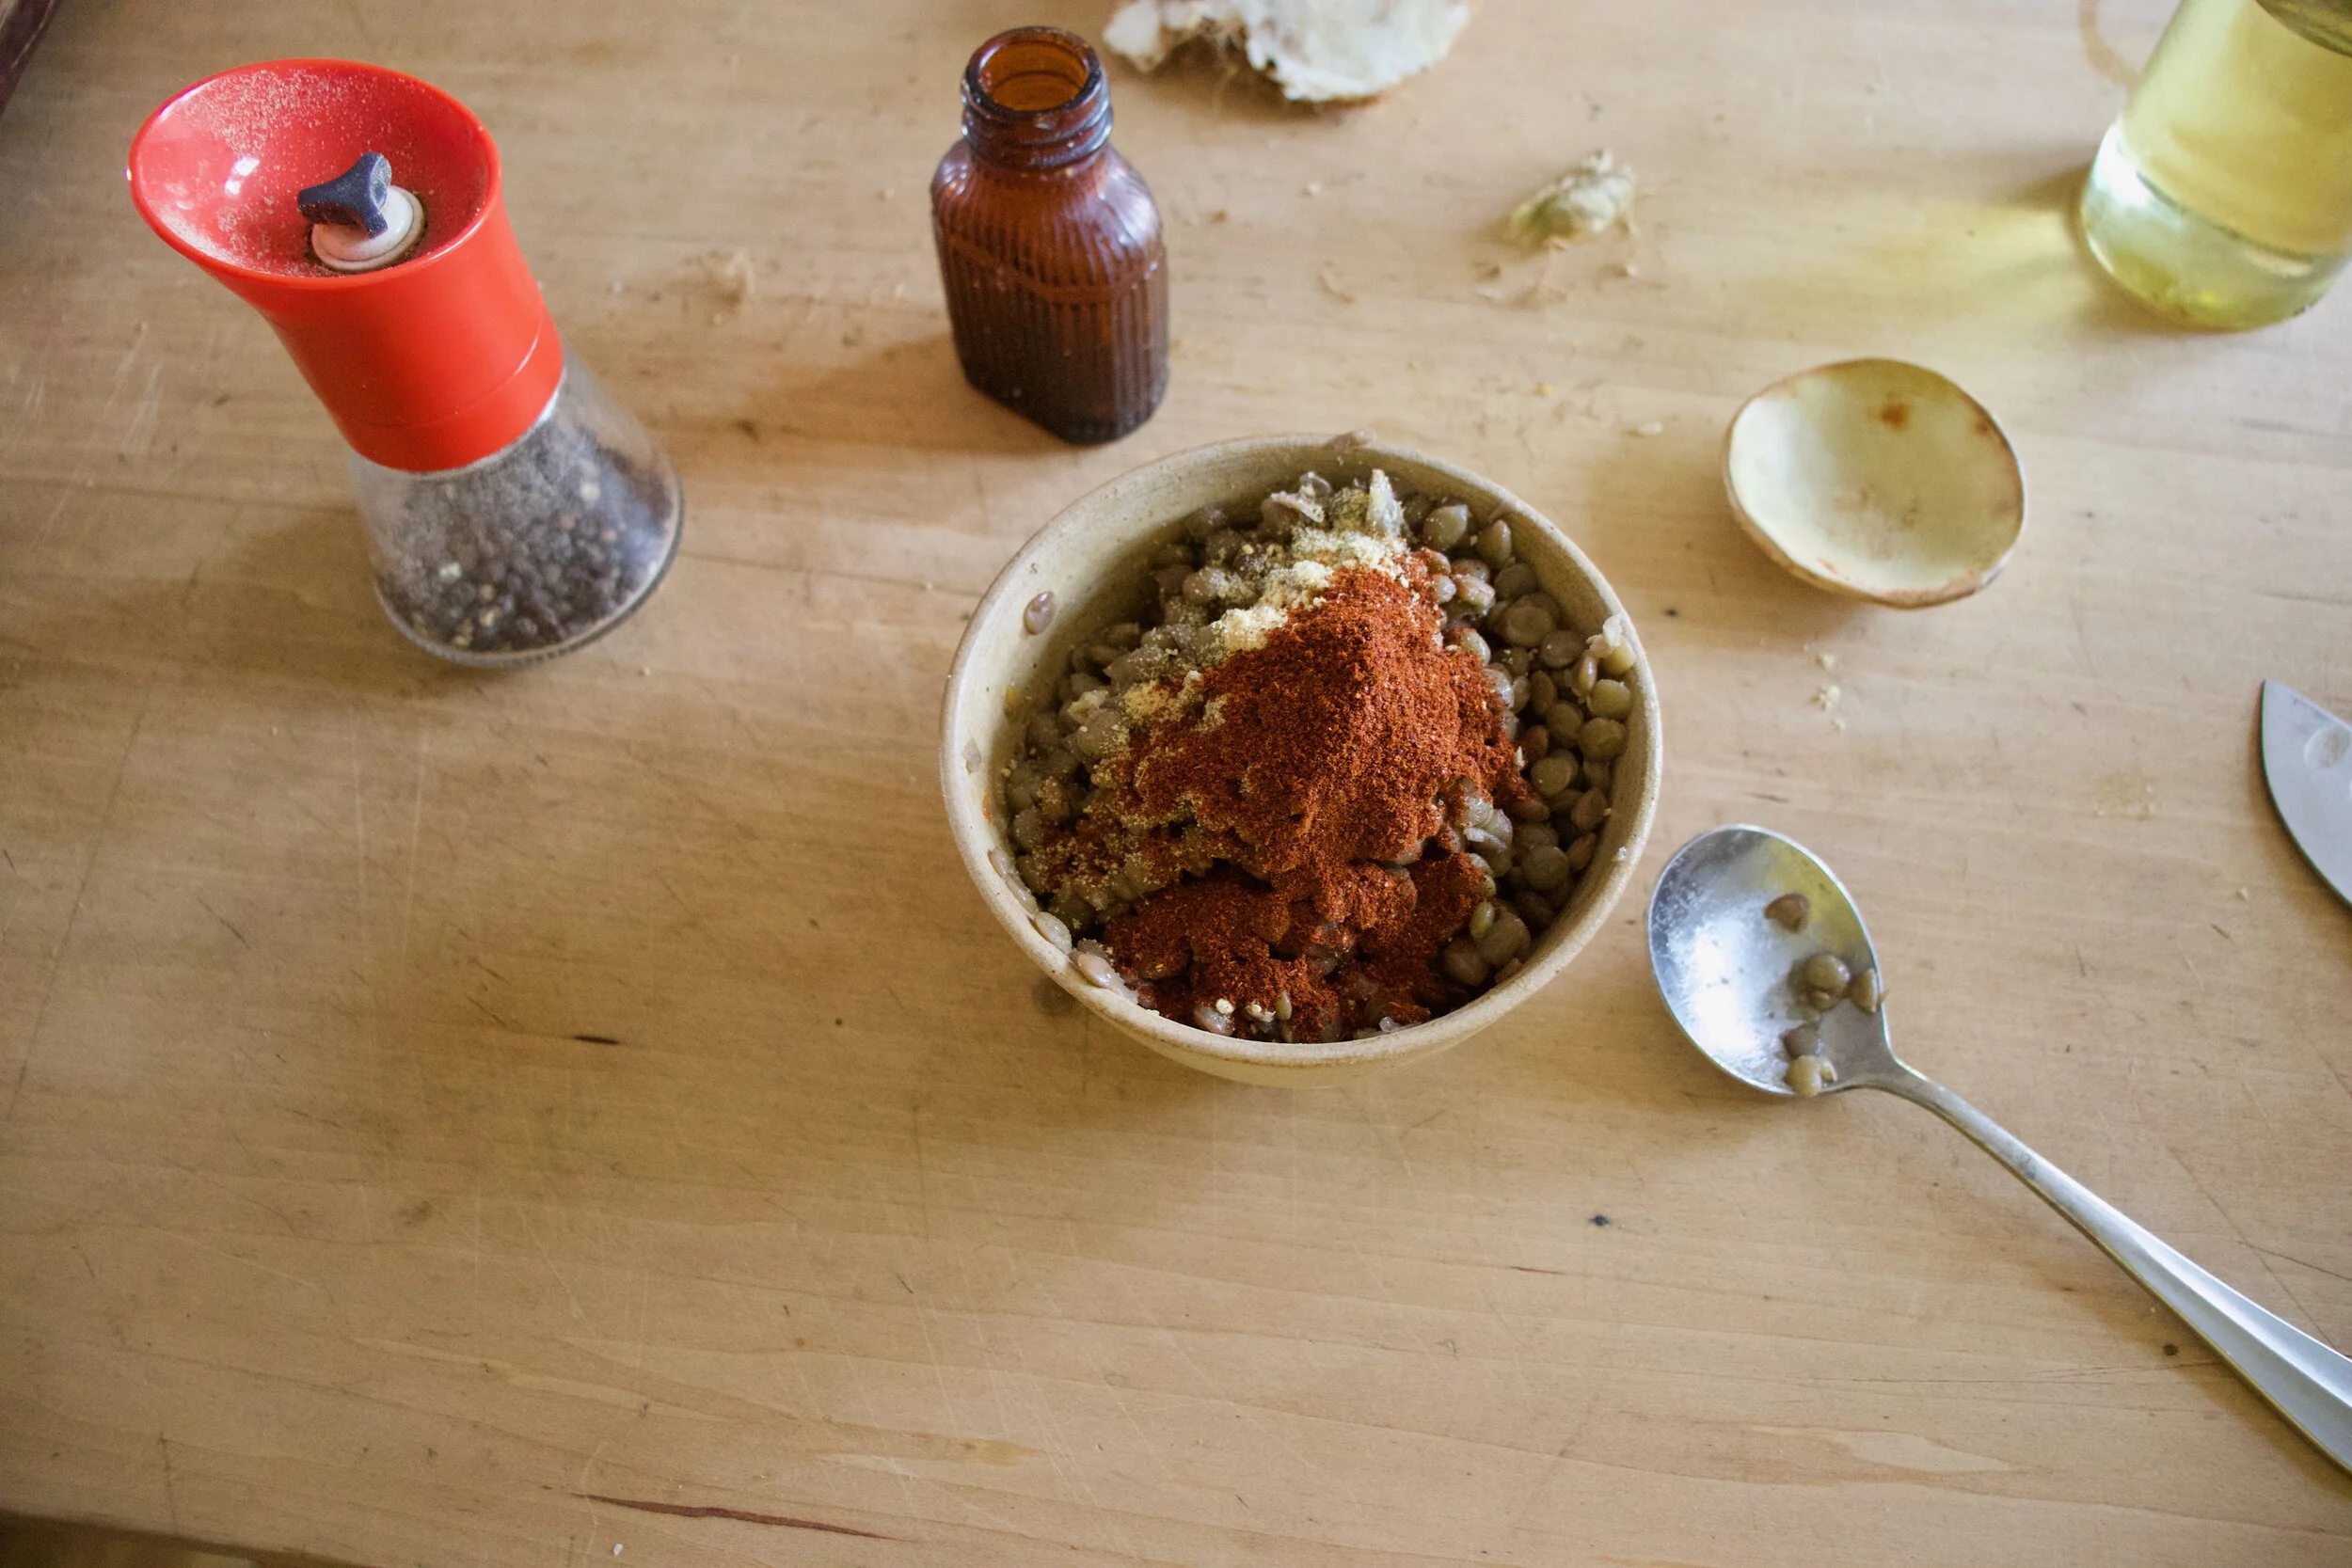
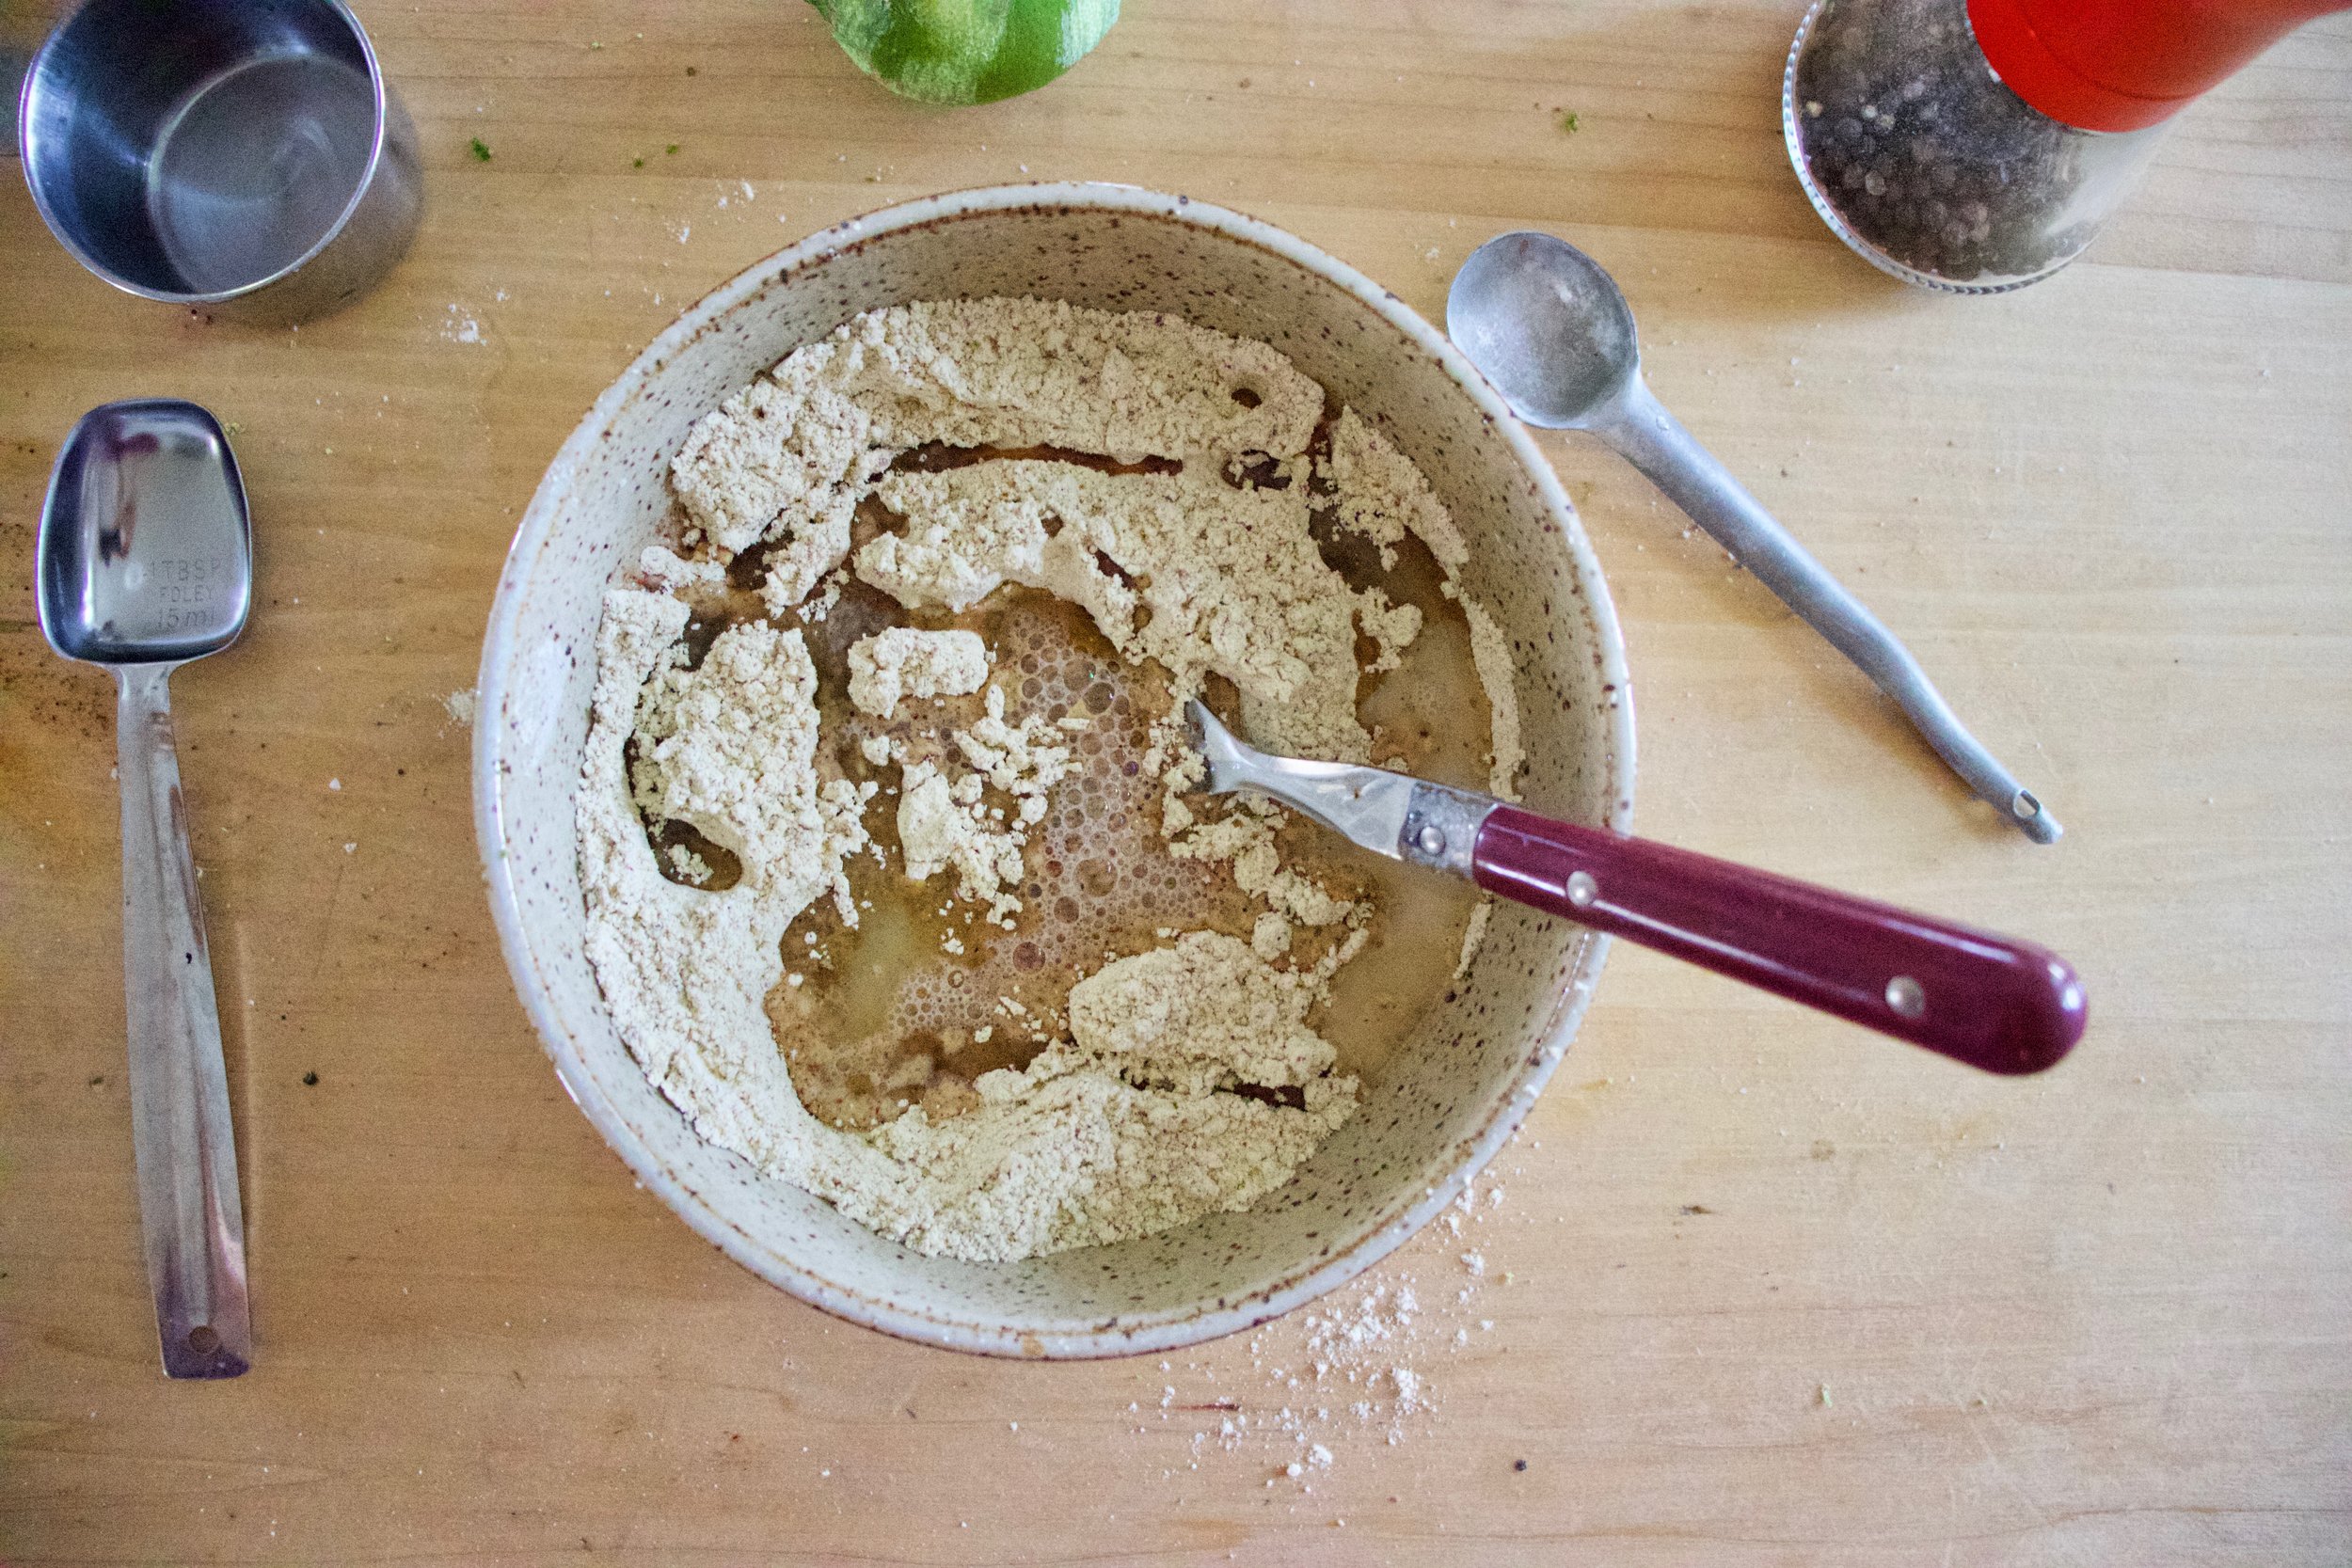
Lentils meet spices and get mix all together. Add a pinch of salt and lots of cracked pepper too.

IMG_2820.jpg
IMG_2847.jpg

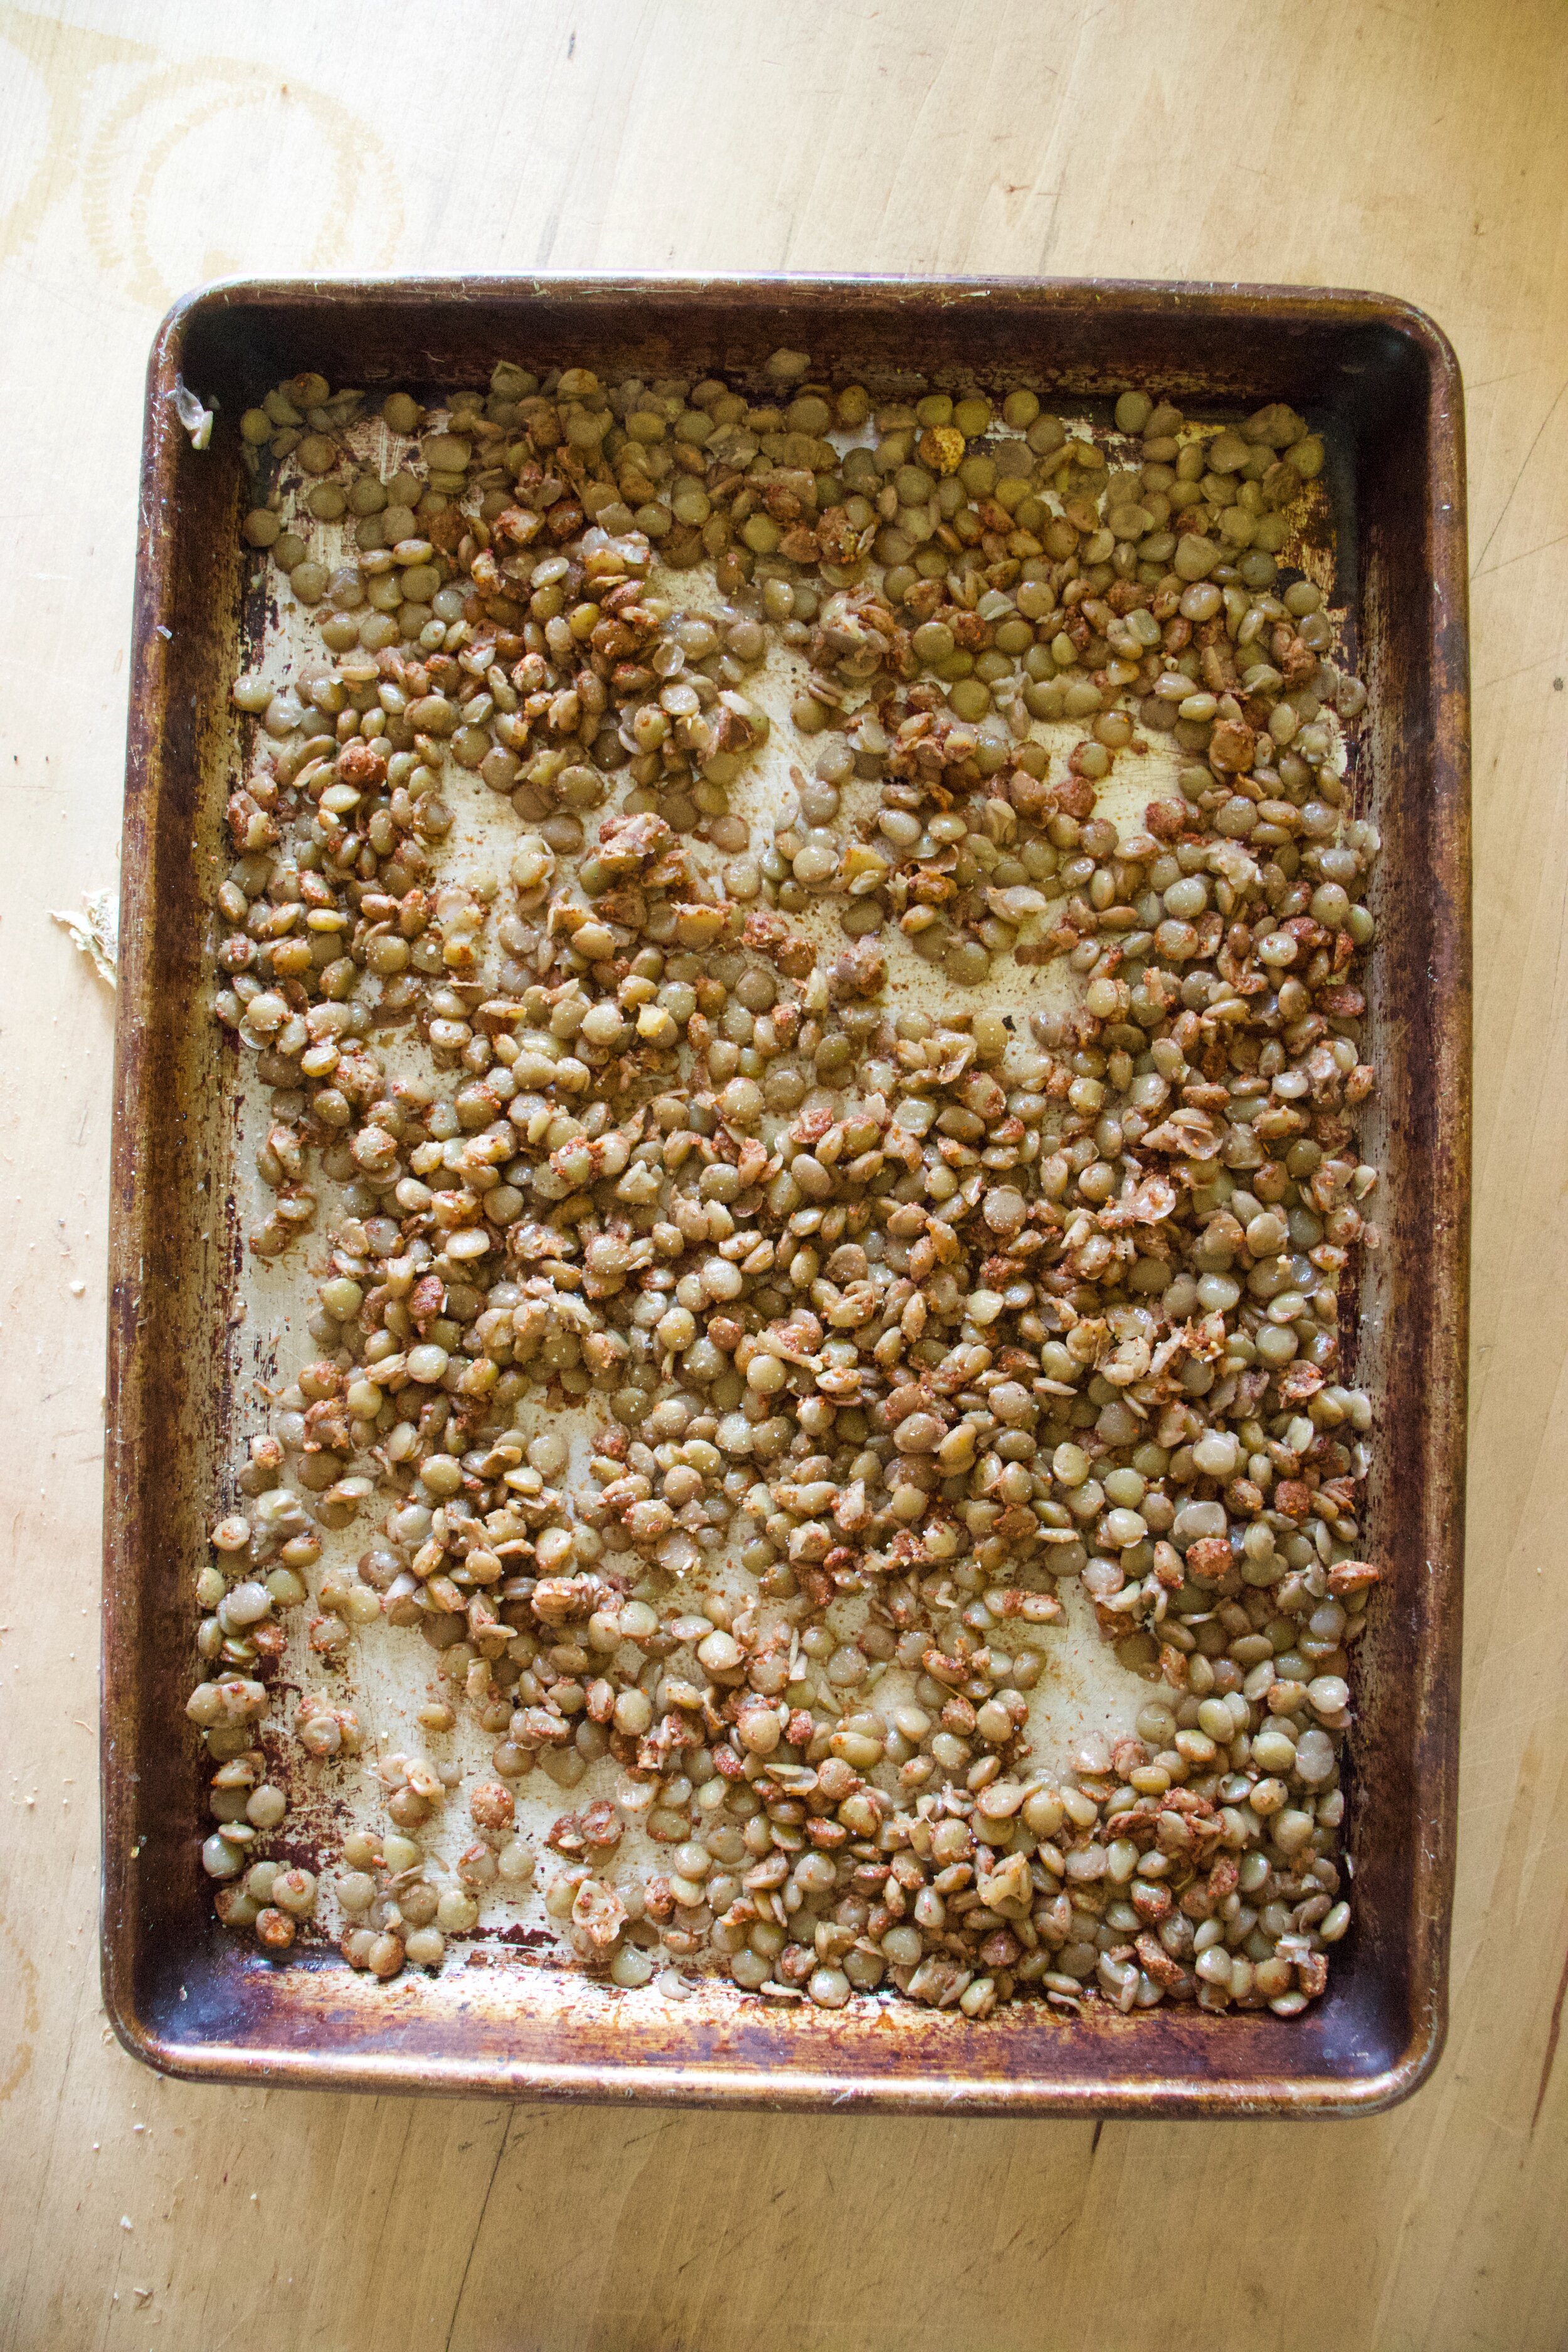
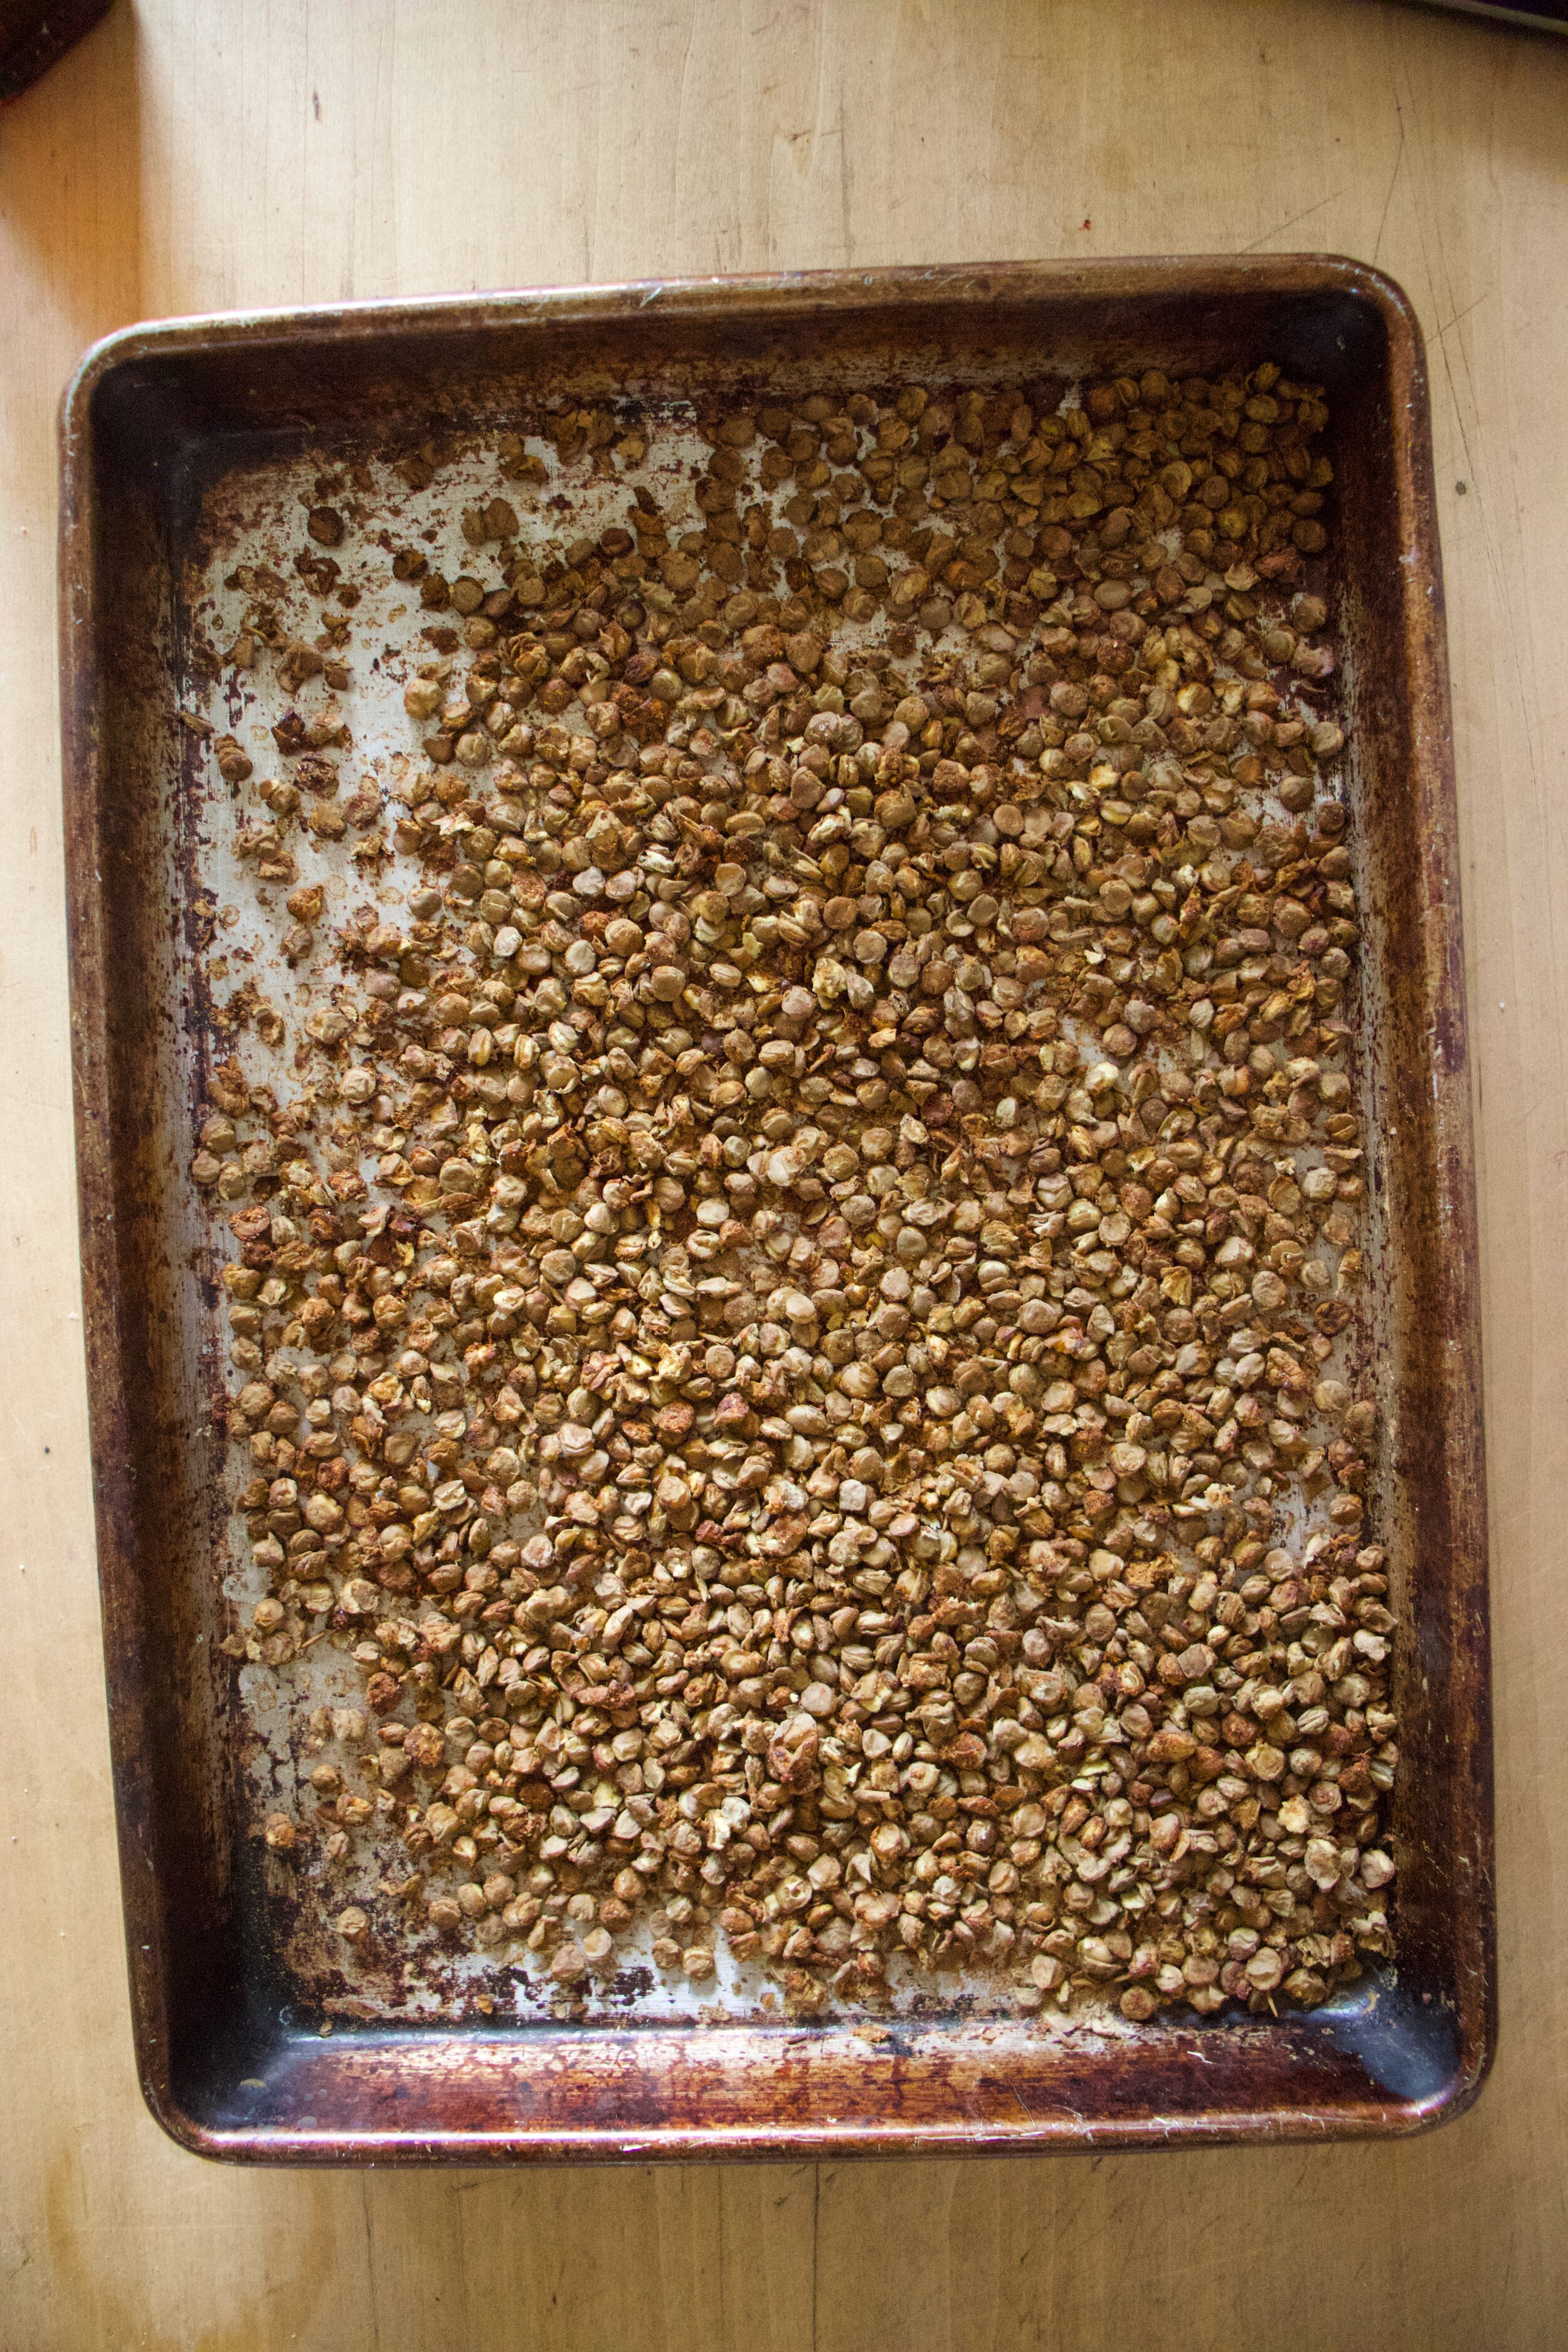
Spread now spiced lentils onto a baking sheet, pop into oven, and bake until crispy. Easy peasy.

IMG_2852.jpg

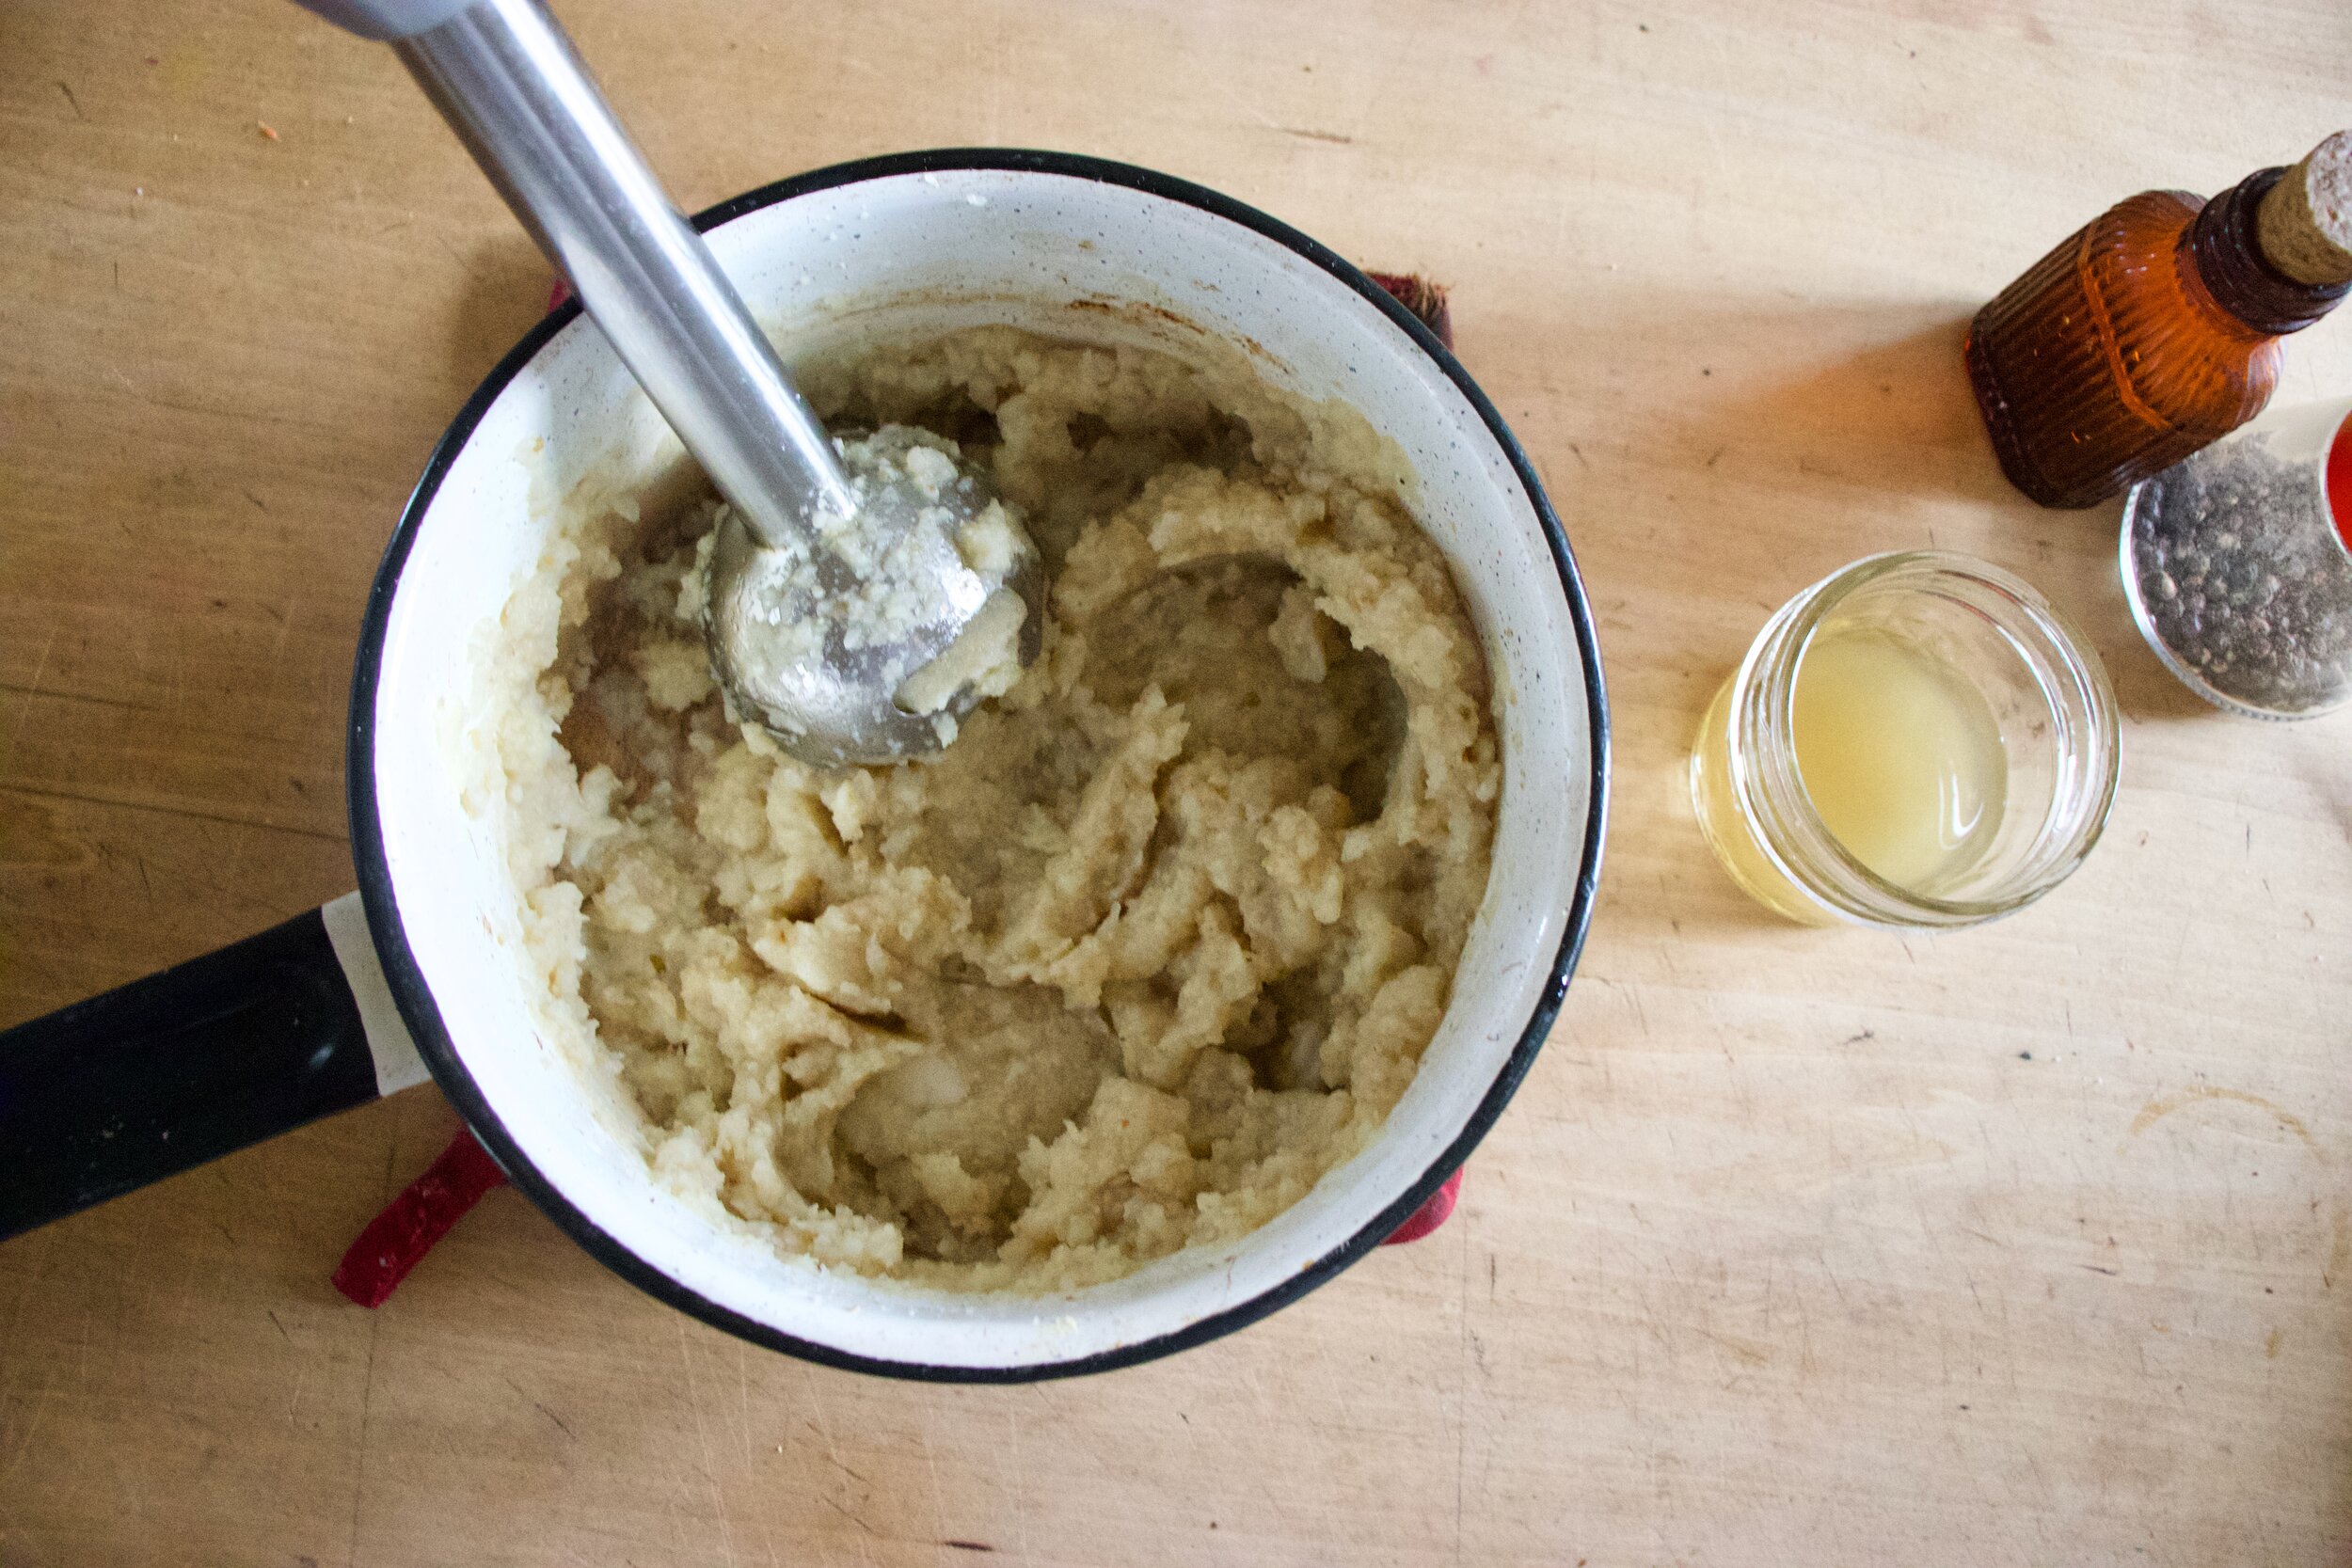
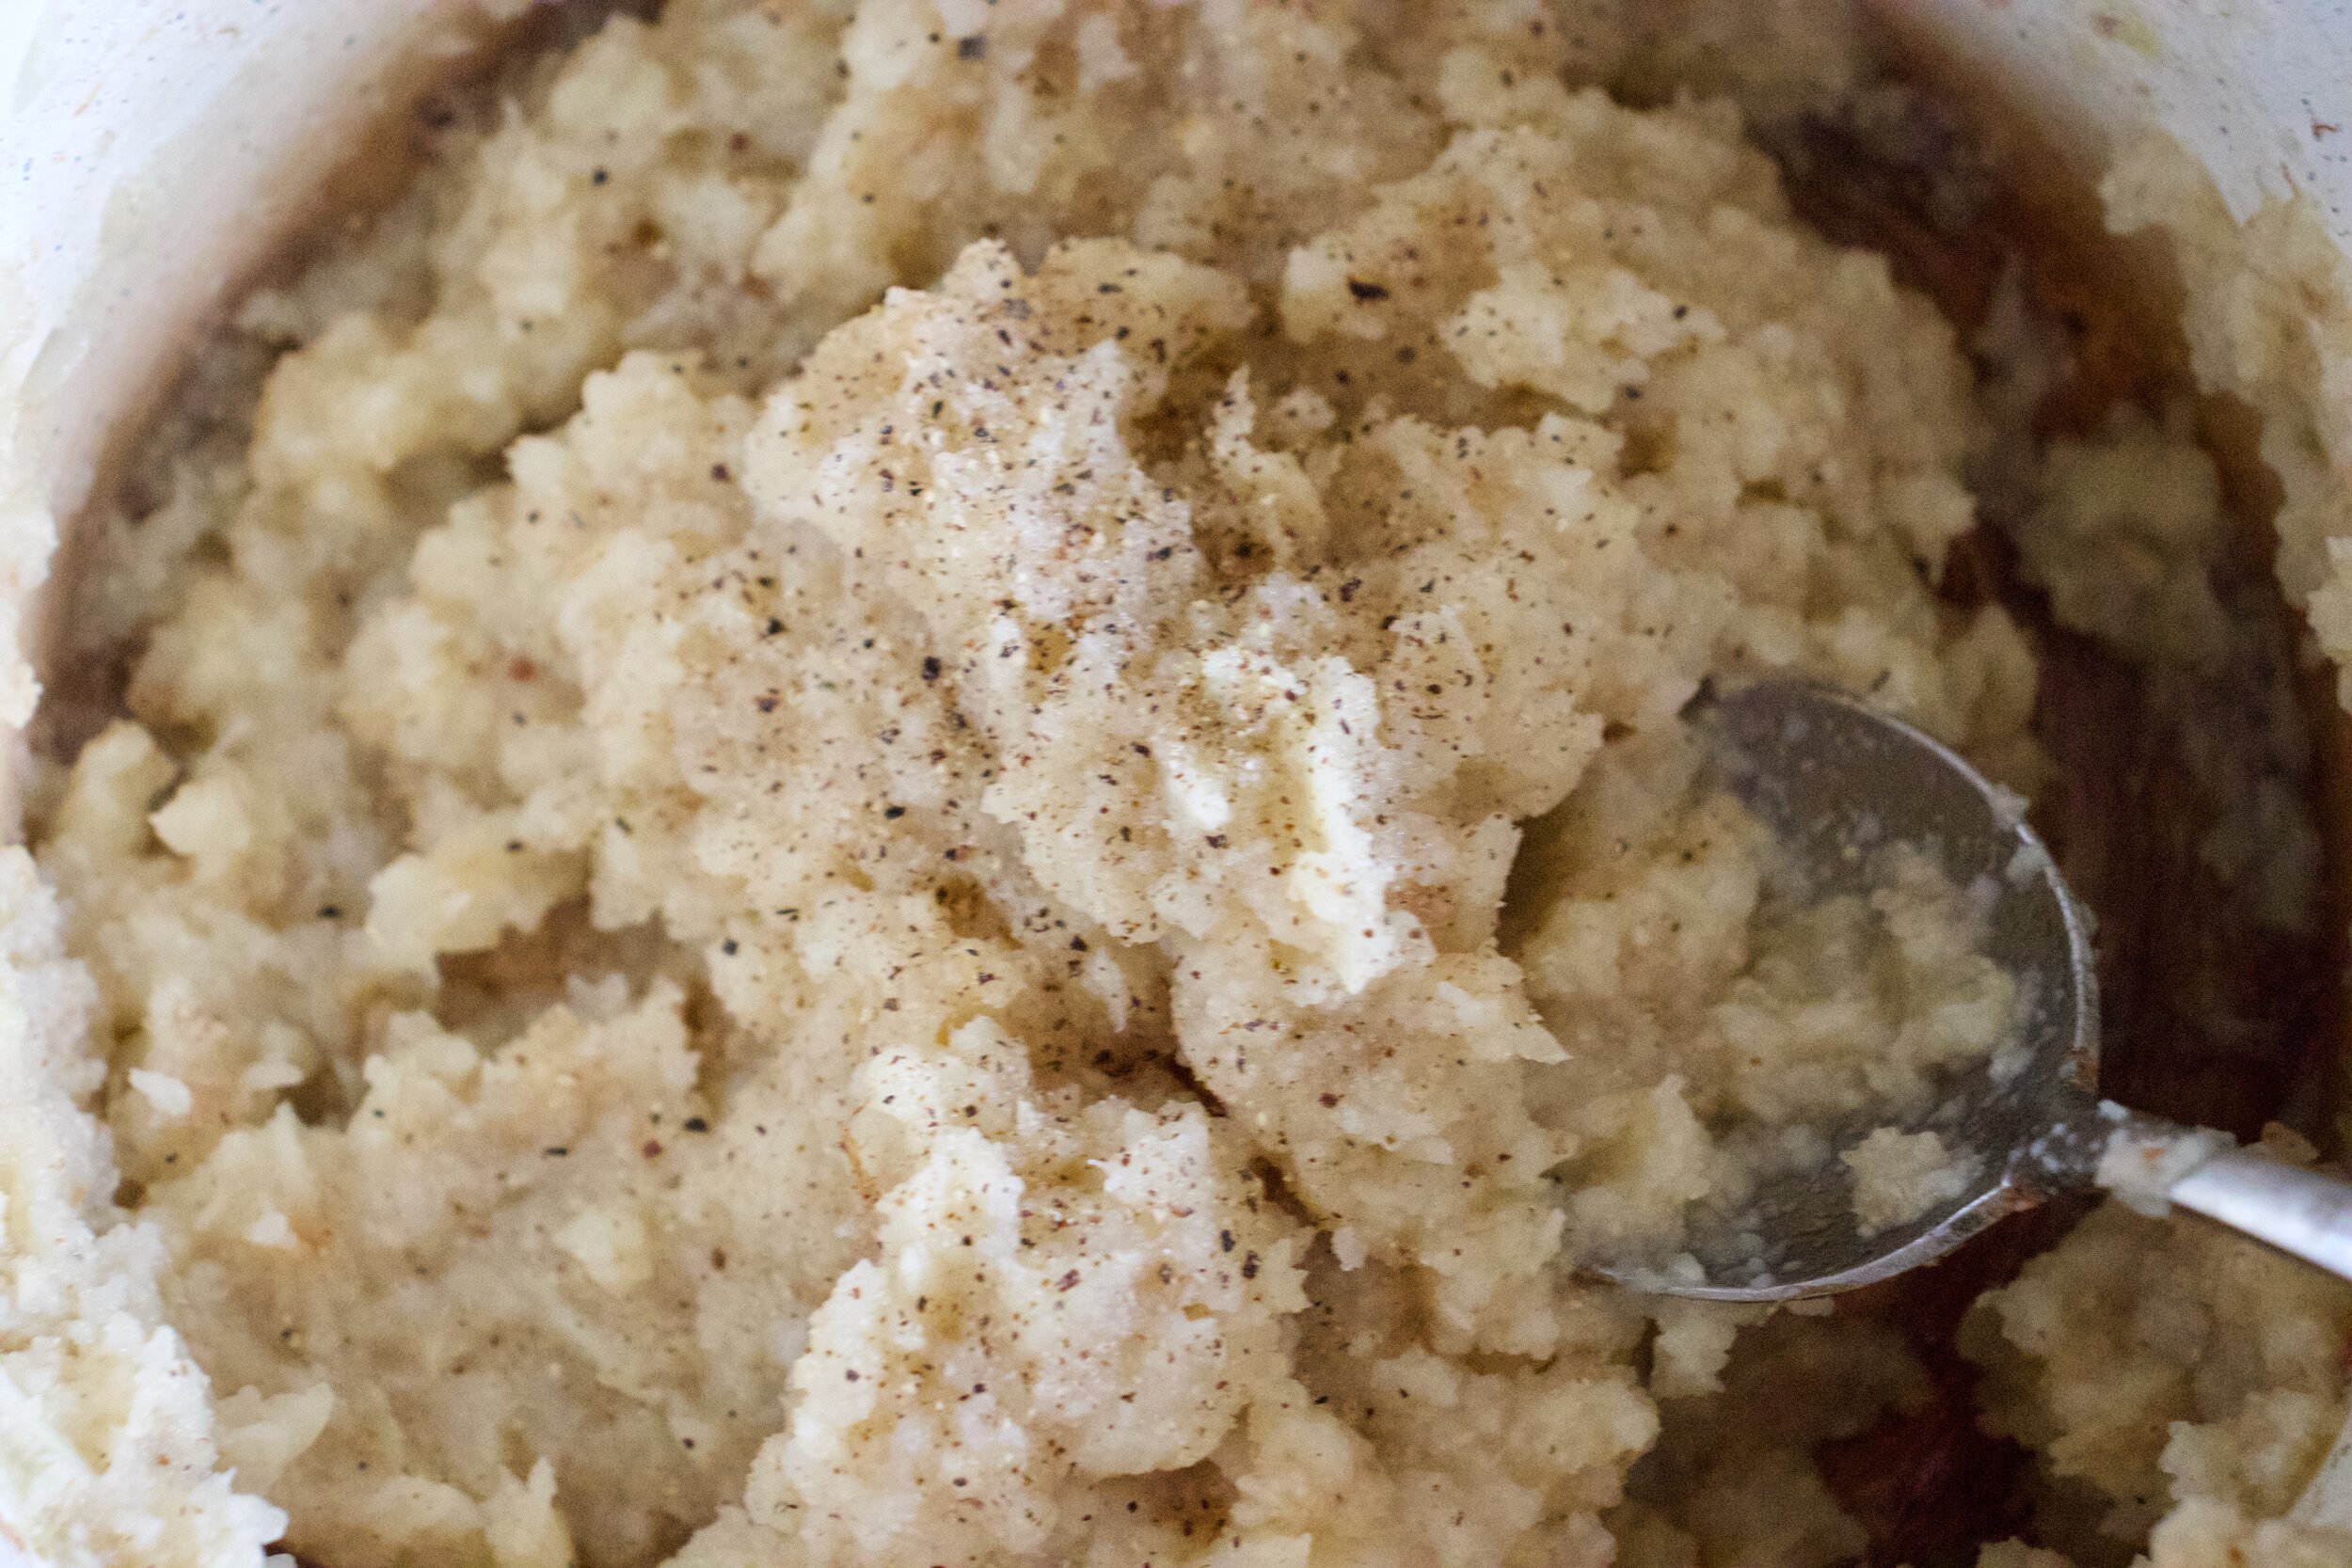
And to puree the celeriac. Strain any extra water into a cup. Season with a pinch of salt and pepper and grab the hand blender (or regular blender) and blend it, adding back in some of the strained water as needed, to get to a consistency that you like. Me, I liked it pretty smooth, but also with a little chunk. Heck, you could leave it really chunky or go all out completely smooth. Up to you. Also if you want a creamier texture, add in a teaspoon or so of the olive oil. That is a taste preference. I didn't add oil this time, but I have before. It’s good both ways.

IMG_2894.jpg

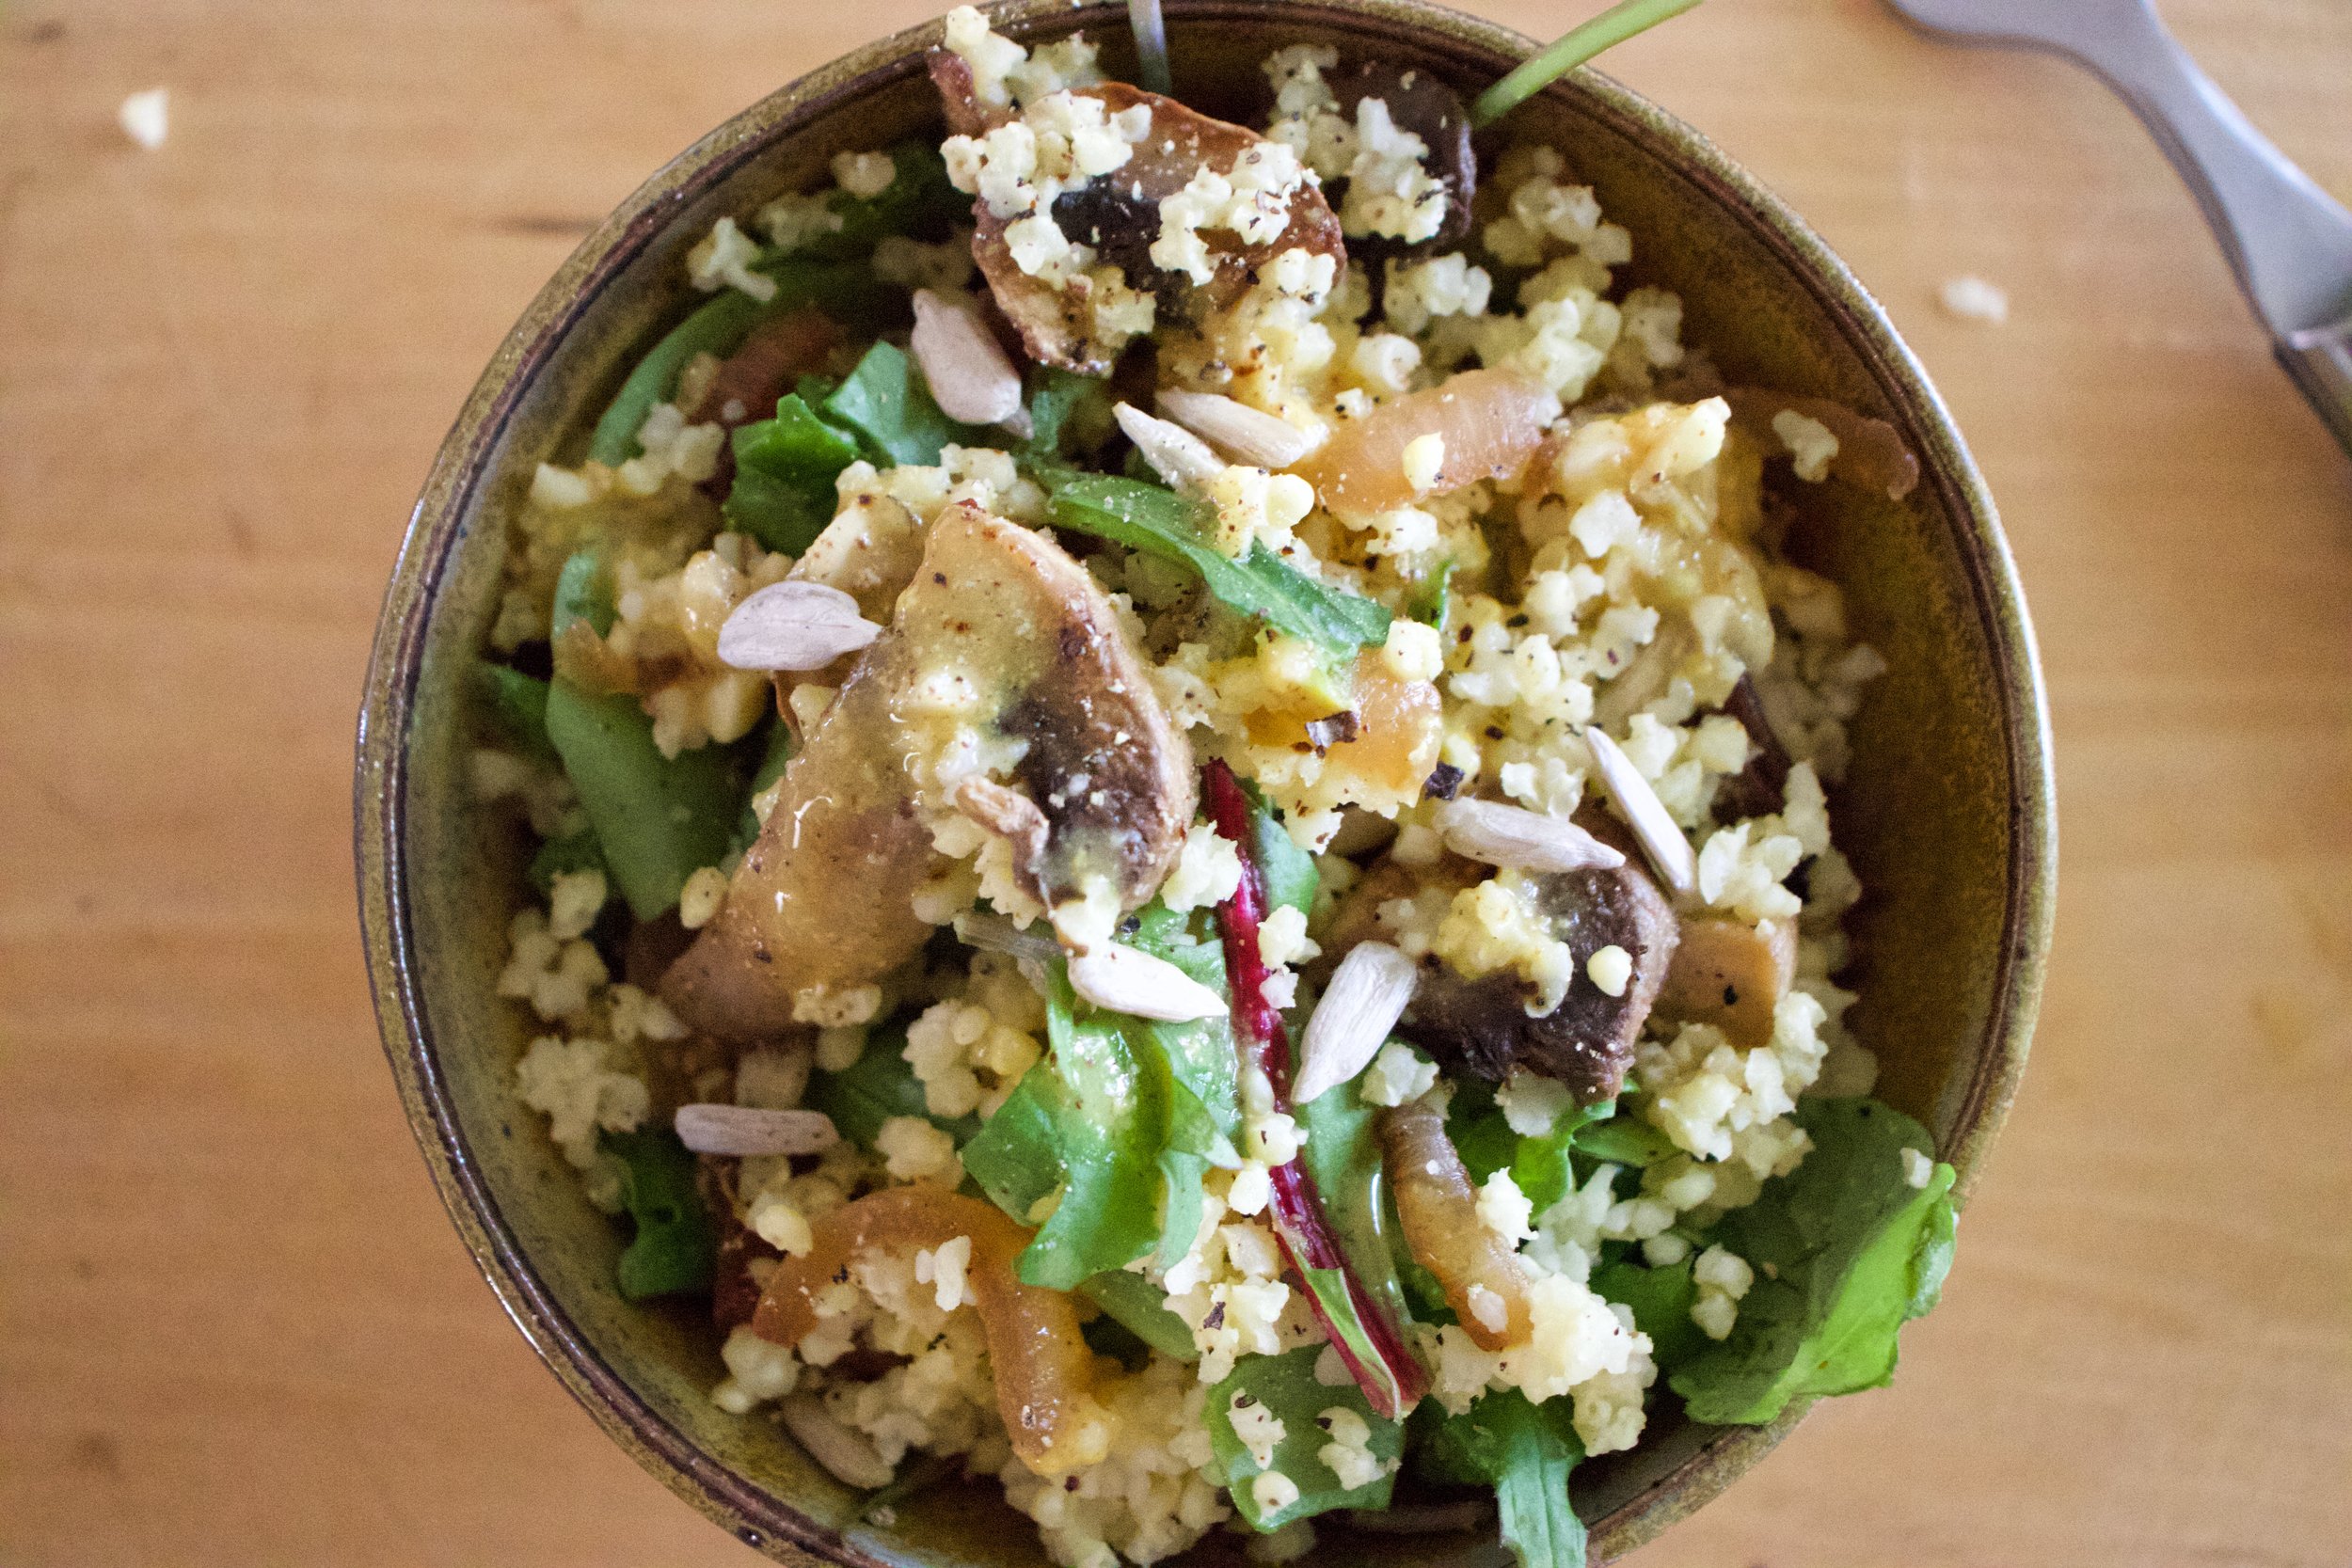
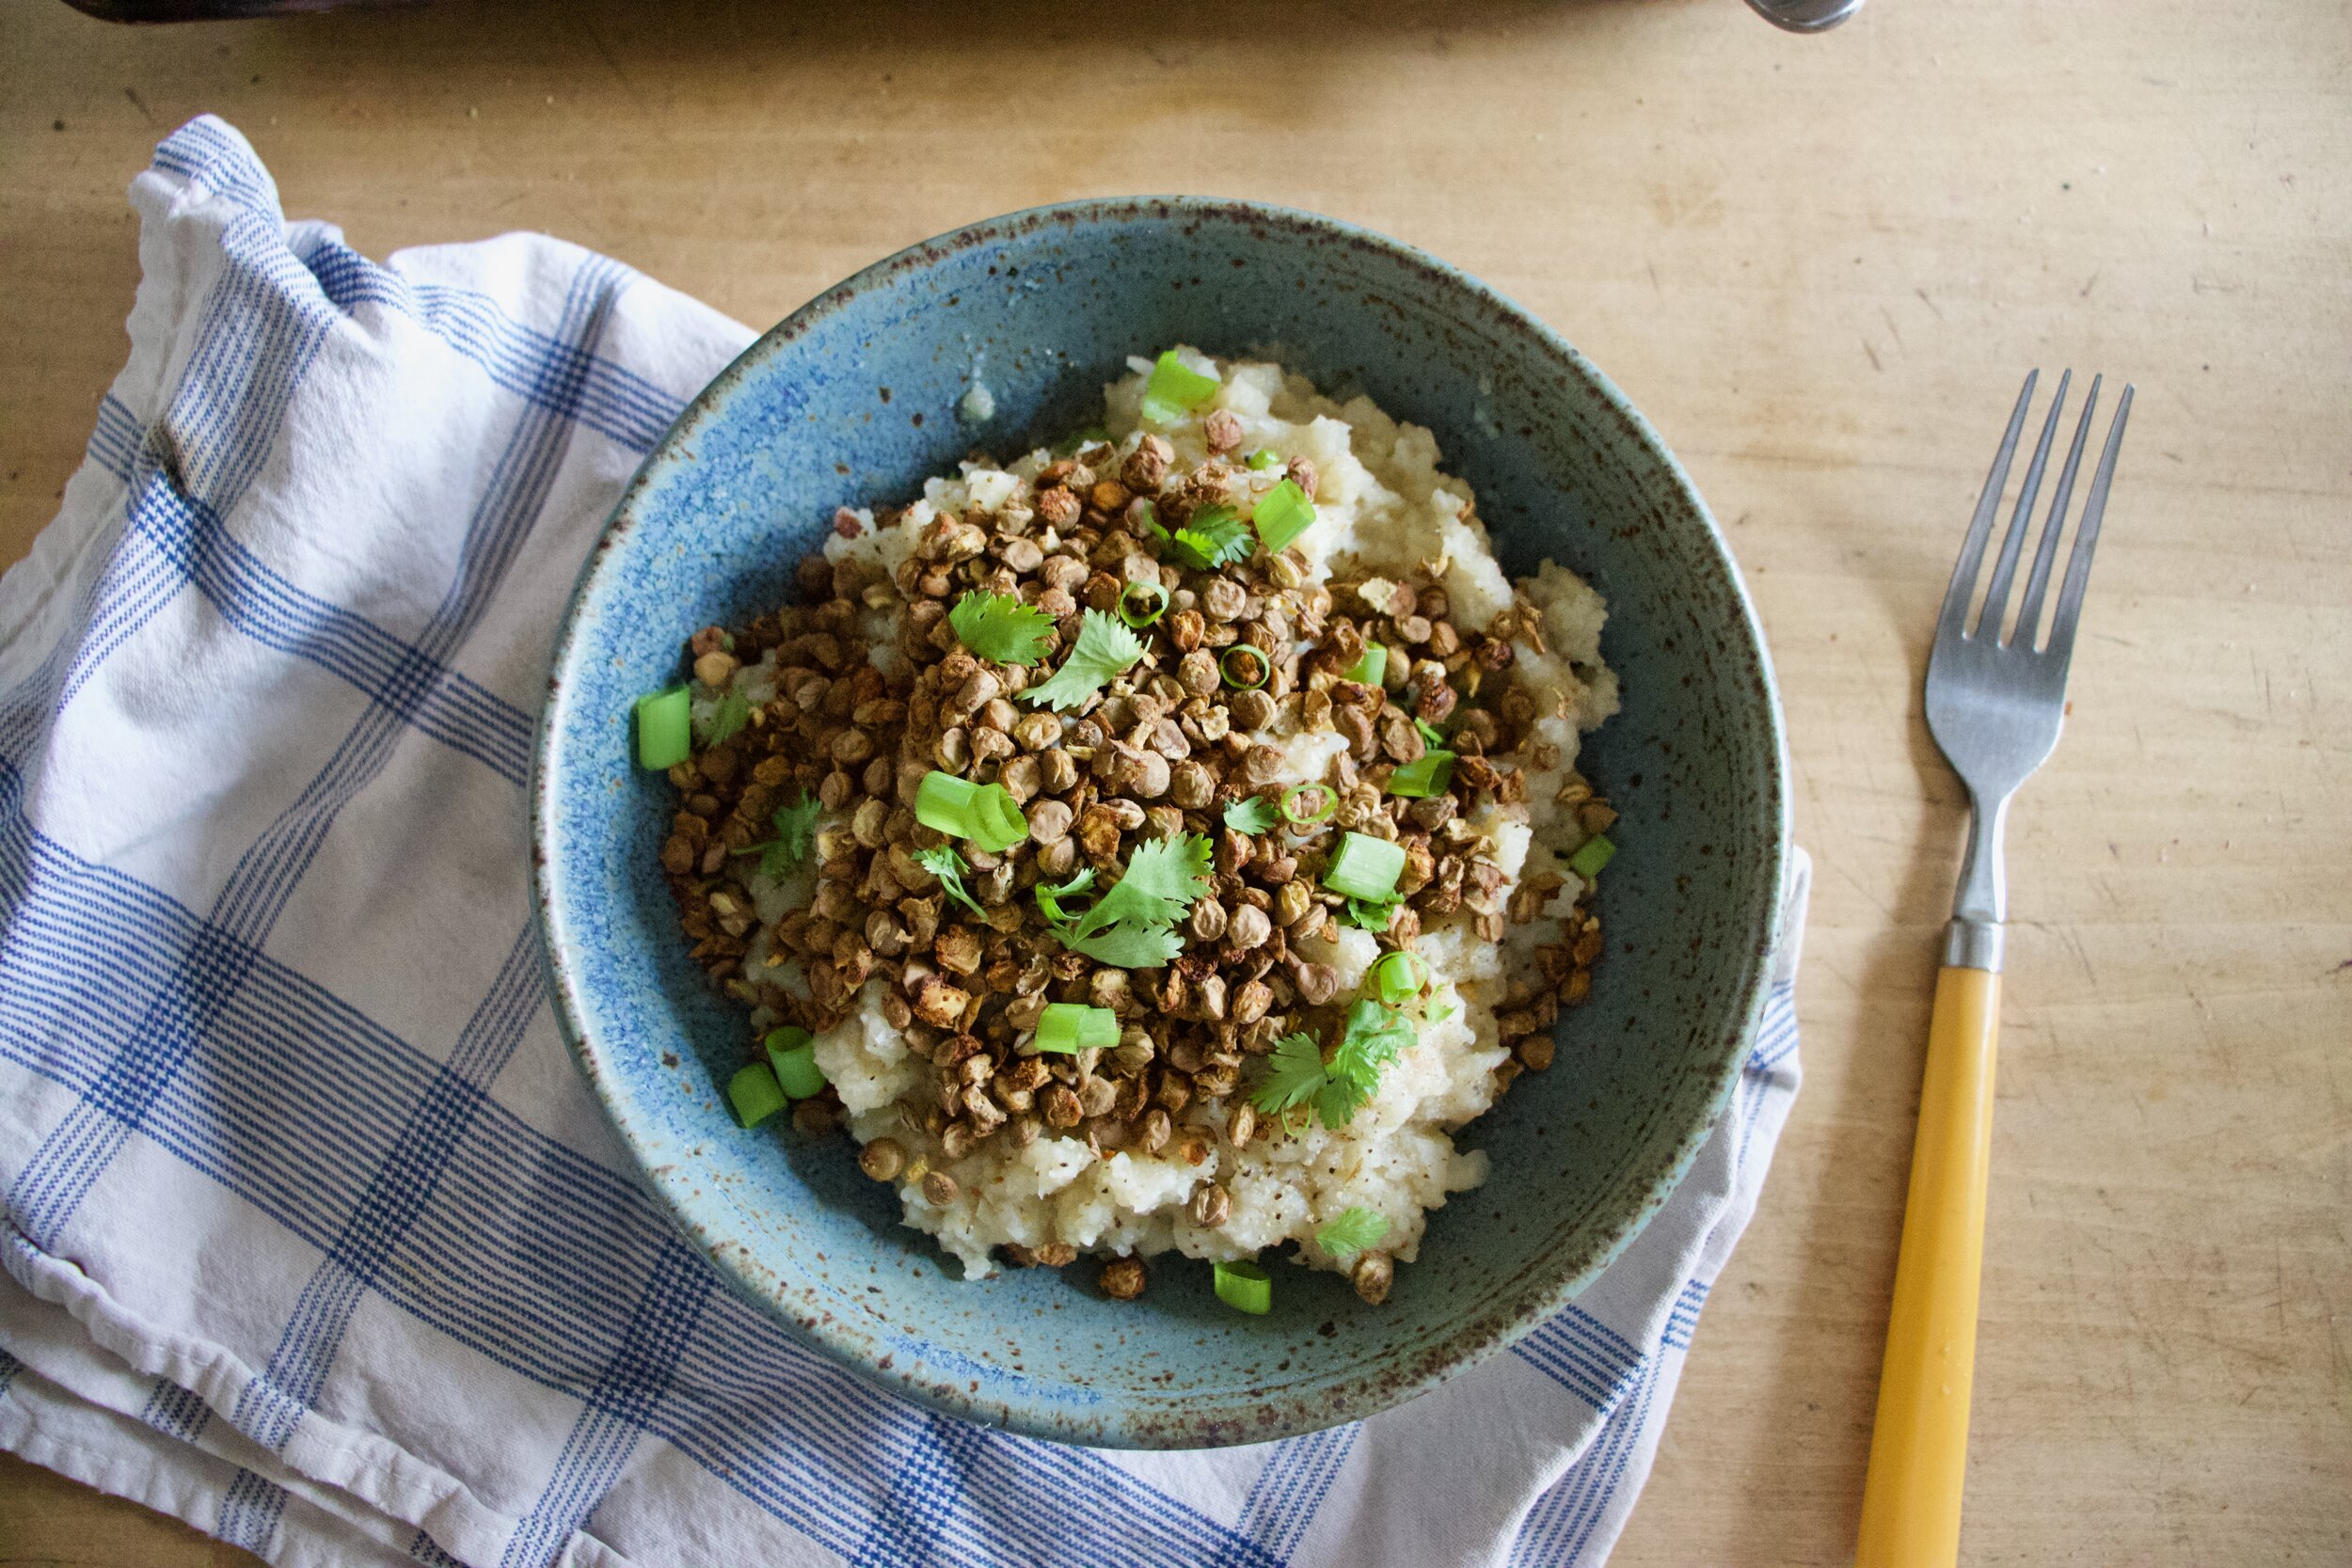
And there you have it. Add the celeriac puree to a bowl, top with crispy lentils, and garnish with something green if you want.

Then eat it.

Not going to lie. After this picture was taken, I busted out the spicy mustard and covered everything with it. And it was amazing.

-C


Celeriac Puree With Crispy Lentils

serves 1 as a meal, or a few as a side dish

  • 1 1/2 cups cooked green lentils

  • 1 large celeriac bulb (soft ball sized)

  • 1 teaspoon chili power

  • 1/2 teaspoon ground mustard powder

  • 1/2 teaspoon garlic powder

  • salt and pepper

  • olive oil (optional)

Grab celeriac and peel if you want, or just give it a really good wash. Cut into chunks and place into pot. Add enough water to just cover the celeriac and place on medium heat on the stove. Cook until fork tender.

In the mean time, mix all the spices and a good pinch of salt and lots of pepper together with the lentils. Dump them and spread them out onto a lightly oiled baking sheet. Place in oven and turn to 400 degrees (you can start cooking the lentils while the oven is preheating). Bake for about 20 minutes or until lentils are crispy.

Once the celeriac is tender, strain water into a cup and either with a hand blender or a regular blender, blend until smooth, adding in some of the poured off water as needed. You can puree as smoothly as you like or leave a few chunks.. Also, you might want to add in a teaspoon or so of olive oil for a slightly richer and creamier taste. Season to taste with salt and pepper.

Ehen the lentils are done, take them from oven. Place large amount (or all) of the celeriac puree to a bowl, cover with some (or all) of the crispy lentils and that is that. Eat away.

Serving suggestion…. Mustard. Any kind. So good.

In Dairy Free, dinner, entree, Gluten Free, grain free, pulses, quick and easy, side dish, Vegan, Vegetables Tags Celeriac Puree With Crispy Lentils, plant based, vegan, roots, vegetable, pulses, lentils, easy, gluten free, grain free, celery root, heathy, clean eating, dinner, dairy free, celeriac puree, crispy lentils
Comment

Falafel Stuffed Peppers With Pickled onions and Tahini

September 21, 2019 Colleen Stem
IMG_2407.jpg
IMG_2383.jpg

I love me some falafel. I love me some peppers. So I guess it is natural that I would want to stuff falafel inside of peppers and eat them all to my face right? I think so.

As we all already know, most of what I cook is depicted by whatever I get at farm share. And the past few weeks we have been getting a lot of peppers. I have been happily eating one or two a day, just as they are, but I figured it was time that I did something else with them. Now what is the first thing that comes to mind with peppers? Stuffed peppers of course. And there you have it, falafel stuffed peppers.

So I am not going to lie and say the mr ate them and swooned. He is not the biggest fan of peppers (I am starting to realize that he doesn’t have all the right taste buds in his mouth. So sad for him.) so he dumped the falafel out of the pepper and ate it with most of the pickled onions, the tahini, and rice. That he really liked. Lucky me, I wanted his pepper anyway because roasted peppers are freaking fantastic amazing and whatever him. Me, as a pepper and falafel lover, I found these stuffed peppers to be everything that I wanted and needed and then some. Eaten pretty much right away warm, with pickled onion and covered in all the tahini, it was a very very satisfying meal. But also a left over stuffed pepper that was stuck in the fridge, eaten cold standing in front of said fridge, right before bed. That was something great as well. I might have even gone in for a second one……

Anyway, a pepper stuffed with falafel is a good idea if you want food, like peppers, like falafel, and are cool. Just saying.

To the falafel stuffed peppers!

The stuff. A few sweet peppers, some cooked chickpeas, chickpea flour, an onion, a bunch of fresh cilantro and parsley, a few cloves of garlic, red wine vinegar, a little water, tahini, cumin, chili pepper flakes, and salt and pepper.

First, take the onion and cut in half. Take one half and cut into very thin slices, place in a bowl, sprinkle with a pinch of salt and toss with the vinegar and a few tablespoons of water. Set that bowl aside. The other half of onion just cut into a few smaller chunks.

IMG_2228.jpg
IMG_2232 2.jpg
IMG_2242.jpg
IMG_2258.jpg

To make falafel. Add the chunks of onion and garlic to food processor and pules a few times to start chopping it up. Add in the cilantro and parsley, the chickpeas and chickpea flour, the cumin and chili pepper flakes, and a good few pinches of salt and lots of pepper. Pulse until completely combined but still a bit chunky. OR pulse until smooth if you would rather it like that. It’s up to you.

Grab peppers and cut each in half. Remove the ribs ad the seeds.

Take falafel mix and stuff it into peppers.

Place peppers onto a baking sheet and into the oven they go.

IMG_2311.jpg

In the meantime while the peppers are cooking, toss the onions around in the brine a few times. Then right before you take the peppers from the oven, drain the brine from the onions into a jar with the tahini and mix until smooth. Add a splash of water to the mix if you need to loosen it up a bit more to make the consistency of the tahini drizzle-able.

And out they come when all roasted and crispy and my oh my, so good!

Now you eat. Garb a bowl, maybe a grain of some sort if you like (I made the mr rice), plop a pepper down, add some pickled onions and drizzle that tahini all over.

Eat.

-C


Falafel Stuffed peppers with Pickled Onions and Tahini

Makes 6 half peppers stuffed

  • 3 medium sized sweet peppers

  • 2 cups cooked and drained chickpeas (or one can)

  • 1 large onion

  • 1 bunch (about 1/2 cup packed) cilantro

  • 1 bunch (about 1/2 cup packed parley

  • 2-3 cloves garlic

  • 2 teaspoons cumin

  • 1 teaspoon chili peper flakes

  • 1/3 cup chickpea flour or oat flour if you don’t have chickpea

  • salt and pepper

  • 1/4 cup tahini

  • a few tablespoons water

  • 3 tablespoon red wine vinegar

Preheat oven to 425

Grab the onion and cut in half. Take one half and cut into very thin slices and place in a bowl. Spinkle with a pinch of salt and dump in the vinegar along with about 2 tablespoon water. Toss around until all the onion is coated and set aside.

Take remaining half onion and cut into big chunks. Toss into a food processor along with the garlic and pulse a few times until the onion is chopped up. Add in the cilantro, parsley, chickpeas, chickpea flour, cumin, chili pepper flakes, and a good pinch of salt and lots of pepper. Pulse the hole shebang until the mixture is combined, the herbs are incropeted, but there is a little chunk left. Or you could make it smooth if you wanted too. It’s up to you.

Grab the peppers and cut them in half. Remove the ribs and seeds then take the falafel mixture and evenly distribute it between the peppers halves.

Place stuffed peppers on a baking sheet, falafel side up, and place into oven to bake for about 45 minutes. You want the falafel mix to have a chance to cook inside and out and to get nice and golden brown and crispy on top.

Right before the peppers are done, grab the onions and the tahini. Toss the onions one last time in the briny mix it’s been sitting in, then drain that brine into the tahini. Mix around until smooth. The tahini should be at the consistency to drizzle so if it is still to thick, add in a splash of hot water to loosen it up.

Once peppers are cooked, remove fro oven. Place on a plate with or without some grain, toss on some pickled onion and drizzle tahini all over.

Eat.

Store left over peppers in a the fridge. To eat, just reheat or eat cold. I really enjoyed eating one cold.

In Vegetables, Vegan, pulses, Pickled, grain free, Gluten Free, entree, Dairy Free, beans Tags Falafel Stuffed peppers with Pickled Onions and Tahini, Stuffed peppers, vegan, dinner, Vegan stuffed peppers, Gluten free, Gluten free stuffed peppers, grain free, grain free stuffed peppers, falafel, dairy free, sweet peppers, entree, protein, pulses, chickpeas, homemade, easy, healthy
Comment

Fresh Corn and Oat Fritters

September 7, 2019 Colleen Stem
IMG_1926.jpg
IMG_1794.jpg
IMG_1803.jpg

Corn is the name of the game, and this game I won!

The mr doesn’t much like to eat corn. But I do. And this time of year I get like 10 ears of corn every week from farm share, which is a lot of corn for one person to have to eat every week and sometimes I just can’t do it. So every now and then I make something that I think the mr will tolerate, if not like, to get him to help me eat the stash of a hundred ears or corn that I have going on in the fridge.

These fritters helped me with that and I think with all the future corn that I will get from the farm. They are soooo good! The mr liked them! As for me, I couldn't stop eating them and almost didn't want to share because they we just so dang good. Sweet fresh corn, nutty and slightly chewy oats. Scallions. And that’s pretty much it. So fresh and clean and yummy tasting. A summertime fritter situation that takes corn to a place where even the corn hater likes it.

Although who the hell hates corn? I know one person. One. And I live with him. Weirdo.

Anyway, to the fritters!

IMG_1710.jpg

The stuff. Fresh sweet corn, old fashion rolled oats, and a few scallion. Also some ground flax seed, water, baking powder, salt and pepper, and a little oil.

IMG_1722.jpg
IMG_1725.jpg

Start with oats. Add most of what we need to a blender and blend until it becomes oat flour.

Then the corn. Remove the kernels from the cobs. Best way is to hold corn in a large bowl and cut downward. Don’t want corn flying all over the place!

IMG_1740.jpg
IMG_1744.jpg

Add most of the corn you just cut off the cob to the blender with the oat flour, along with with flax and water. Blend until smooth.

IMG_1732.jpg

Chop the scallions into thin and tiny pieces.

IMG_1750.jpg

Now dump the contents of the blender into a bowl, add in the scallions, the baking powder, and the extra oats and corn. Mix it all up and then let the batter rest for a few minutes (like 10) so the oats have a chance to really absorb all the liquid.

IMG_1773.jpg

And then to cook them. Heat a lightly oiled skillet to medium high heat. Once skillet is hot, drop scoops of batter into it. Cook for 3-4 minutes or until the bottom is a nice deep golden brown. Flip and cook the other side the same.

Fritters be cookin!

IMG_1794.jpg

When fritters are done cooking, place them on a wire rack. So they don’t get soggy.

And then serve them right away. I ate mine with fresh salsa. Definitely the way to go. So GOOD!

Now eat your corn.

-C


Fresh Corn and Oat Fritters

makes about 12 fritters

  • 3 ears fresh corn ( about 1 1/2 cups of kernels)

  • 1 1/2 cups rolled oats (gluten free if needed)

  • 1/2 teaspoon baking powder

  • 2-3 scallions

  • 1 tablespoon flax meal

  • 3 tablespoons water

  • salt and pepper

  • a little oil for skillet

Combine water and flax meal, mix and set aside.

Place 1 cup of oats into blender or food processor and blend for about a minutes or until the oats are a fine flour.

Grab corn and remove from cob. Best way to do this is to place corn vertically in a big bowl and cut downwards so the bowl catches all the kernels. Cut enough corn until you have about 1 1/2 cups of kernels. Also, garb scallions and chop into very small, thin pieces.

Add in a cup of the corn, the flax and water mixture, baking powder, and a pinch of salt and pepper. Pulse or blend until completely combined and the mixture is mostly smooth.. Dump mixture into a bowl and add in the remaining corn, chopped scallions, and oats and mix together. The mixture should not be runny, but also should not be dry enough to pack together. If the mixture seems too dry and tight, add in a tablespoon or two more or water. To wet, add in a small handful of oats.

Once batter is mixed, set aside for about 10 minutes to rest.

Grab skillet and place on medium high heat. Add a touch of oil to pan and make sure it evenly coats the bottom. Once pan is preheated, add scoops batter into pan (about 2 tablespoons each). Cook first side for about 3-4 minutes or until dark golden brown, then flip and cook the other sides for another 2-3 minutes until a dark golden brown. Remove from pan and either place on a wire rack or a plate. ( I recommend a wire rack just to keep them from getting soggy.)

Serve right away. Fresh salsa goes amazingly with them!

Any left overs can be stored in fridge and reheated in the oven.

In Dairy Free, Vegetables, Vegan, summer, Gluten Free, grains Tags Fresh Corn and Oat Fritters, fritters, vegan, gluten free, corn, oats, dinner, snack, plant based, food52, food, recipe, farm fresh, healthy, easy, summer, dairy free
2 Comments

Chili Lime Chickpea Flour Crackers

July 27, 2019 Colleen Stem
IMG_0580.jpg
IMG_0602.jpg

We have officially kicked off our summer camping adventures. And with camping comes all the greatness of all the things, including camping food.

Recently a friend asked me what it is that we do for camp food. So I told her. Camp food is basically aways the same and consists of a big pot of spiced warm lentils or split peas (both cook really fast and have lots of protein), a shredded summer squash in the summer, or pumpkin in the colder months, maybe fresh tomatoes or a bunch of kale to chop and mix in, and a side of cut up carrots, cucumbers, green beens or whatever else I have.. Then I'll bring a hunk of bread for the mr to eat and me, usually a small head of cabbage to squirt mustard on and crunch into. (Always have the mustard on hand.) And I bring apples to snack on too, but that usually it. (Sometime I’ll back a desert for the mr. If I am feeling nice.)

She was a little taken aback. Said when she (and basically everyone in the world, which I disagreed with) goes camping it is bags of chips, cookies, meat, and everything and anything that she (they) wanted. Basically that camp food was junk food and that she though we were weirdos. But cool weirdos so you know.

So our camp food… not like many others. But honestly it is everything that I want to eat and I love it so whatever whatever. As for the mr, he is happy with the food and when he is not, he brings along something else, but that rarely happens because my lentils be so good. HA!

But she got me thinking that I should have a few more snack options beside cut up carrots and apples. So that is why I made crackers. These chickpea chili lime, freaking amazing crackers. Because crackers are a very appropriate snack food, and these crackers in particular are even greater because they are made with the goodness of chickpea flour which is packed full of protein and is well received after a day of hiking or other fun outdoor camping activities. And how can you go wrong with chili lime? Well i’ll tell you, you really can’t

So the plan was to make a batch, eat a few, save the rest for this camping weekend. But guess what? I have to make another batch. They didn’t make it. We ate them all. (not sorry) At least I know we will be liking our new camping snack addition well and right.

So if you like crackers, camping or elsewhere, you should really gives these a go. They will not disappoint.

Now to the crackers!

IMG_0509.jpg

The stuff. Chickpea flour, chili powder, a lime, a little baking powder, olive oil, salt and pepper, and water.

IMG_0517.jpg
IMG_0523.jpg

Combine the flour, zest of the lime, half the chili powder and half the salt, and the baking powder and some pepper in a bowl. Mix until completely combined then add in the oil, water and the juice of the lime.

Mix until dough forms. It might feel a little sticky, if that is the case, just mix other tablespoon of chickpea flour.

Knead dough on a well chickpea floured surface for a good minute until the dough is a even consistency then let it sit for a few minutes to rest. Once rested, cut dough into 2-3 pieces because working smaller is easier.

IMG_0551.jpg
IMG_0555.jpg

Roll out your first piece of dough about 1/8 inch thick. (Again, make sure to really flour your work surface and rolling pin.) Mix salt and chili powder together and sprinkle on top. Cut out your crackers (squares are nice but triangles would be nice too) then poke each cracker with a fork.

IMG_0558.jpg

Up close and personal.

IMG_0564.jpg
IMG_0565.jpg

Crackers on a baking sheet before baking and after baking looking all crackery and delicious. And yeah, they shrink a bit.

And lastly, cool the crackers on a cooling rack. They will crisp up a even more. Then it’s all you.

Ready to eat whenever you make the move. You can pack them away for later or place these delicious crackers in a very pretty bowl and eat them away. Or both.

A cracker win!

-C


Chili Lime Chickpea Flour Crackers

make 75 crackers

  • 1 1/2 cups chick pea flour plus about 1/3 more for dusting and rolling

  • 1/2 teaspoon baking powder

  • 1 tablespoon olive oil

  • 1/3 cup room temp water

  • 1 teaspoon chili powder split in half

  • 1 lime

  • 1 teaspoon salt split in half

  • 1/2 teaspoon fresh crackers pepper

Preheat oven to 350.

In a bowl combine the chick pea flour, baking soda, pepper, 1/2 teaspoon chili powder, and half a 1/2 teaspoon salt. Mix until evenly incorporated. Add in oil, the juice of the lime, and and water and mix until a dough forms. Dump dough onto counter and knead until completely uniform in texture. Add more flour if the dough is really sticky. Set dough aside for a few minutes to rest.

To make the crackers, really dust the counter with chickpea flour. Cut the dough into 2-3 pieces and roll1 piece out at a time to about an1/8 inch thin. Again, really flour the surface and rolling pin or else the dough will stick Once rolled, combine the remaining chili powder and salt and sprinkle the top with it. And then cut the crackers. Take a knife of bench scrapper or pizza cattier and cut the dough into inch long strips vertically, then diagonally. Poke each cracker with a fork then gently place them onto a baking sheet. Repeat with remaining dough.

Bake crackers for 15-20 minutes or until a nice deep golden brown. Remove from oven and let cool on a wire rack.

And then eat.

Store uneaten crackers in an airtight container for about a week.

In Vegan, snack, pulses, grain free, Gluten Free, Dairy Free, crackers and chips, beans Tags Chili Lime Chickpea Flour Crackers, gluten free, grain free, vegan, camp, cracker, snack, chili lime, pulses, protein, beans, dairy free, quick and easy, chick pea flour, gram flour, besem flour
Comment

Millet with mushrooms, onions, Greens and a mustard vinaigrette

June 8, 2019 Colleen Stem
IMG_9275.jpg
IMG_9282 2.jpg

Salad season is here. Green salads, fruit salads, potato salads, and grain salads. All the salads and we are not mad about it.

This is a good grain salad using millet, which I am sightly surprised to hear that a lot of people have never had. Millet is kind of like quinoa, but not. I cooks fluffy and looks kind of the same, and is gluten free like quinoa. I think the biggest difference is that millet is slightly softer and tastes a bit more nutty. It also is really good at absorbing liquid flavors.

But who are we to compare. The main thing is that it is nutritious and delicious so we will eat it.

Back to the salad. This is one of those grain salads that is good cooked and served warm but only gets better with a little age (like an hour or a day) in the fridge. Served hot or cold or room tempature, and is hearty enough to be meal like but is also a fantastic addition as a side to any of you meal plans. Like maybe a BBQ? Whatever the occasion, or non occasion, this is just a really good grain salad situation and I think you will be pleased, smiling all smiles while eating it.

To the millet salad.

IMG_9091.jpg

The stuff. Millet, a couple handful of greens, a few mushrooms, an onion, dijon mustard, a little maple syrup, red wine vinegar, a lemon, a couple cloves or garlic, some toasted sunflower seeds, and salt and pepper.

IMG_9099.jpg

Start by giving the millet a little toast, just enough to really up the nutty flavor and make it that much more yummy. It only takes a few minutes in a skillet on medium heat. Not an entirely necessary step, but you should do it.

IMG_9107.jpg

Toasted millet goes into pot with water. Bring pot to a boil and then turn to the lowest simmer and cover.

IMG_9112.jpg
IMG_9128.jpg

While millet is cooking, get to the mushrooms and onions. Chop the onion thin and small and the mushrooms thin and small as well. Place them into the skillet with a drizzle of oil and place on medium heat. Mix around every now and then and cook until the mushrooms and onions are soft and a nice golden brown.

And make the vinaigrette. Minced garlic, mustard, vinegar, the juice of the lemon, and maple syrup get put into one place.

IMG_9137.jpg

Mixed and now all is one.

IMG_9147.jpg

Millet. Cooked and fluffed and ready to go.

IMG_9158.jpg
IMG_9177.jpg

Cooked mushrooms and onions go into the pot, along with the greens, the sunflower seed, and the vinaigrette. This step can be right away or you can wait a little while for things to cool as to not wilt the greens. Up tp you.

IMG_9185.jpg

Mixed with love and hunger.

Even if you are making it ahead of time, just do yourself a favor. Grab a bowl, grab a fork, and get down on it.

-C


Millet with mushrooms, onions, Greens and a mustard vinaigrette

Seves 4-6

  • 3/4 cup uncooked millet

  • 2 cups water

  • 1 sweet onion

  • 3-4 big button mushrooms

  • Large handful or two of bitter greens like arugula, spinach or a mixture.

  • 2 tablespoon brown or dijon mustard

  • 2 tablespoon red wine vinegar

  • 1 teaspoon maple syrup

  • 2 cloves garlic

  • salt and pepper

  • handful toasted sunflower seeds

To start, toast millet. Dump the uncooked millet into a pan and place on a medium heat tt for about 5 minutes or until you start hearing the millet crackle.This gives the millet a slightly more nutty flavor but you can skip this step if you don’t care.

Dump millet and water into medium pot. Place on high heat until water starts to boil then tun heat down to simmer and over. After about 15 or 20 minutes, when most of the water is gone, turn pot completely off. Let sit, covered for another 10ish minutes then take a fork and fluff it.

While the millet is cooking, cook the veggies. Grab the onion and slice it up into thin pieces. Clean off the mushrooms and chop them into small thin pieces too. Place the chopped stuff into the skillet with a drizzle of olive oil and a pinch of salt and place on a medium heat. Stir occasionally and cook for about 15 minutes or until the onion and mushroom are a nice dark, golden brown.

And make the mustard vinaigrette. Mince garlic and place into a jar or bowl with the vinegar, the mustard, the maple, and the juice of the lemon. Mix and set aside.

Once the millet is cooked, the mushrooms and onions are cooked, and the vinaigrette is made, all you have left to do is mix everything together. You can do this while things are slightly warm which will wilt the greens a bit, o let them cool so the greens stay fresh. Up to you. (I like the greens fresh)

Finally, dump cooked mushrooms and onions into pot with cooked millet. Add in the greens and sunflower seeds and drizzle the vinegertte all over. Toss around until fully mixed. Sprinkle with lots of fresh cracked pepper.

Then eat. Or place in a container to bring to the BBQ.

In BBQ, Dairy Free, Gluten Free, grains, salad, seeds, side dish, Spring, Vegan, Vegetables Tags Millet with mushrooms, onions, Greens and a mustard vinaigrette, gluten free, millet, vegan, salad, grain salad, grain bowl, grain, mushrooms, plant based, sunflower seeds, mustard, vinaigrette, dinner, BBQ, make ahead, healthy, dairy free
Comment
← Newer Posts Older Posts →
 

https://thelovelycrazy.squarespace.com/config#/|/about/

Me. Food Maker.Food eater. Woo HOO!

STEM+NODE  SMALL BATCH AND ONE OF A KIND POTTERY

stem+node ceramics


____________________

Subscribe

GET NEW POSTS IN YO EMAIL

You are AWESOME!!!


@thelovelycrazy 2014-2021