• stem+node ceramics
  • HOME
  • Food Recipes
  • About
  • Contact
Menu

The Lovely Crazy

Street Address
City, State, Zip
Phone Number

Your Custom Text Here

The Lovely Crazy

  • stem+node ceramics
  • HOME
  • Food Recipes
  • About
  • Contact

Green pea and Watermelon Radish Salad

March 5, 2022 Colleen Stem

We are getting closer and closer to spring (2 weeks!) and with spring comes color, in the form of all things, food included. (I am so ready for all the greens!!!!)

Speaking of color. Have you ever cut open a watermelon radish? It is pure joy. You have this creamy white and slightly green bulb, nothing much out of the ordinary but when you slice it open the inside is the brightest purplish pink. So freaking pretty! But better then pretty, watermelon radishes taste so freaking good! And then we have peas. They are just the best bright green and creamy little gems which pair perfectly prefect with the radish.

Bright purple radish and green peas tossed together with some onion and tahini. Yes and yes. On freaking tasty as all heck salad. A true spring delight!

Now to the pretty as all heck salad!

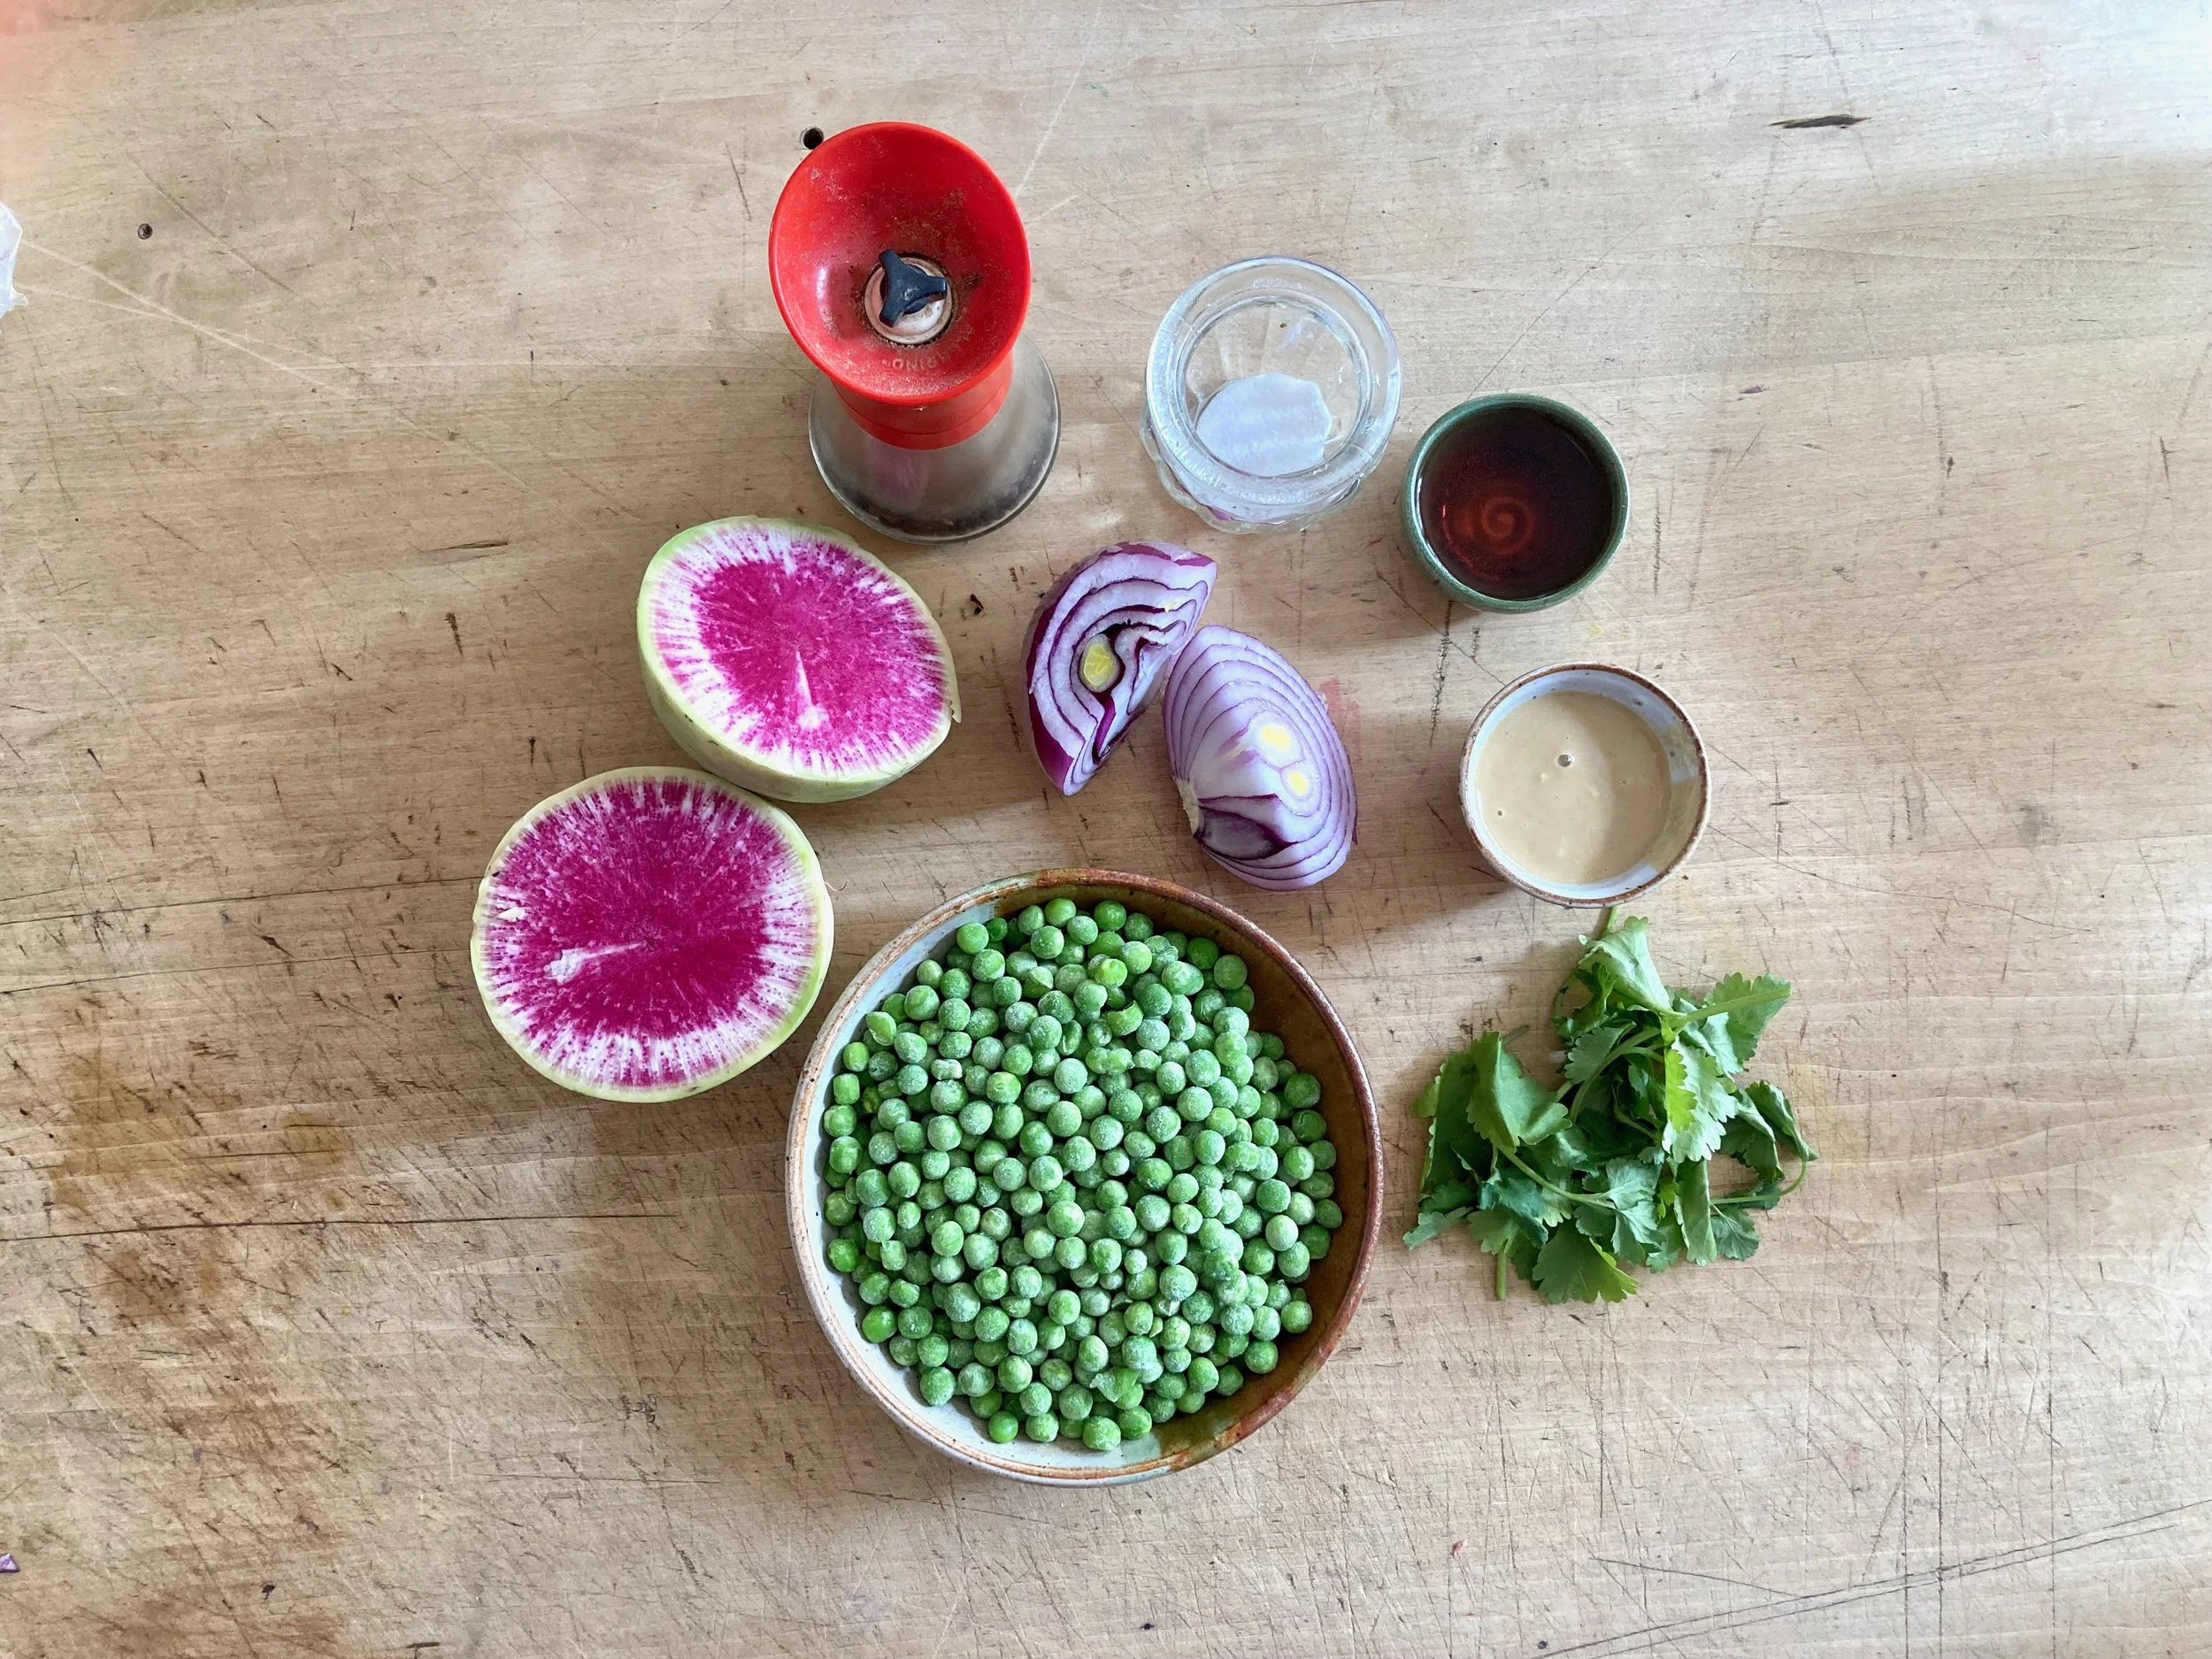
The stuff. A large watermelon radish, frozen and thawed green peas, red onion, tahini, red wine vinegar, salt and pepper, and aa small handful of cilantro.

First thing is to dice up radish. Cut into cubes about twice the size of a pea.

Place diced rashes on a lined baking sheet and pop into a hot oven.

In the mean time cut up the onion nice an thin.

IMG_1586.jpg
IMG_1592.jpg
IMG_1598.jpg

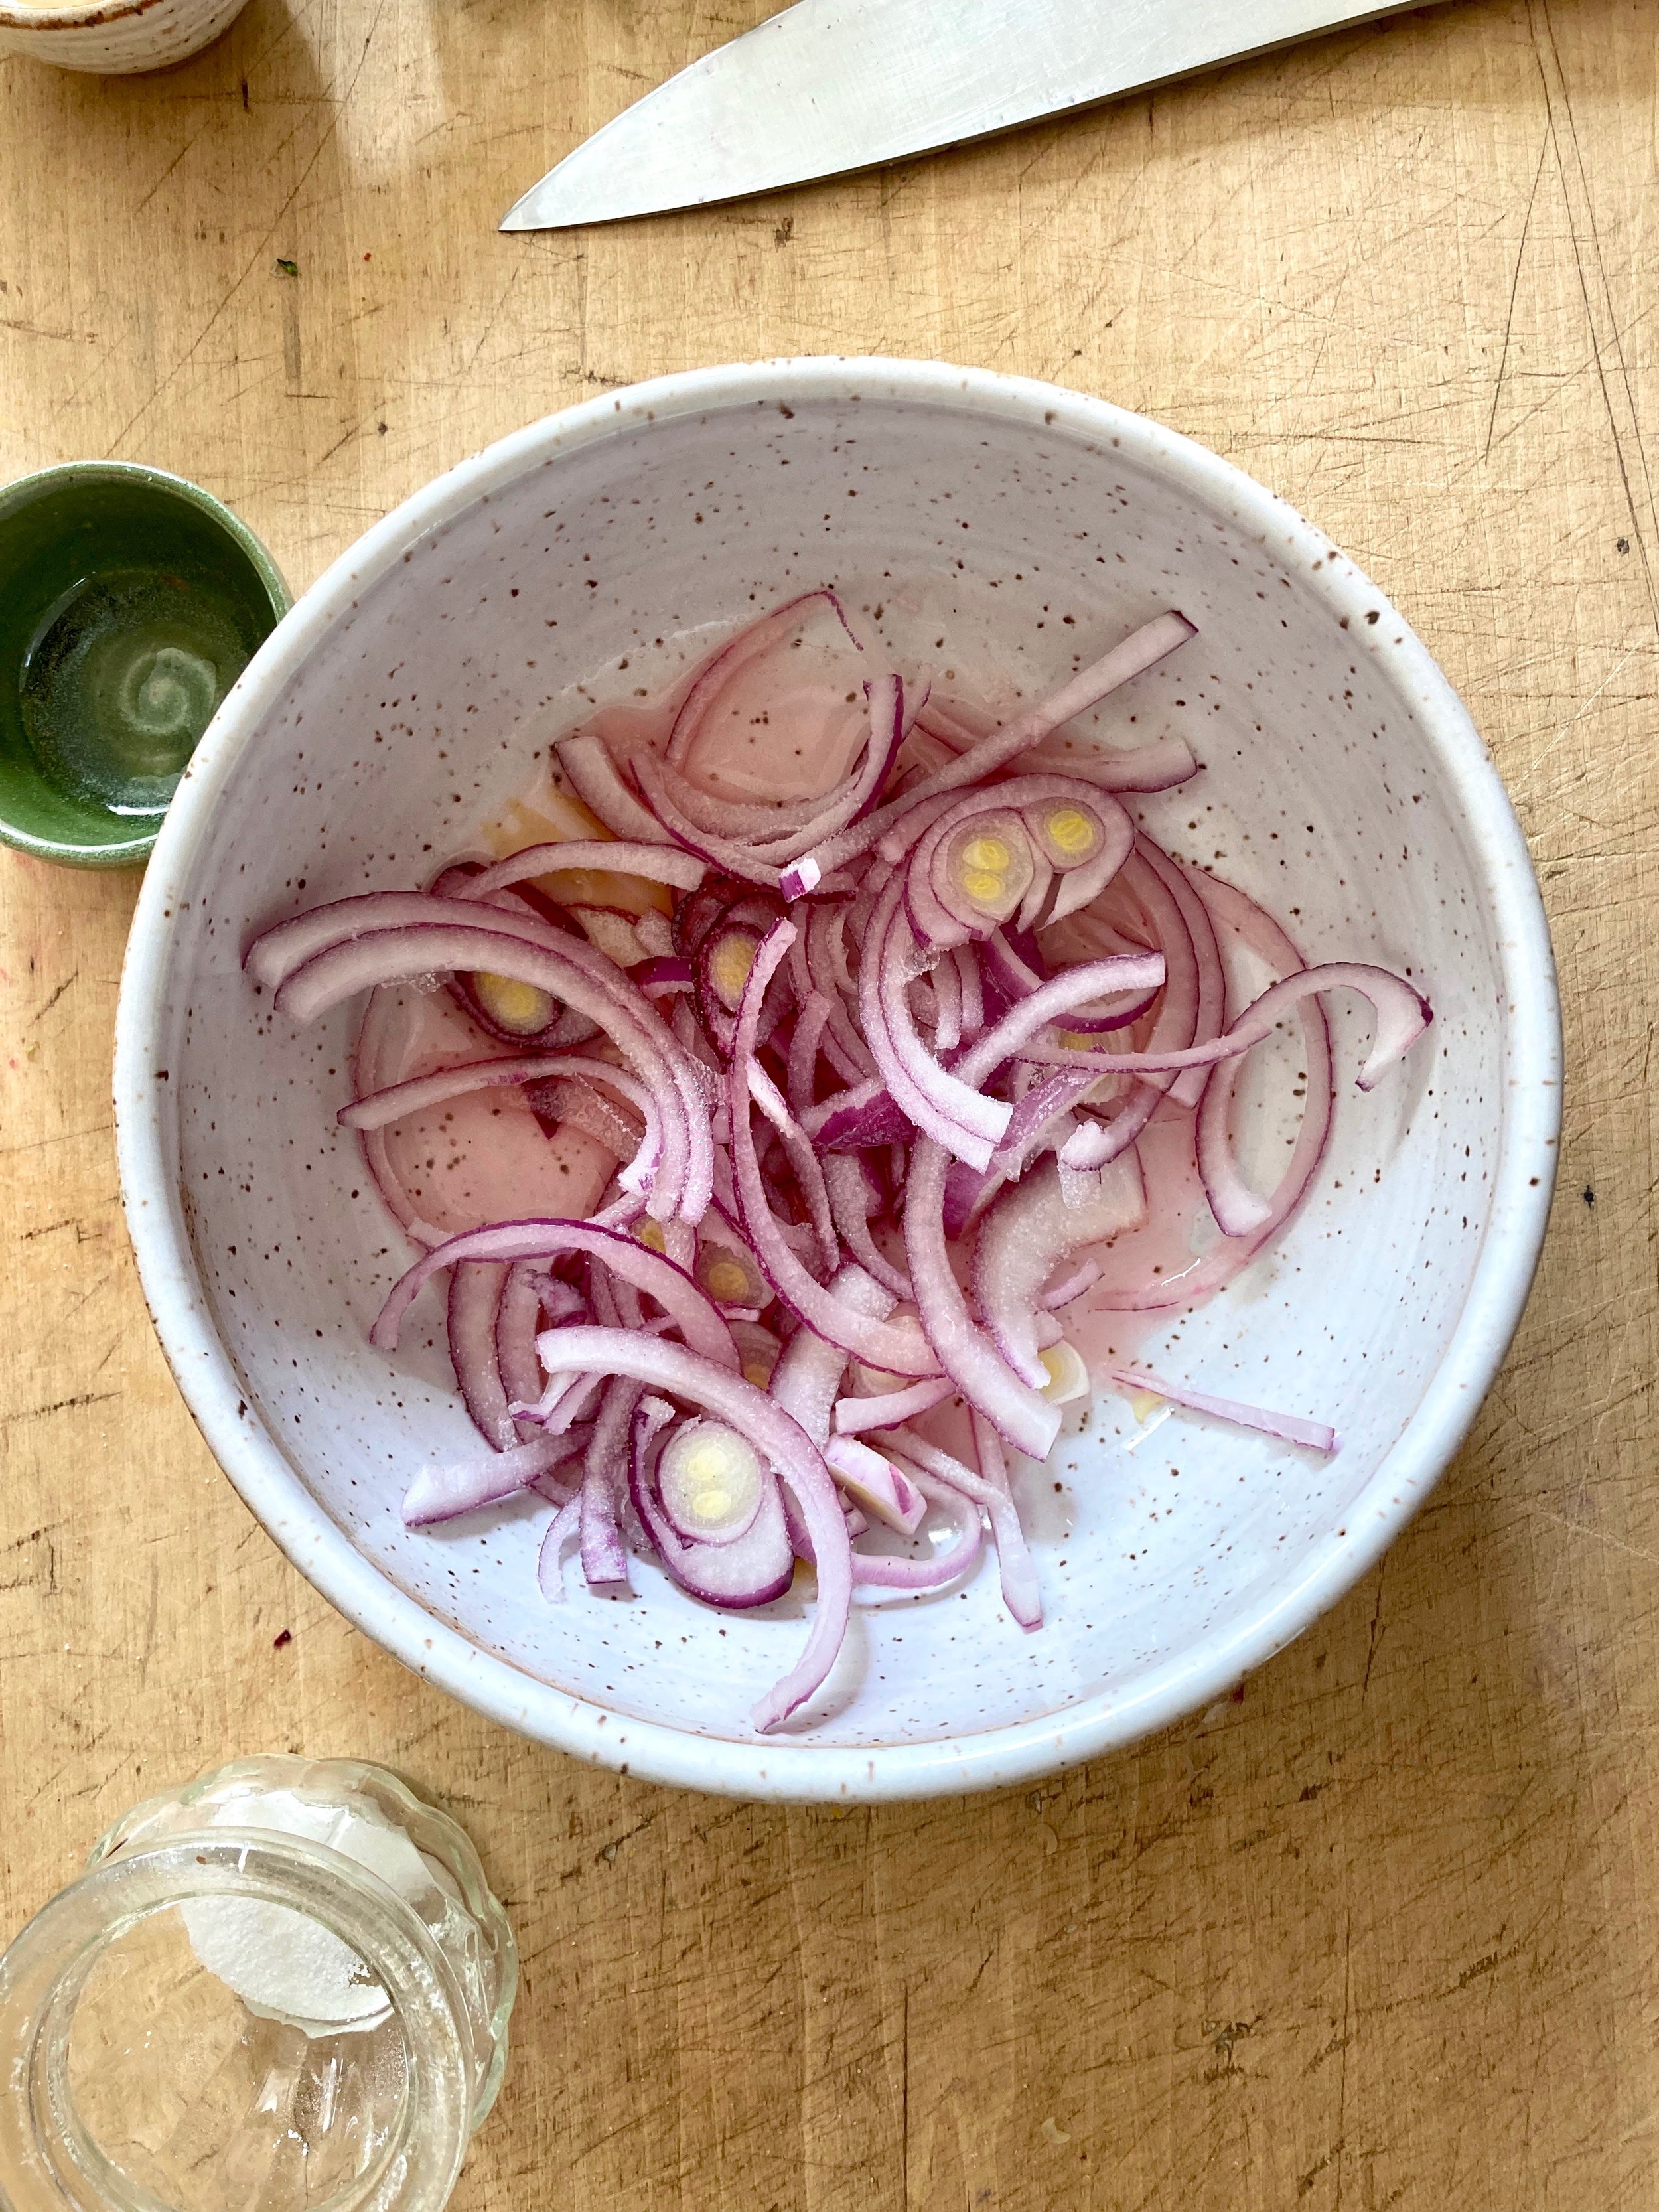
Place cut onion into a big bowl, add a sprinkle of salt, and add in the vinegar. Toss around and let sit for 5 minutes or so then add in the tahini and toss around until creamy.

Slightly roasted radishes. You can roast them more but I find a good 20 minutes so they are slightly tender and haven’t lost have much color to e the best.

Toss the peas onto the hot sheet pan with the radishes and let them sit for a fe minutes just slightly warm up.

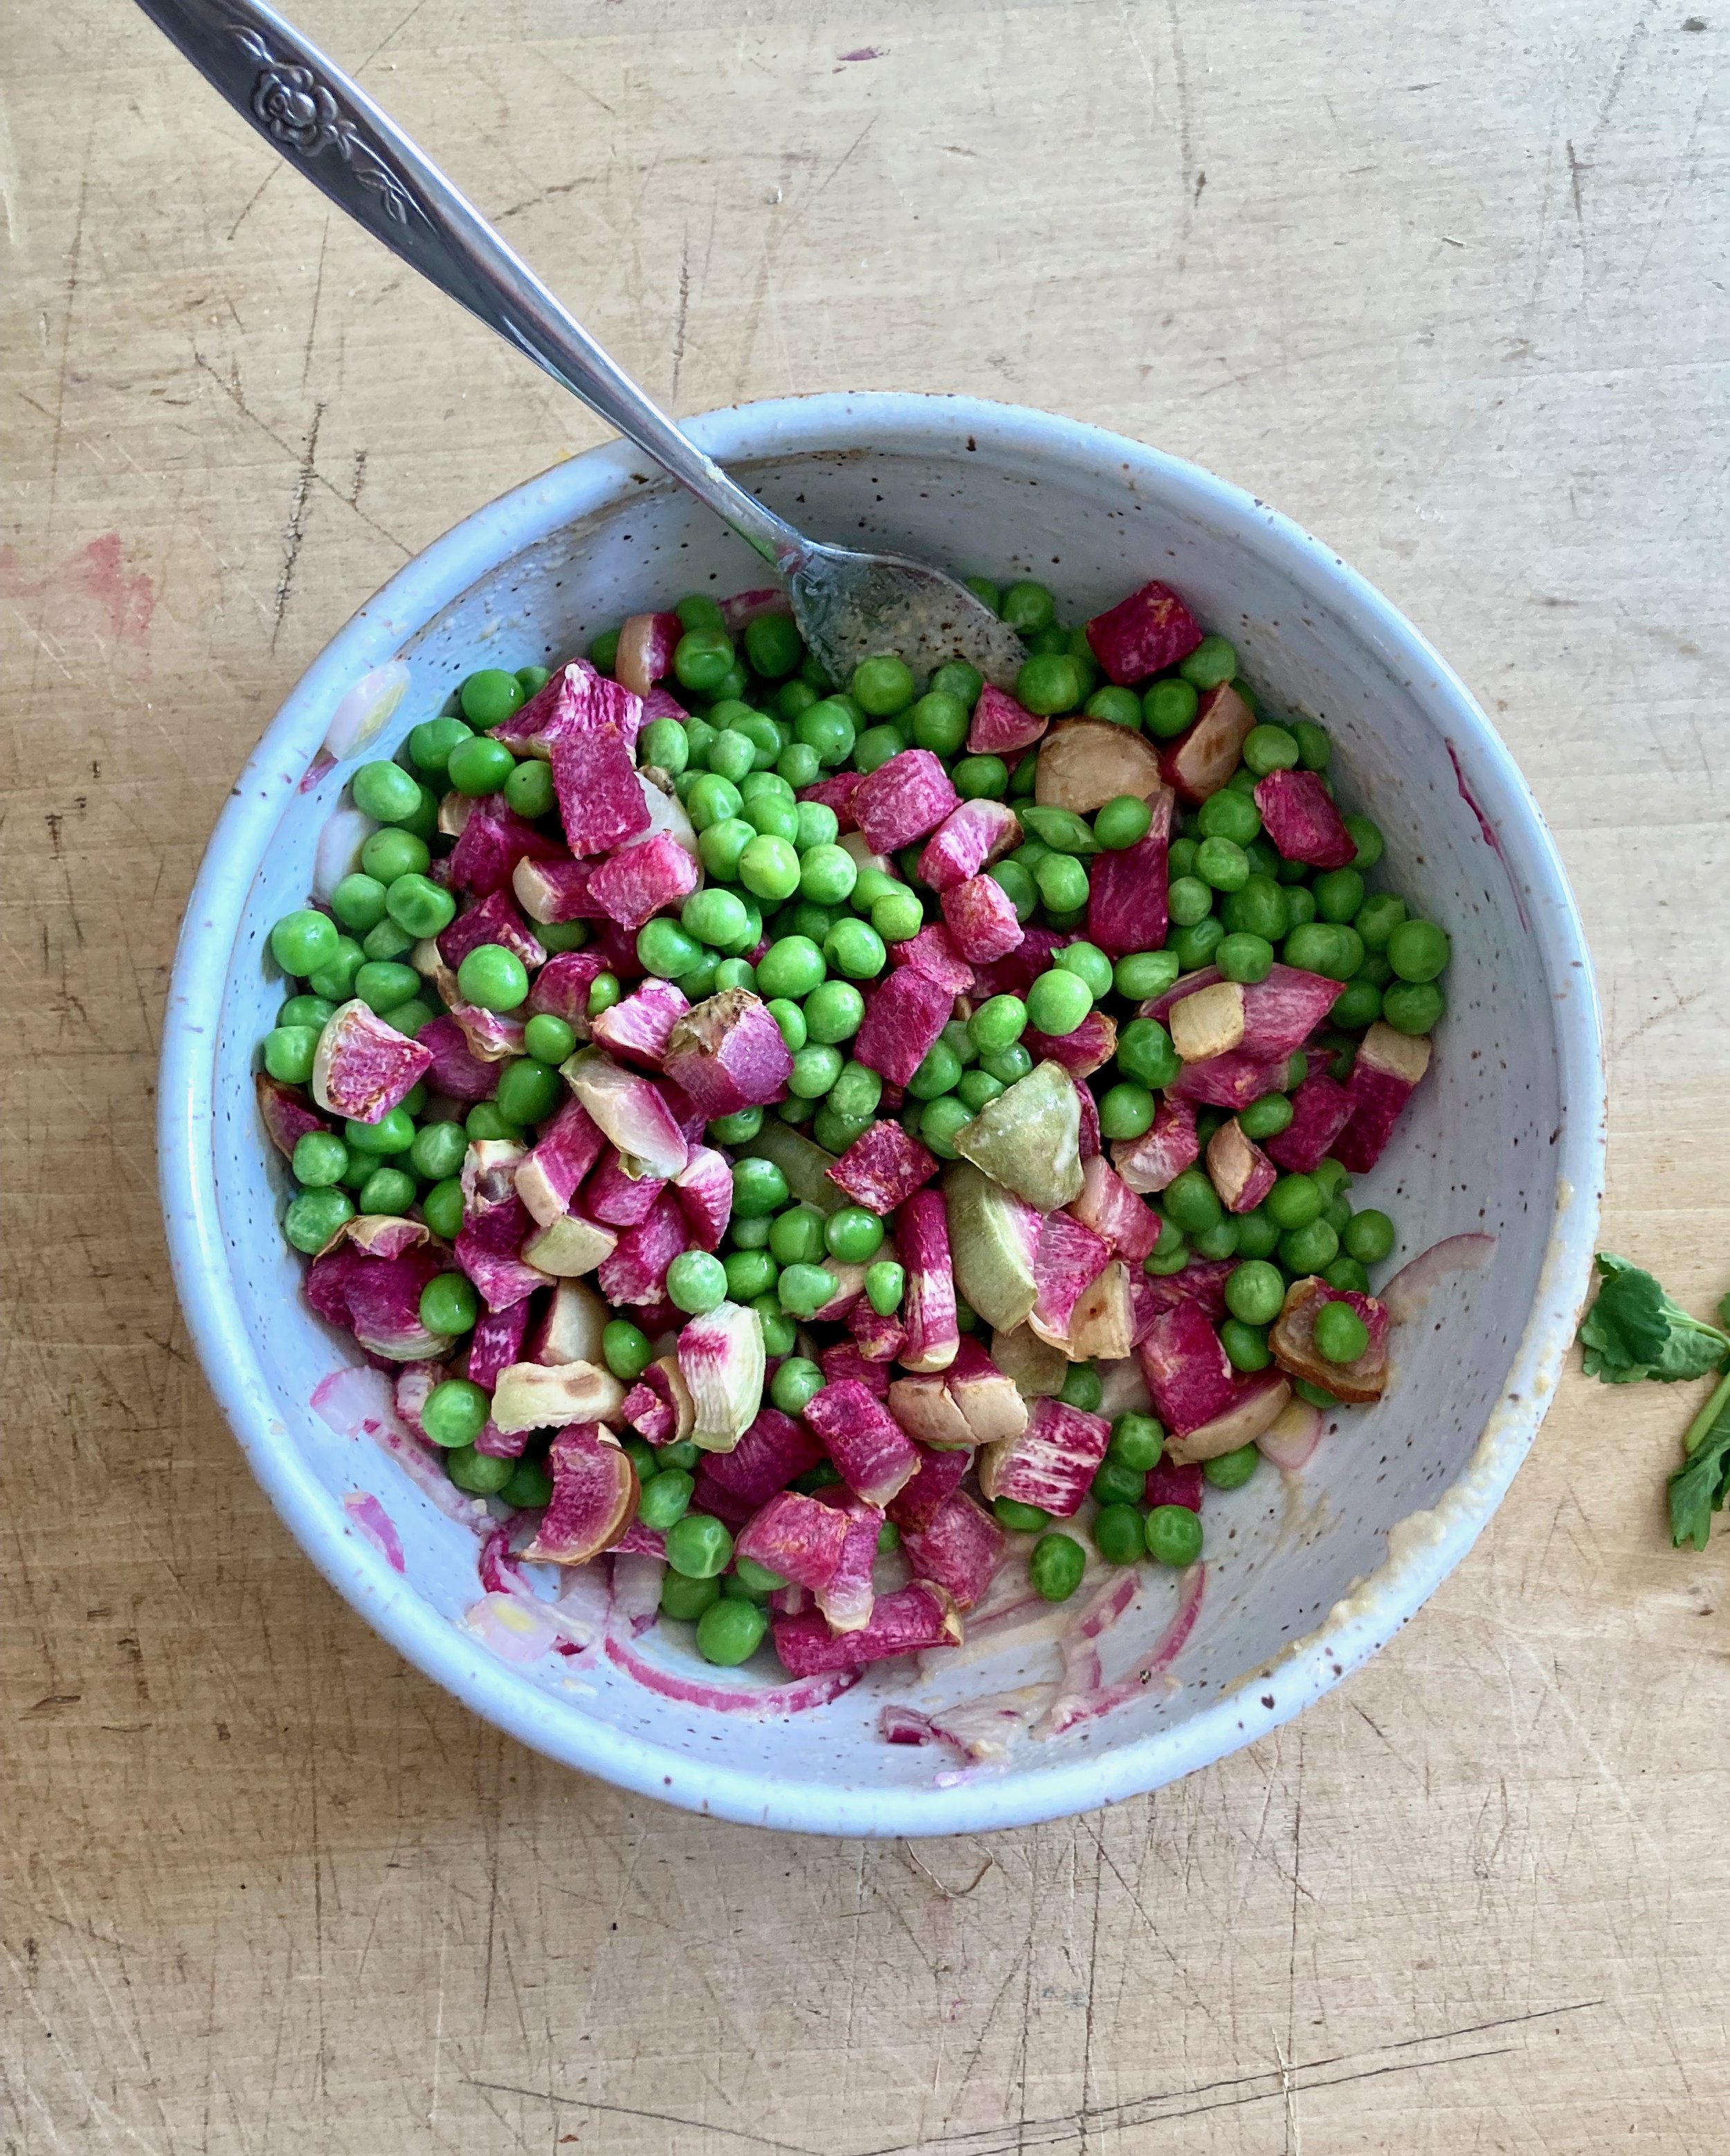
Then dump the peas and radishes into the bowl with the tahini onions. Sprinkle with pepper and toss around.

Look at that. Gorgeous right? And if you have and want, toss some fresh cilantro or parsley onto top because why not.

No stop starting at the how pretty it is and you know, eat it.

-C


Green pea and Watermelon Radish Salad

serve 2-4 as a side

  • 2 cups green peas (fresh or frozen andthawed)

  • 1 large (softball sized) watermelon radish

  • 1 small red onion

  • 3 tablespoons tahini

  • 2 tablespoons red wine vinegar

  • salt and pwpper

  • handful of fresh cilantro or parsley (optional)

Preheat oven to 425.

Grab radish and cut into small cubes about twice the size of a pea. Place on a lined baking sheet and pop into hot oven.

While radishes are roasting, grab onion and slice as thin as you can Place sliced onion along with the vinegar into a big bowl and toss around with a pinch of salt. Let sit for a few minutes then add in the tahini. Toss around until creamy.

After about 20 minutes pull the radishes form oven They should be slightly tender. Dump peas onto baking sheet with radishes and let them warm up for a few minutes.

Dump the peas and radishes into the bowl with the tahini onions. Add black pepper and another small pinch of salt. Toss around until evenly coasted. Top with sm ripped up fresh herbs (if using).

Eat.

Store any leftovers (there will be none) in an airtight container for 4-5 days.

In Vegetables, Vegan, salad Tags Green pea and Watermelon Radish Salad, tahini, plant based, vegan, raw, fresh, spring, side dish, color, vegetables, peas, grain free, oil free, salad, simple, dairy free, food, recipe
Comment

Sourdough Bagels

February 26, 2022 Colleen Stem
IMG_1321 2.jpg
IMG_1258 2.jpg

I don’t know about you and your people situation but my people, they are bagel people, like my whole entire family (and it is a big one). I swear that they (especially the littles) could eat bagels every day and be happy about it They like them so much that we even do bagels at just about all of our special family get togethers, which is fine by me because the get togethers are always at my house and they don’t make as big a mess as lets say spaghetti. They can really make a mess with that. So bagels, they are good.

I made this batch for the littles. (And that is why I made them plain. Can’t go wrong with plain). They have winter break right now so they came over for an afternoon of sledding, hot cocoa, and lunch. I asked them the day before what they wanted me to make for lunch and they said bagels. Big surprise. HA! But really, they all know what they like so why mess with a good things?

A little about these bagels. It is not the fastest recipe you will find. The hands on time commitment is no too much but there is a good amount of time that the dough is spent rising in the fridge. Because they are sourdough the dough needs at least 12 hours to rise so if you want bagels right now then this is not the recipe to use. But the great thing about this bagel dough is that you can make it and leave in fridge for 12 hours but I have left it in the fridge for like 3 days and the dough was still great. If you want bagels anytime in the next few days, then this is the recipe for you. Also a lot of bagel recipes have barely malt and that is not always easy to find or buy in not gigantic quantities but this recipe just uses molasses and the results are pretty close to perfect. So time yes, but fancy ingredients no. And they taste amazing. Plus who doesn't want to make their own bagels and just be that bad ass? Because yes. Bagel making is badass.

Now to the bagels!

The stuff. Flour, water, salt, ripe sourdough started, yeast, and molasses.

IMG_1111.jpg
IMG_1118.jpg
IMG_1122.jpg
IMG_1130.jpg

Day one. Mix the water with the starter, yeast, and a bit of the molasses until combined. Add in the salt and flour and mix unit it becomes a shaggy dough.

Dump dough onto a floured surface and… get to kneading. About 10 minutes, (a few extra if you are slow). Have about 1/2 a cup of extra four on the side to flour the counter as needed.

soft and suple and kneaded all nice. Place kneaded dough into a clean wet bowl and cover.

IMG_1151.jpg
IMG_1172.jpg

Before rise and after rise dough.

Dump risen dough onto a lightly floured surface and cut into 8-12 pieces. (8 for larger bagels, 12 for smaller)

IMG_1191.jpg
IMG_1181.jpg
IMG_1190.jpg

Shape bagels. Roll each piece of dough into a ball and stick a whole into the middle. Carefully stretch the hole out about twice as big as you think it should be. (it will shrink). Place shapped bagels ontoa lined and or greased baking hseet, giving each a bit of room to groww.

Now it all looks like bagels. Cover and let them sit and proof for about 35-45 minutes.

Before bagels are comeplety done their second proof, prepare the molasses water bath. Just add water and molasees to a big wide pot and bring to a boil.

Once water bath is boil and bagels are done the second proof it is time to boil. Carefully drop bagels inot boiling water and boil for 2 minutes. Flip then boil for another minute. REmove boiled bagelss with a slooted spaturla and place back on lined or greased baking sheet.

boiled bagels. Now pop the into hot oven and bake. 22-25 minutes, until nice and golden brown.

Gorgeous!

Place them on a wire rack to cool just a bit.

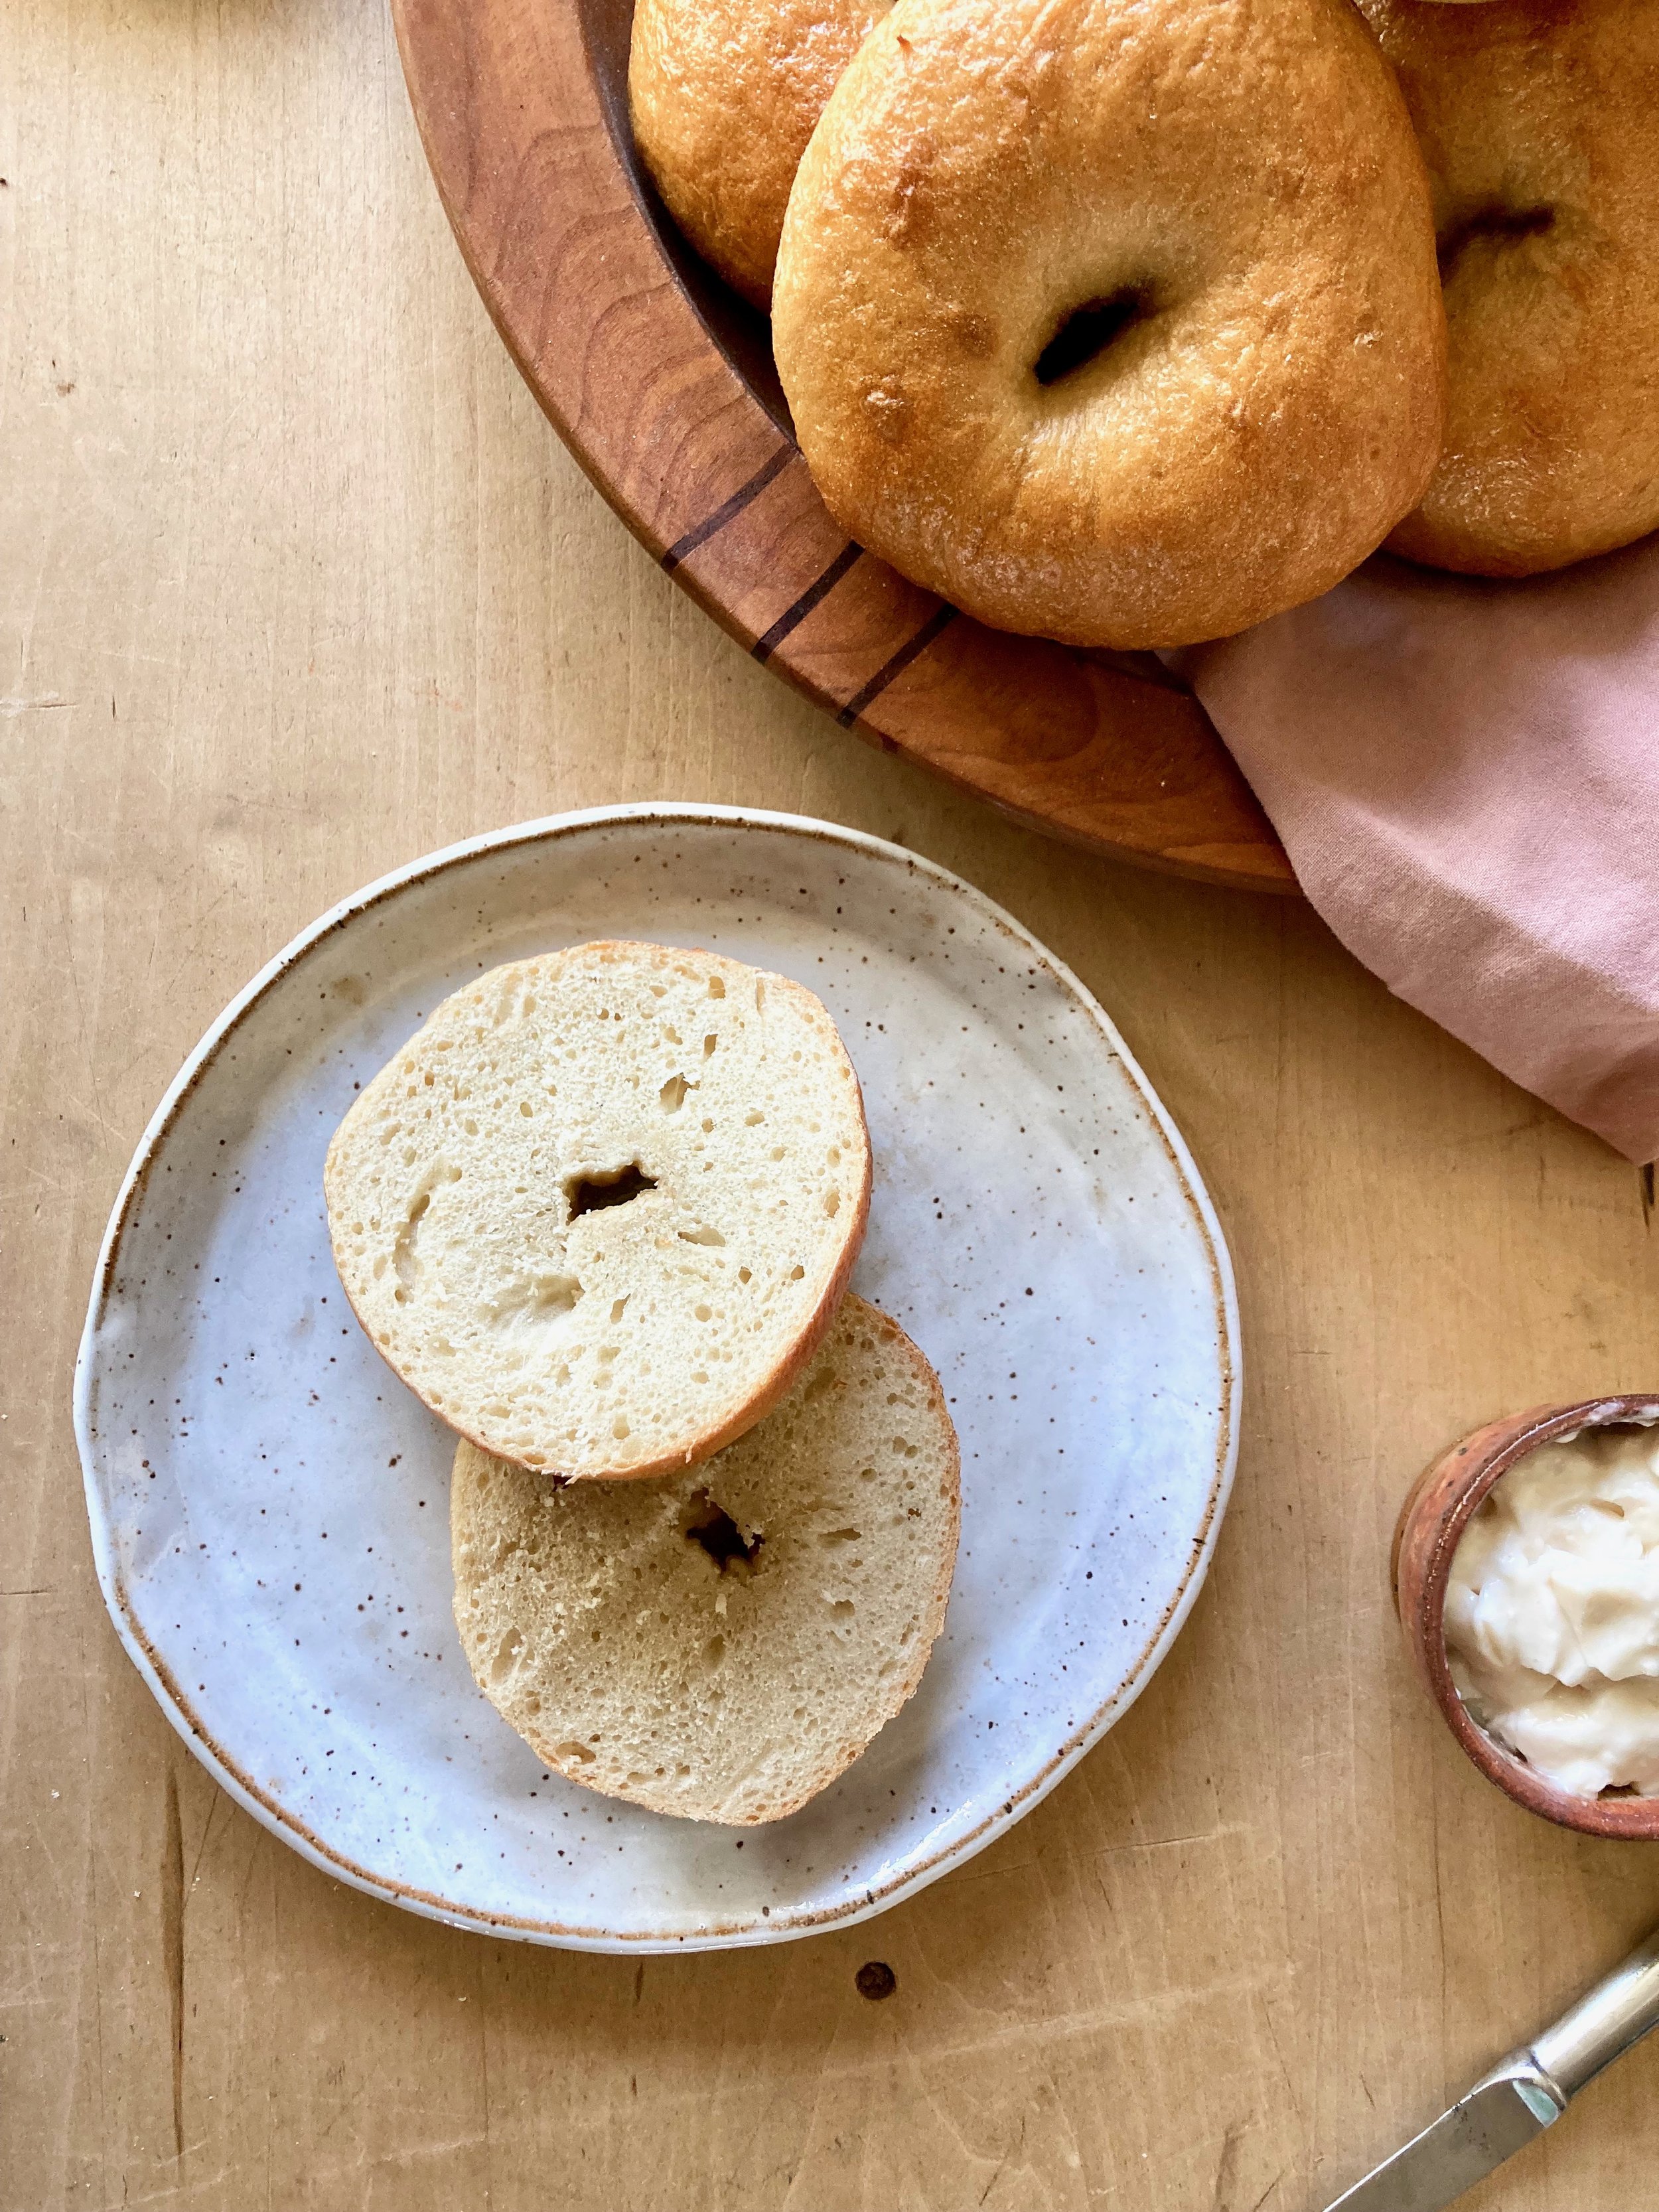
And then you serve them up and eat them. How do you eat the bagels is up to you. My people are easy. Plan cream cheese or peanut butter so that is what they get.

-C


Sourdough Bagels

makes 8- 12 (depending on size)

  • 5 1/2 cups al purpose flour

  • 1/4 cup active starter

  • 1 teaspoon active yeast

  • 1 tablespoon molasses

  • 1 teaspoon salt

  • 2 cups warm water

    WATERBATH

  • 6-7 cups water

  • 2 tablespoon molasses

In a large bowl mix the warm water, starter, yeast, and molasses until combined. Add in salt and 5 cups of flour and mix until a shaggy dough forms. Dump dough onto a floured surface and start kneading, dusting counter (you might use 1/2 cup or even a little more) whenever dough gets too sticky, for 10 minutes (add a few extra minutes if you are kind of slow). The dough should be smooth and not sticky and feel dense.

Place kneaded dough into a wet large bowl, cover with plastic or a silicone lid, and place in fridge for 12-24 hours.

After dough had risen in fridge, remove and dump dough onto a lightly floured surface and divide into 8-12 equal sized pieces. Pinch and roll each piece into a ball then punch your thumb into the middle all the way through. Carefully stretch the hole about an inch in diameter then place the shaped bagel onto a lined and greased baking sheet. Repeat with all dough. Once the bagels are all shapped, lightly cover and let them sit and proof for another 35-40 minutes.

While bagels are proofing, pre heat oven to 450 degrees and get the water bath ready.

For water bath combine water and molasses in a pot as wide as you got and bring it to a boil.

Once bagels are done their second proof, carefully drop bagels (a few at a time so not to overcrowded) into the boiling water. Boil first side for 2 minutes then flip and boil other side for 1 minute. Remove boiled bagels with a slotted spatula and place back on baking sheets. Repeat until all bagels are boiled and once they are, pop them into hot oven. Bake for 22-25 minute, rotating baking sheets half way, until bagels are nice and golden brown.

Remove bagels from oven and place on a wire rack to cool. Eat right away or whenever you want. Bagels can be stored in airtight container or bag for 3-4 days at room temperature but if you are not eating them within a day or two, it is better to slice and freeze them. Frozen bagels last a few months and are easy to pop from oven and toast!

In bread, Vegan Tags sourdough, bagels, vegan, King Arthur flour, wheat, easy, plain, bread, recipe
Comment

Black Bean Soup with Cornbread Dumplings

February 19, 2022 Colleen Stem
IMG_1030.jpg
IMG_0937.jpg

Black beans soup is eaten on the regular around here. Not always the same way but pretty much. Why screw with a good thing you know?

Now soup with dumplings. This is not (yet) a regular thing but I was making the usual blacken soup and planing on making corn bread to go with (in a pan) , when I had a moment of clarity and realized that I should just make the corn bread into dumplings and not have to deal with baking and another pan to clean. Duh. Why don’t I do this more often?

And that is it. A black bean soup, nice and thick, with light fluffy cornbread dumplings cooked in one pot. Quick, easy and all sorts of delicious. Can’t complain about that.

Now let’s get to the soup and dumplings!

The stuff. For the soup there are bLackbeans, and onion, spices, a carrot, garlic, tomato paste, apple cider vinegar. For dumplings we have flour, baking powder, salt, oil, and plant milk. Salt and pepper too.

Start by dicing up the carrot and onion and mincing the garlic.

IMG_0834.jpg
IMG_0847.jpg

Dump all that you diced into a big pot, along with the spices, some salt and pepper, and about 1/2 cup of water. Place on stove and cook down on medium heat until the onion is becoming translucent and the whole pot is starting to smell fragrant.

IMG_0864.jpg
IMG_0867.jpg

Now add in beans and tomato paste and about 5 cups of water. Bring to a boil then turn down to medium an cook for about 20-30 minutes.

Soup. Cooked and all taste but one more little step.

Remove a third of the soup and blend until smooth and then add it back it.

IMG_0905.jpg
IMG_0909.jpg

Dumplings. Mix dry together then add in oil and milk. Mix together unit incorporated.

While soup is still on medium heat, scoop the dumping mixture right into the soup.

Place a loose side on top of pot ans let the dumplings cook util list and fluffy which will take about 15-20 minutes.

Cornbread dumplings looking all nice in the soup.

Then you eat it. Add some avocado on top of you want. Avocado is always a good idea.

-C


Black Bean Soup with Cornbread Dumplings

feeds 3-4

  • 3 cups cooked black beans (or 2 16 oz cans)

  • 1 large onion

  • 1 good sized carrot

  • 3-4 cloves garlic

  • 1 teaspoon chill powder

  • 1 tablespoon cumin

  • 1/2 teaspoon red pepper flakes (or none if you don’t like the spice)

  • 1 tablespoon maple cider vineger

  • 1/3 cup tomato paste

  • 5 cups water

  • salt and pepper

    Dumplings

  • 3/4 cup all purpose flour

  • 1/4 cup corn meal

  • 3/4 cup plant milk

  • 2 tablespoon neutral oil

  • 1 teaspoon baking powder

  • 1/2 teaspoon salt

Start by dicing up the carrot and onion into small pieces. Mince the garlic and then place the garlic, onion, and carrot into a large pot with the cumin, chili powder, and red pepper flakes, a good pinch of salt and pepper, and about 1/2 a cup of water. Place pot on stove on a medium low heat and sweat the mixture for about 10-15 minutes or until fragrant and the onions are slightly translucent.

Add in the tomato paste, beans , and 5 cups water. Bring to a boil then reduce to medium heat and let cook for about1/2 hour. Once soup has cooked down a bit and tastes delicious, remove form heat and carefully transfer 1/3 of the soup to a blender or jar (if using a hand blander) and blend until smooth. Add the blend soup back to the pot and turn the heat back on to medium low. Taste and add more salt and pepper if needed.

Now make dumpling mixture. Mix the dry ingredients together in a bowl then add in the oil and milk and mix until incorporated. Scoops the dumping mixture into the soup while the soup then place a lid loosely on the pot. Cook for another 15-20 minutes or unit the dumplings are nice a n fluffy.

And when they are done, remove lid, tun the heat off, and paddle soup and dumplings into bowl. Eat. Add sliced avocado for a little more yum.

In beans, biscuits and such, dinner, soups/stews/chilis Tags Black Bean Soup with Cornbread Dumplings, soup, stew, beans, dinner, vegan, vegetarian, easy, meal, winter, hardy, delicious, healthy, plant based, one pot meal
Comment

Chocolate covered Peanut Butter and Jelly patties

February 12, 2022 Colleen Stem
IMG_0682.jpg
IMG_0667.jpg

The other day I was talking to So, my little 9 year old niece about Valentines day and what she loves about it. Of course the conversation quickly because about food and then about candy and what kind of candy is the best. So, being the eater that she is, had a tendency to steer towards anything chocolate and eats more peanut butter then me, (and I eat a lot) which meant that it was decided that the best candy is chocolate and peanut butter anything. We then decided that I should make peanut butter chocolates for Valentines day.. We wanted to do it together but she has like school and all sorts of after school ballet classes all week so yeah, she told me I should just go ahead a make a batch for her, And you know what, that is what I did. And because I wanted to make them a little more, I don’t know, fun, I added the jelly. Who wouldn’t want a chocolate covered peanut butter and jelly?

These patties are super easy to make. The only time consuming part is freezer time for setting the peanut butter. There are no crazy ingredients, just peanut butter, jelly, graham crackers (the peanut butter part is ground up with graham crackers to give it some heft and a little cookieness) and chocolate (plus a little oil to melt with the chocolate). And the results are as good, if not better then any chocolate you will find at any store. Plus if you are feeling fancy you can drizzle white chocolate and or add sprinkles because um, yeah. So cute!

Anyways, I made the patties and have hidden most of them away (from the mr) to bring over to So. I am a little worried she won’t like the jelly because she really has very specific food preferences and we didn't talk about the jelly part…. But again, super easy to make and if she doesn't like them I know a bunch of other littles (and the mr) that will love them. And now that I am thinking about it I am probably should make another batch to share with the other littles anyways so I’ll just make more and set aside a few without the jelly, just in case.

Man those littles, they got me whipped. HA!

Now to the peanut butter and jelly patties!

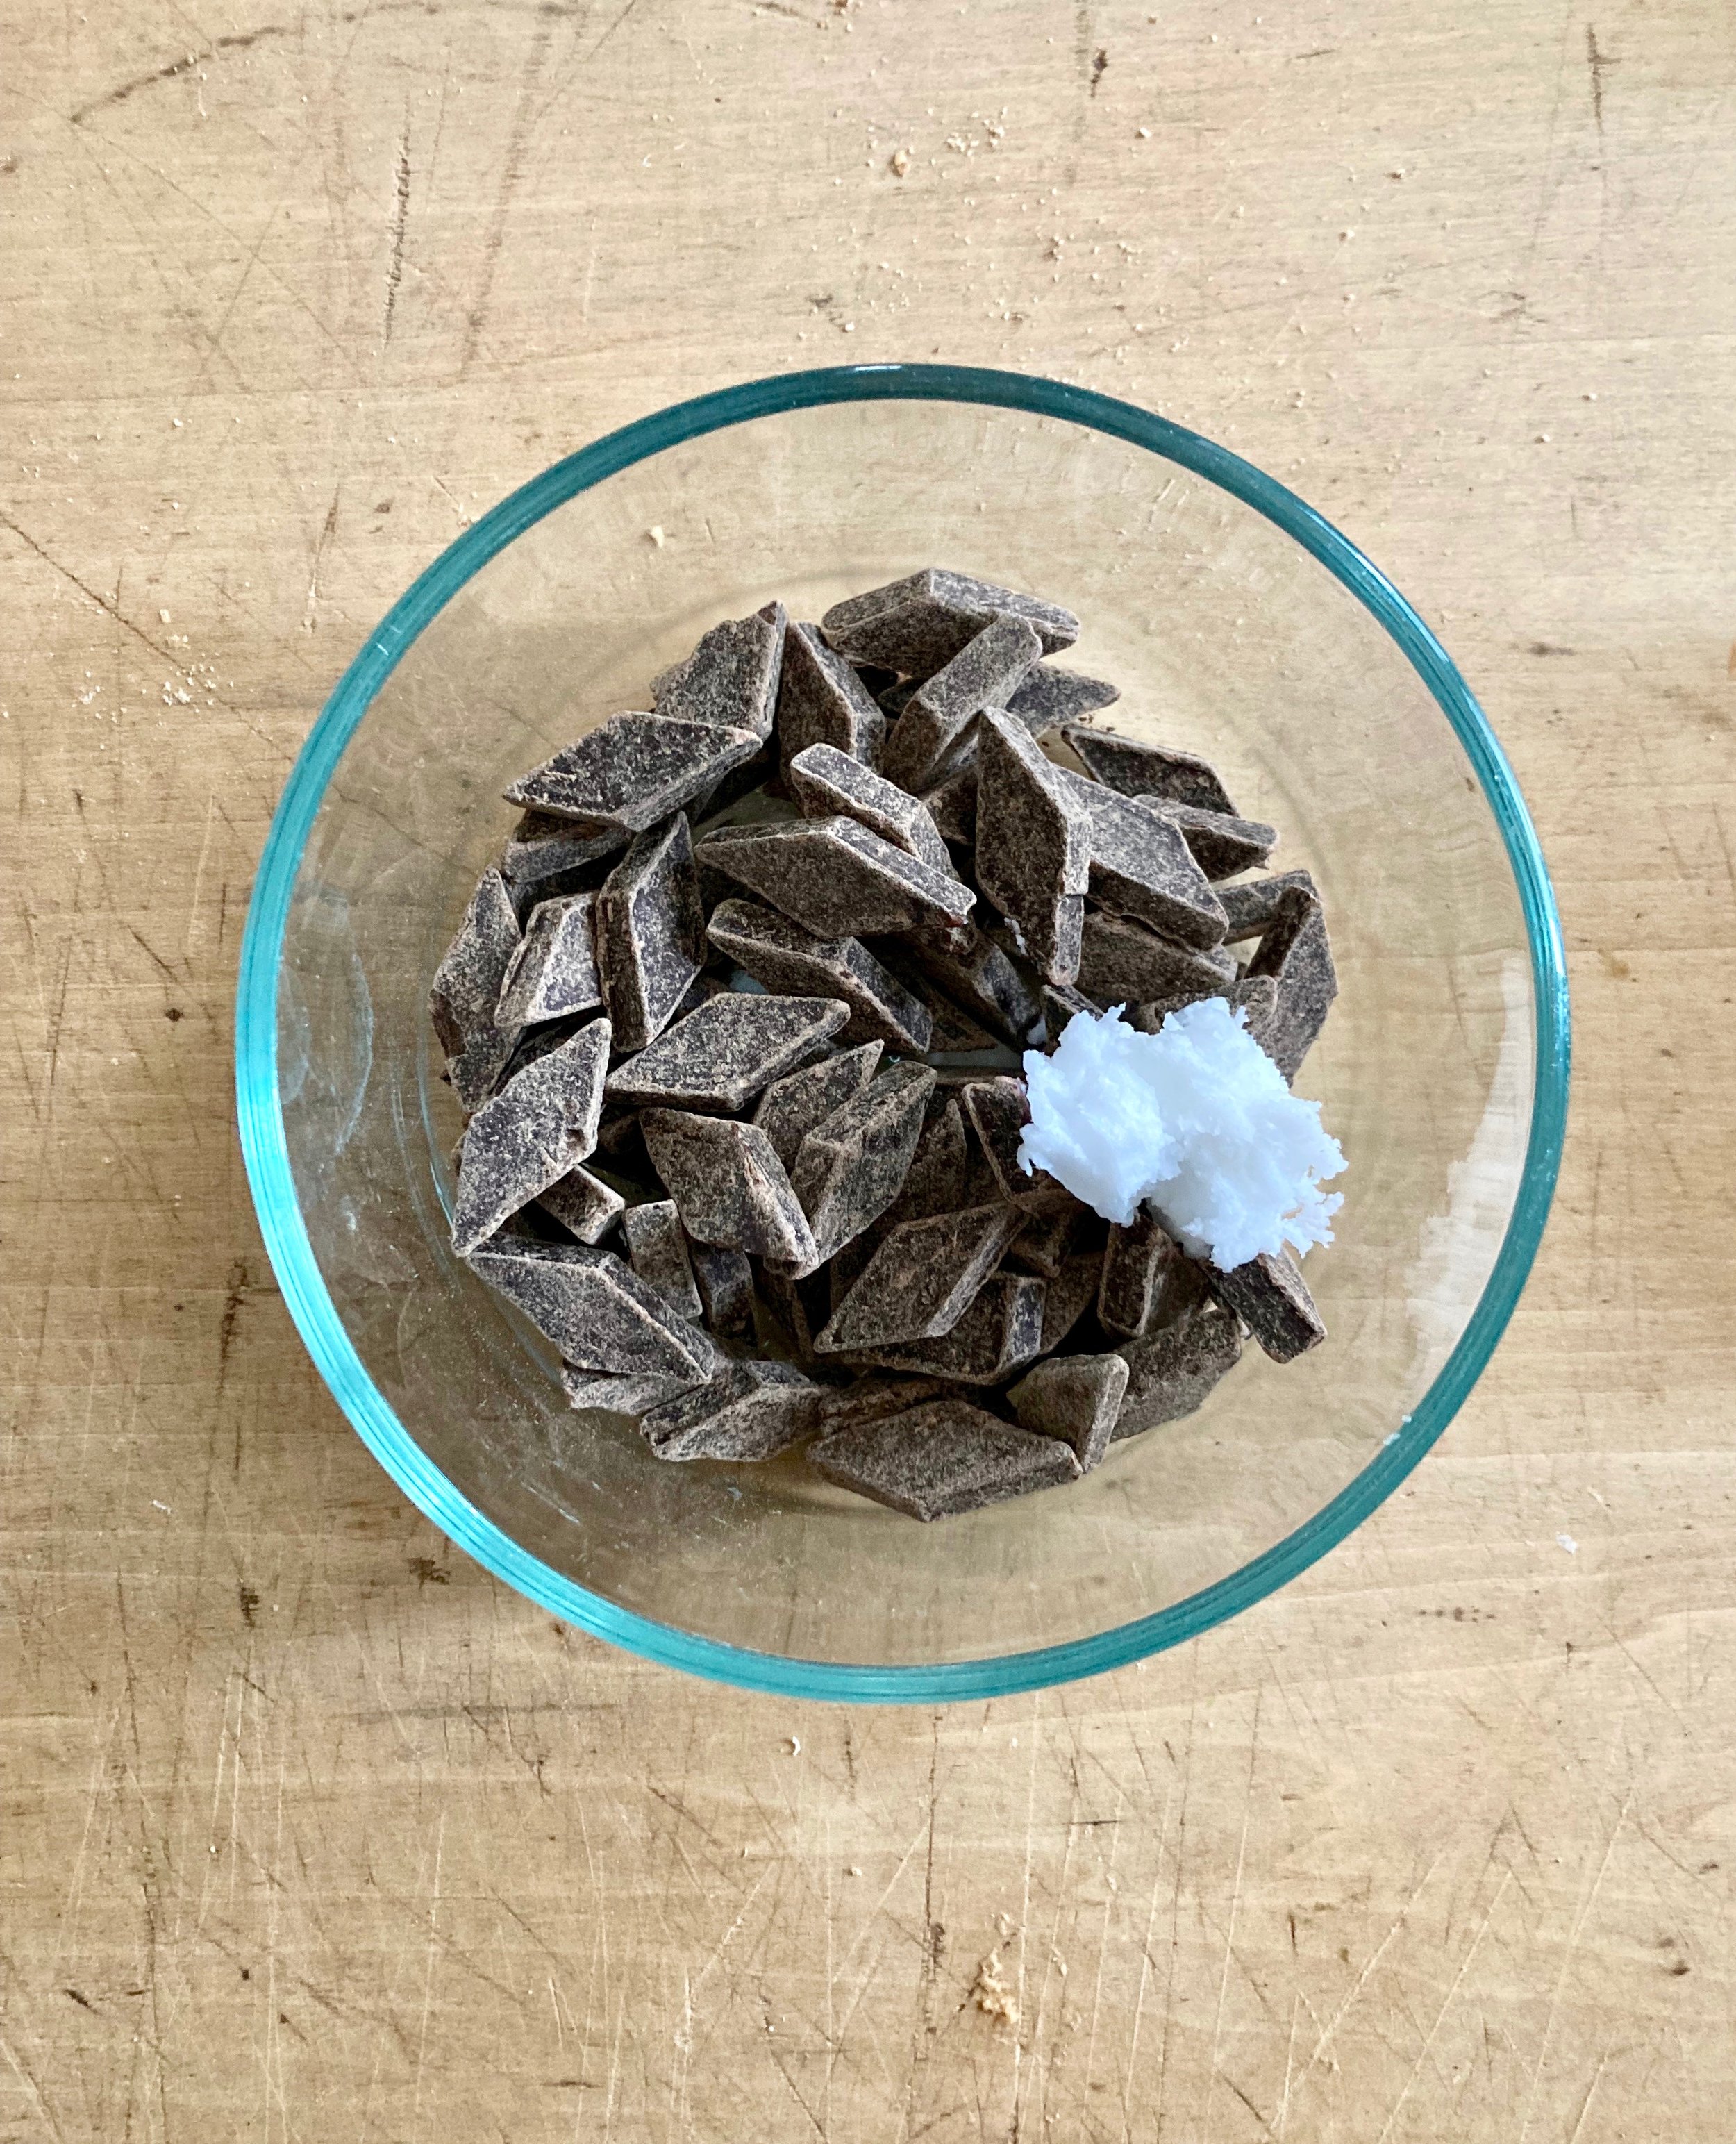
The stuff. Peanut Butter, jelly, graham crackers, chocolate chunks and coconut oil.

IMG_0622.jpg
IMG_0627.jpg
IMG_0641.jpg

Super basic. Add graham crackers to food processor and blend until the crackers are super crumby. Add in the peanut butter and pulse (scrap sides if needed) until the graham crumble and peanut butter are completely incorporated.

Scoop out balls of the peanut butter graham cracker mixture onto a wax or silicone lined baking sheet. Once all scooped, roll into a ball then with you finger (dipped in water to prevent sticking,) make a little well in each ball and flame it a bit. Fill the wells with jam then place the baking sheet into the freezer. Freezer for about an hour.

IMG_0653 2.jpg
IMG_0656.jpg

Right before you take the peanut butter jelly patties from the freezer, melt chocolate. Just add the oil to the chocolate and place in the microwave for about 30 seconds, Stir around until it starts to melt. Stick it back in the microwave for another 15 seconds if it didn't get ht enough to become smooth.

And once you have the chocolate smooth, grab the frozen patties and start dipping them in the chocolate. I don’t know what I was thinking at the time but I went ahead and spooned the chocolate on top then realized that I need to the do the bottoms so had to let them harden and them had to dip the bottom after whihj was annoying. So Mayne just dip the whole thing in the first time.

And if you are feeling fancy, decorate the patties. Sprinkles are alway welcomed around here so I melted a little white chocolate and dazzled it on and stuck the sprinkles to that because the chocolate what already hard (if adding sprinkles they need to be added before the chocolate gets hard) and plus the white chocolate looks pretty.

And that is it. Chocolate covered peanut butter and jelly patties. Perfect for all chocolate needs and maybe a sweet treat to make for your special Valentine… Or a 9 year old that basically told you too. 🤣


Chocolate covered Peanut Butter and Jelly patties

makes around 15 chocolate patties

  • 3/4 cup creamy peanut butter (the non natural kind like skippy)

  • 1/3 cup strawberry jam

  • 8 whole graham crackers

  • 1 1/4 cup dark or semi sweet chocolate chips or chunks

  • 2 teaspoons coconut oil

  • sprinkles and or 1/4 cup white chocolate chips (optional)

Start but placing graham crackers into a food processor and blend until they have became a medium fine crumb. Add in the peanut butter and pulse (scraping down sides if needed) until the peanut butter and graham cracker crumb have been completely incorporated so about a minute or 2.

Line a baking sheet with wax paper or silicone mat and scoop out about 2 tablespoons of the mixture and roll into a ball. Place on baking sheet and with a wet finger (so it doesn’t stick) slightly flatten the ball and make a little well into the patty. Fill the wells up with about 1/2 teaspoon or so of jam. Once they all have been jammed place the baking sheet into the freezer. Let the patties freeze for about an hour.

Right before taking the peanut butter patties from freezer, melt chocolate. If using a microwave just add oil to the chocolate and melt for 15 second increments unit the chocolate starts to melt. (30-45 seconds should be enough). Once the chocolate is starting to. melt, stir untll smooth. Or if doing it on the stove, stir chocolate in a double boiler until smooth.

Once chocolate is ready pull the peanut butter patties from the freezer. Dip each patties (jelly side up, into chocolate so it is completely covered and place back on baking sheet. If you want to add sprinkles, do it right away before chocolate sets. If you want to add white chocolate, let the dark chocolate set until hard and then melt white chocolate the way you did the dark chocolate and then drizzle it on.

And that is it. You then eat them. Store left over chocolates in airtight container. They are fine at room temperature but are best left in the freezer.

In candy, Vegan Tags Chocolate Covered Peanut Butter And Jelly Patties, peanut butter, jelly, candy, chocolates, Valentines day, dessert, vegan, easy, homemade
Comment

Roasted Roots Snack Plate

February 5, 2022 Colleen Stem

Did I make a roasted roots charcuterie of sorts? Yeah maybe I did, but I don’t know about calling it a charcuterie. I like to think of it more as a snack plate. And I say snack plate only because I placed everything on a plater which is, in fact, a very large plate. I could have showed you how I usually eat this, directly off a baking sheet, but that wouldn’t be as fun. And a snack plate looks a heck of a lot nicer when/if you want to share. Think of it. All your people around, snacking away in some dank ass roasted veggie. (No I did not share or even intend to share any. This was my lunch thank you very much.) Well not exactly something to day dream about but your people, if choosing to share, will really enjoy themselves while eating. Plus it works for any occasion where there are like people withl food allergies and easy to make all the people with all the different diets happy. Everyone can eat it. And it is really pretty. That counts as another plus.

This snack plate. Well it is basic. Just a bunch of the most delicious roots roasted up and served with dips. It is so simple and can be made with pretty much any veggies you like and then served with whatever dips you want. It is a choose your own adventure snack plate. You can even get fancy with it and serve it with nuts and olives and maybe some fruit or whatever but it is not necessary. And also I a want to make it clear, just because I called it a snack plate does not mean it needs to be a snack or that you have to share (see previous paragraph.) Eat is all to your face. I applaud you.

Now to the roasted roots!

The stuff. A bulb of celeriac, a big watermelon radish, a couple carrots and ac couple of beets. A big parsnip, some beets, vinegar and water, and salt and pepper.

Wash all the roots then cut them up. IF you want to peel go for it, but I don’t because I prefer not to.

Anyway, cut them all into wedges, shtik and or rounds. A variety of shapes is nice, just make sure that they are all roughly the same thickness.

Arrange all the cut roots on a baking sheet, trying not to overlap much. Sprinkle with water and vinegar then toss on a good pinch of salt and pepper.

Place in hot oven and roast.

40 fish minutes later, all tender and ready.

Place all your roasted roots on a large plate or plater, grab some dips of your choice (Mustard, hummus, and guacamole are excellent choices) and eat away. Or wait and serve whenever cause these snack situation is delicious eaten at any temperature.

-c


Roasted Roots Snack Plate

Note. The following is more of a suggestion then a recipe. Use as many roots as you like or stick with a just one or two.

  • a bulb of celeriac

  • 2 carrots

  • a large watermelon radish

  • 2 parsnips

  • 2 medium turnips

  • 2 medium beets

  • a couple teaspoons white vinegar and water

  • salt and pepper

  • Hummus, mustard, guacamole.. anything you like to dip veggies in. (optional)

Preheat oven to 425.

Prepare roots. Wash and cut them all into sticks, rounds, and or wedges, just make sure they are roughly the same thickness. Once all cut, place them on a baking sheet, trying not to overlap much, and sprinkle with a little water and a few teaspoons of vinegar (you can use a spray bottle or just flick the the water and vinegar with your fingers) Sprinkle with a good pinch of salt and black pepper.

Place in oven and bake for about 40 minutes or until all veggies are tender.

Remove from oven and let cool enough to handle them arrange on a large plate or plater along with at least one, if not many dips that you like.

Serve hot. Or warm. Room temperature is good or you can pre roasted refrigerate, then serve cold. Whatever temperature it’s fantastic!

In Vegan, Vegetables, snack Tags charcuterie, vegan, roasted roots, fresh, winter roots, dips, plant based, oil free, easy, snack plate, snack, lunch, dinner, gluten free, party, food, simpe
Comment
← Newer Posts Older Posts →
 

https://thelovelycrazy.squarespace.com/config#/|/about/

Me. Food Maker.Food eater. Woo HOO!

STEM+NODE  SMALL BATCH AND ONE OF A KIND POTTERY

stem+node ceramics


____________________

Subscribe

GET NEW POSTS IN YO EMAIL

You are AWESOME!!!


@thelovelycrazy 2014-2021