• stem+node ceramics
  • THE LOVEY CRAZY
Menu

STEM+NODE CERAMICS

Street Address
City, State, Zip
Phone Number

Your Custom Text Here

STEM+NODE CERAMICS

  • stem+node ceramics
  • THE LOVEY CRAZY

Savory Carrot Dill Waffle Iron Fritters with Creamy Maple Mustard

April 3, 2021 Colleen Stem
IMG_4573.jpg
IMG_4551.jpg
IMG_4523.jpg

The other day I went to grab the cookie cutters out of the pantry and had to move the waffle iron out of the way. That is basically the only reason I used the waffle iron. And just like every single time I grab it out to use, I wonder to my self why the hell I don’t use it more. Maybe it’s time to move the waffle iron to a bette spot in the pantry.

So anyway these carrot waffled fritters. Theyare so so so freaking good! I could barely stop eating them before I got a chance to take a couple pictures. So simple, yet so satisfying. Carrot and dill are such a great combo and when made into a crispy fritter situation with chickpea flour and dipped into with the maple mustard. WOW! I was going to make most of this batch for the mr for dinner but I ended up eating more then half (so I ended up making him a waffled sandwich too).

I think these carrot dill waffle fritters might just be the reason the waffle iron gets a new spot in the pantry. Heck I might even leave it out for while because I am definitely making another batch (or 3 of these before I put it away)

Now to the carrots waffle fritters!

IMG_4467.jpg

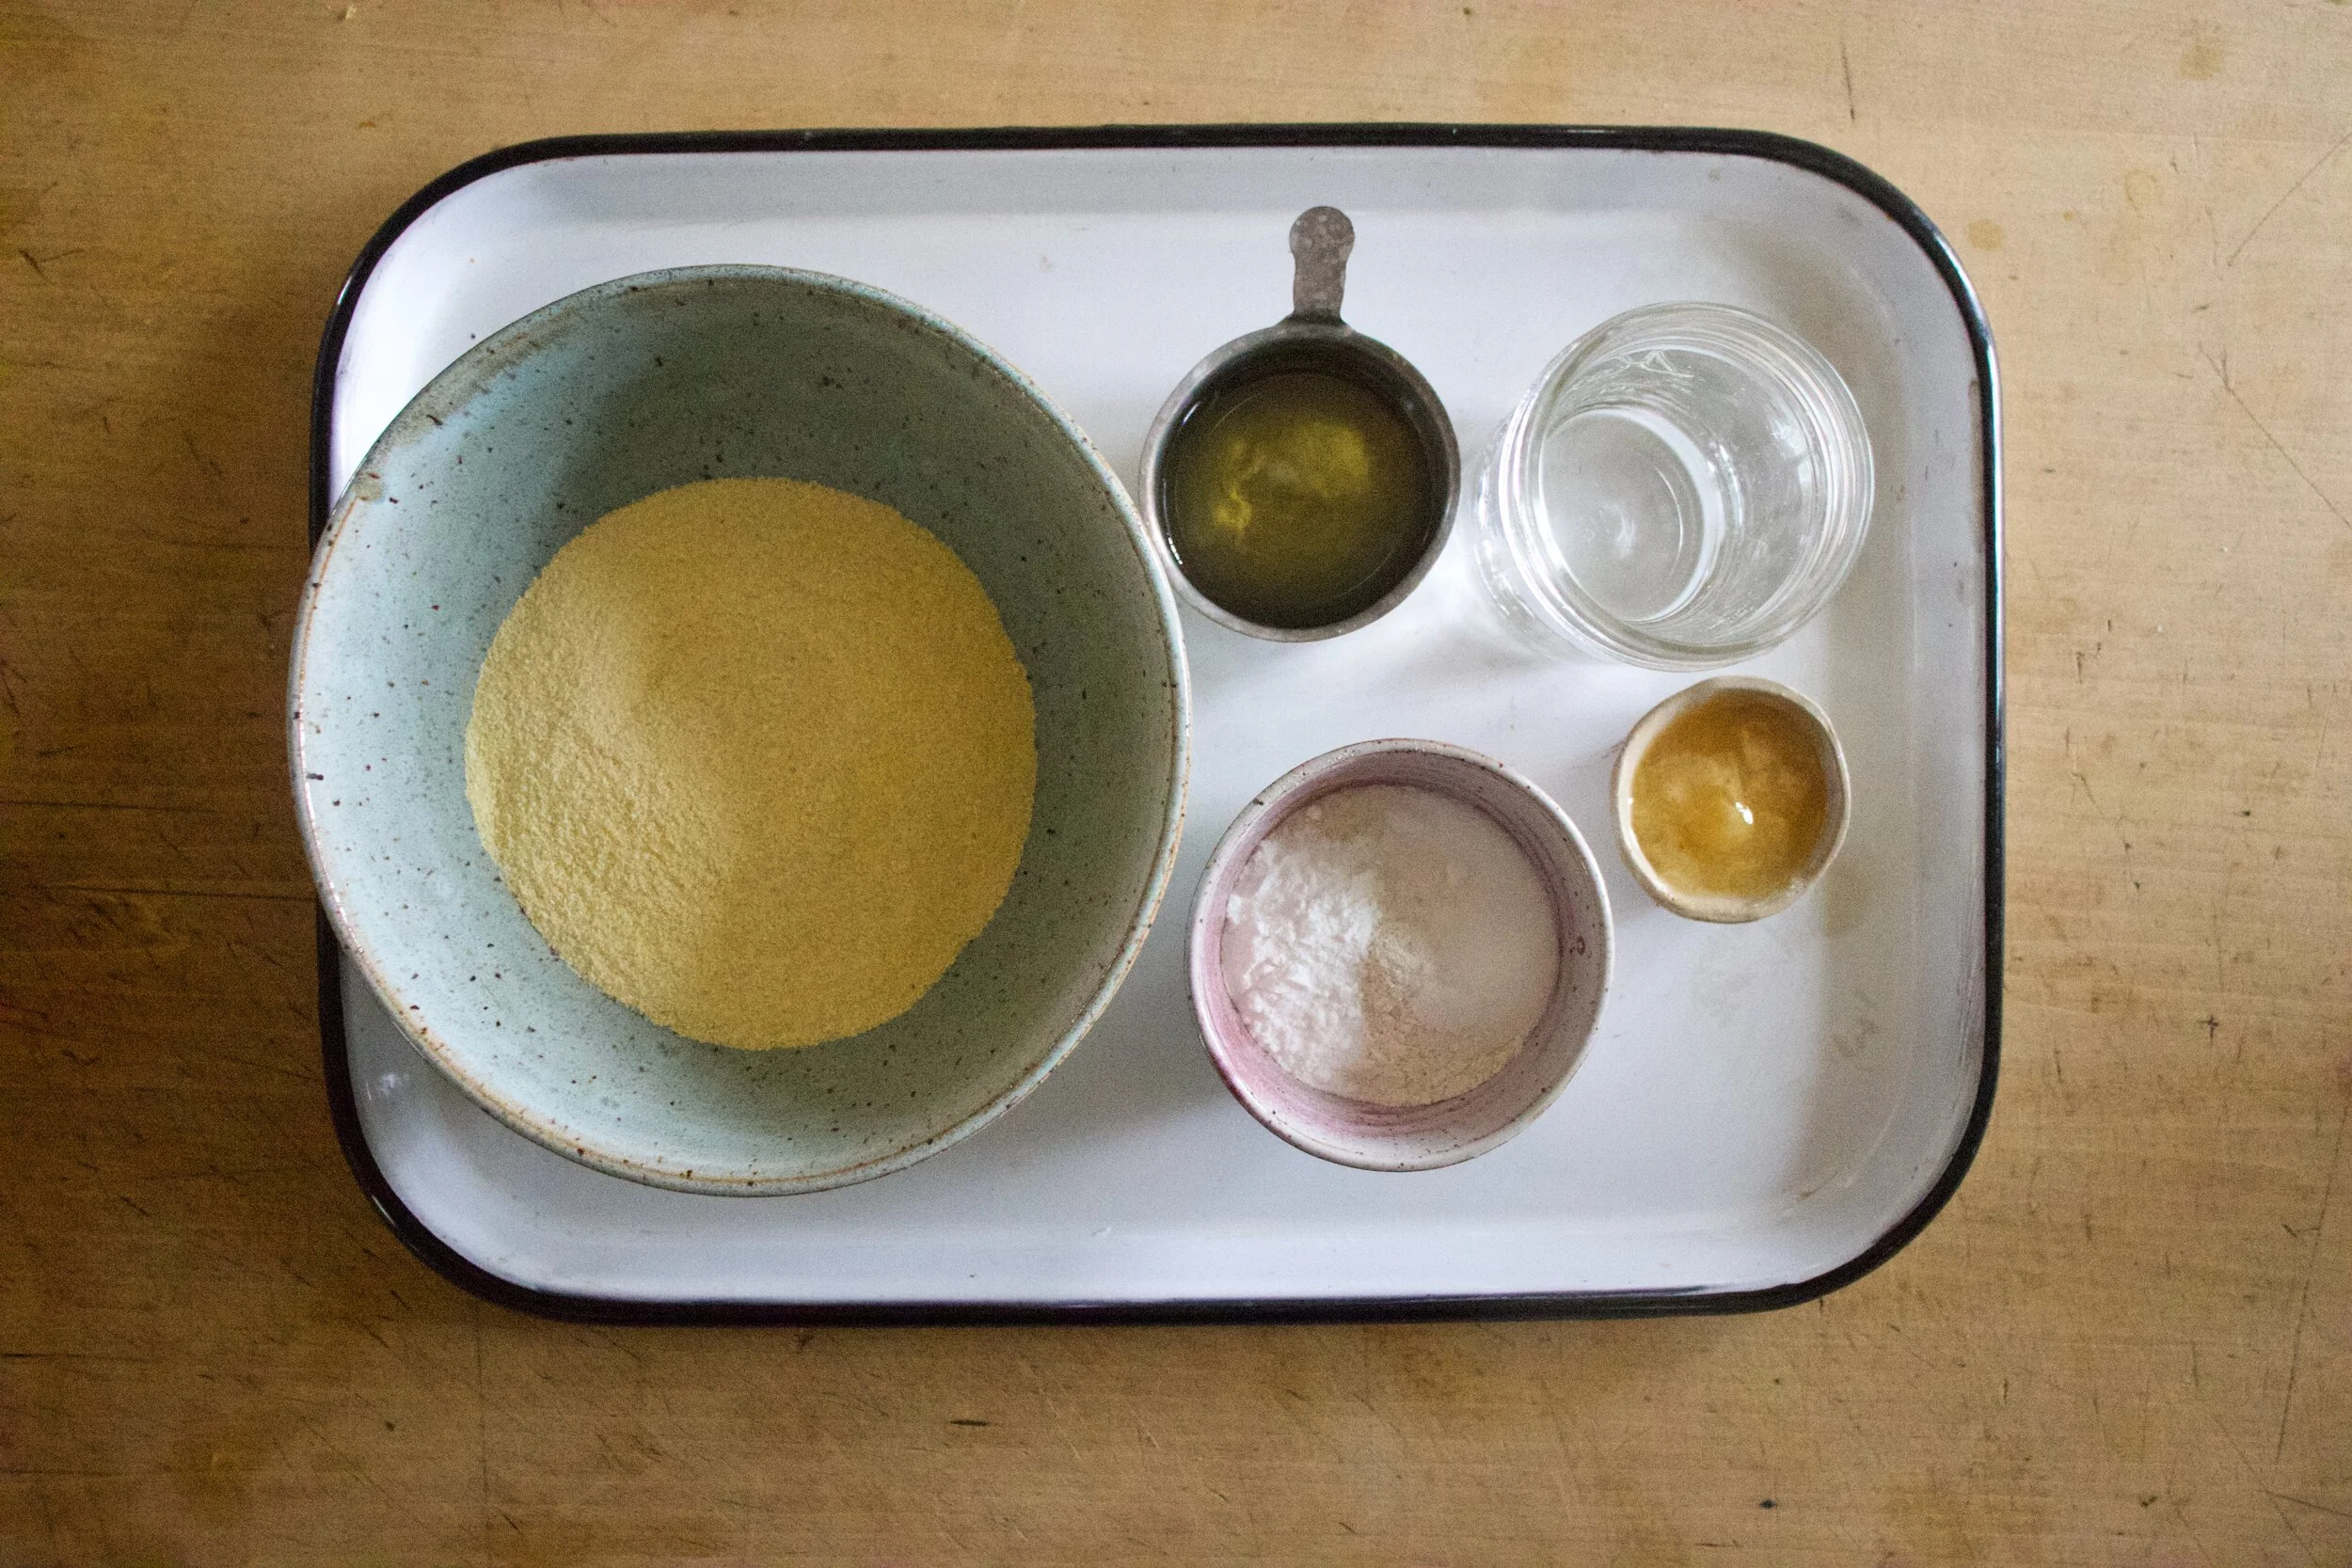
The stuff. Carrots, a small onion, dried dill and garlic powder, chickpea flour, water, salt and pepper, maple syrup, brown mustard, vegan yogurt, and a little oil.

IMG_4476.jpg

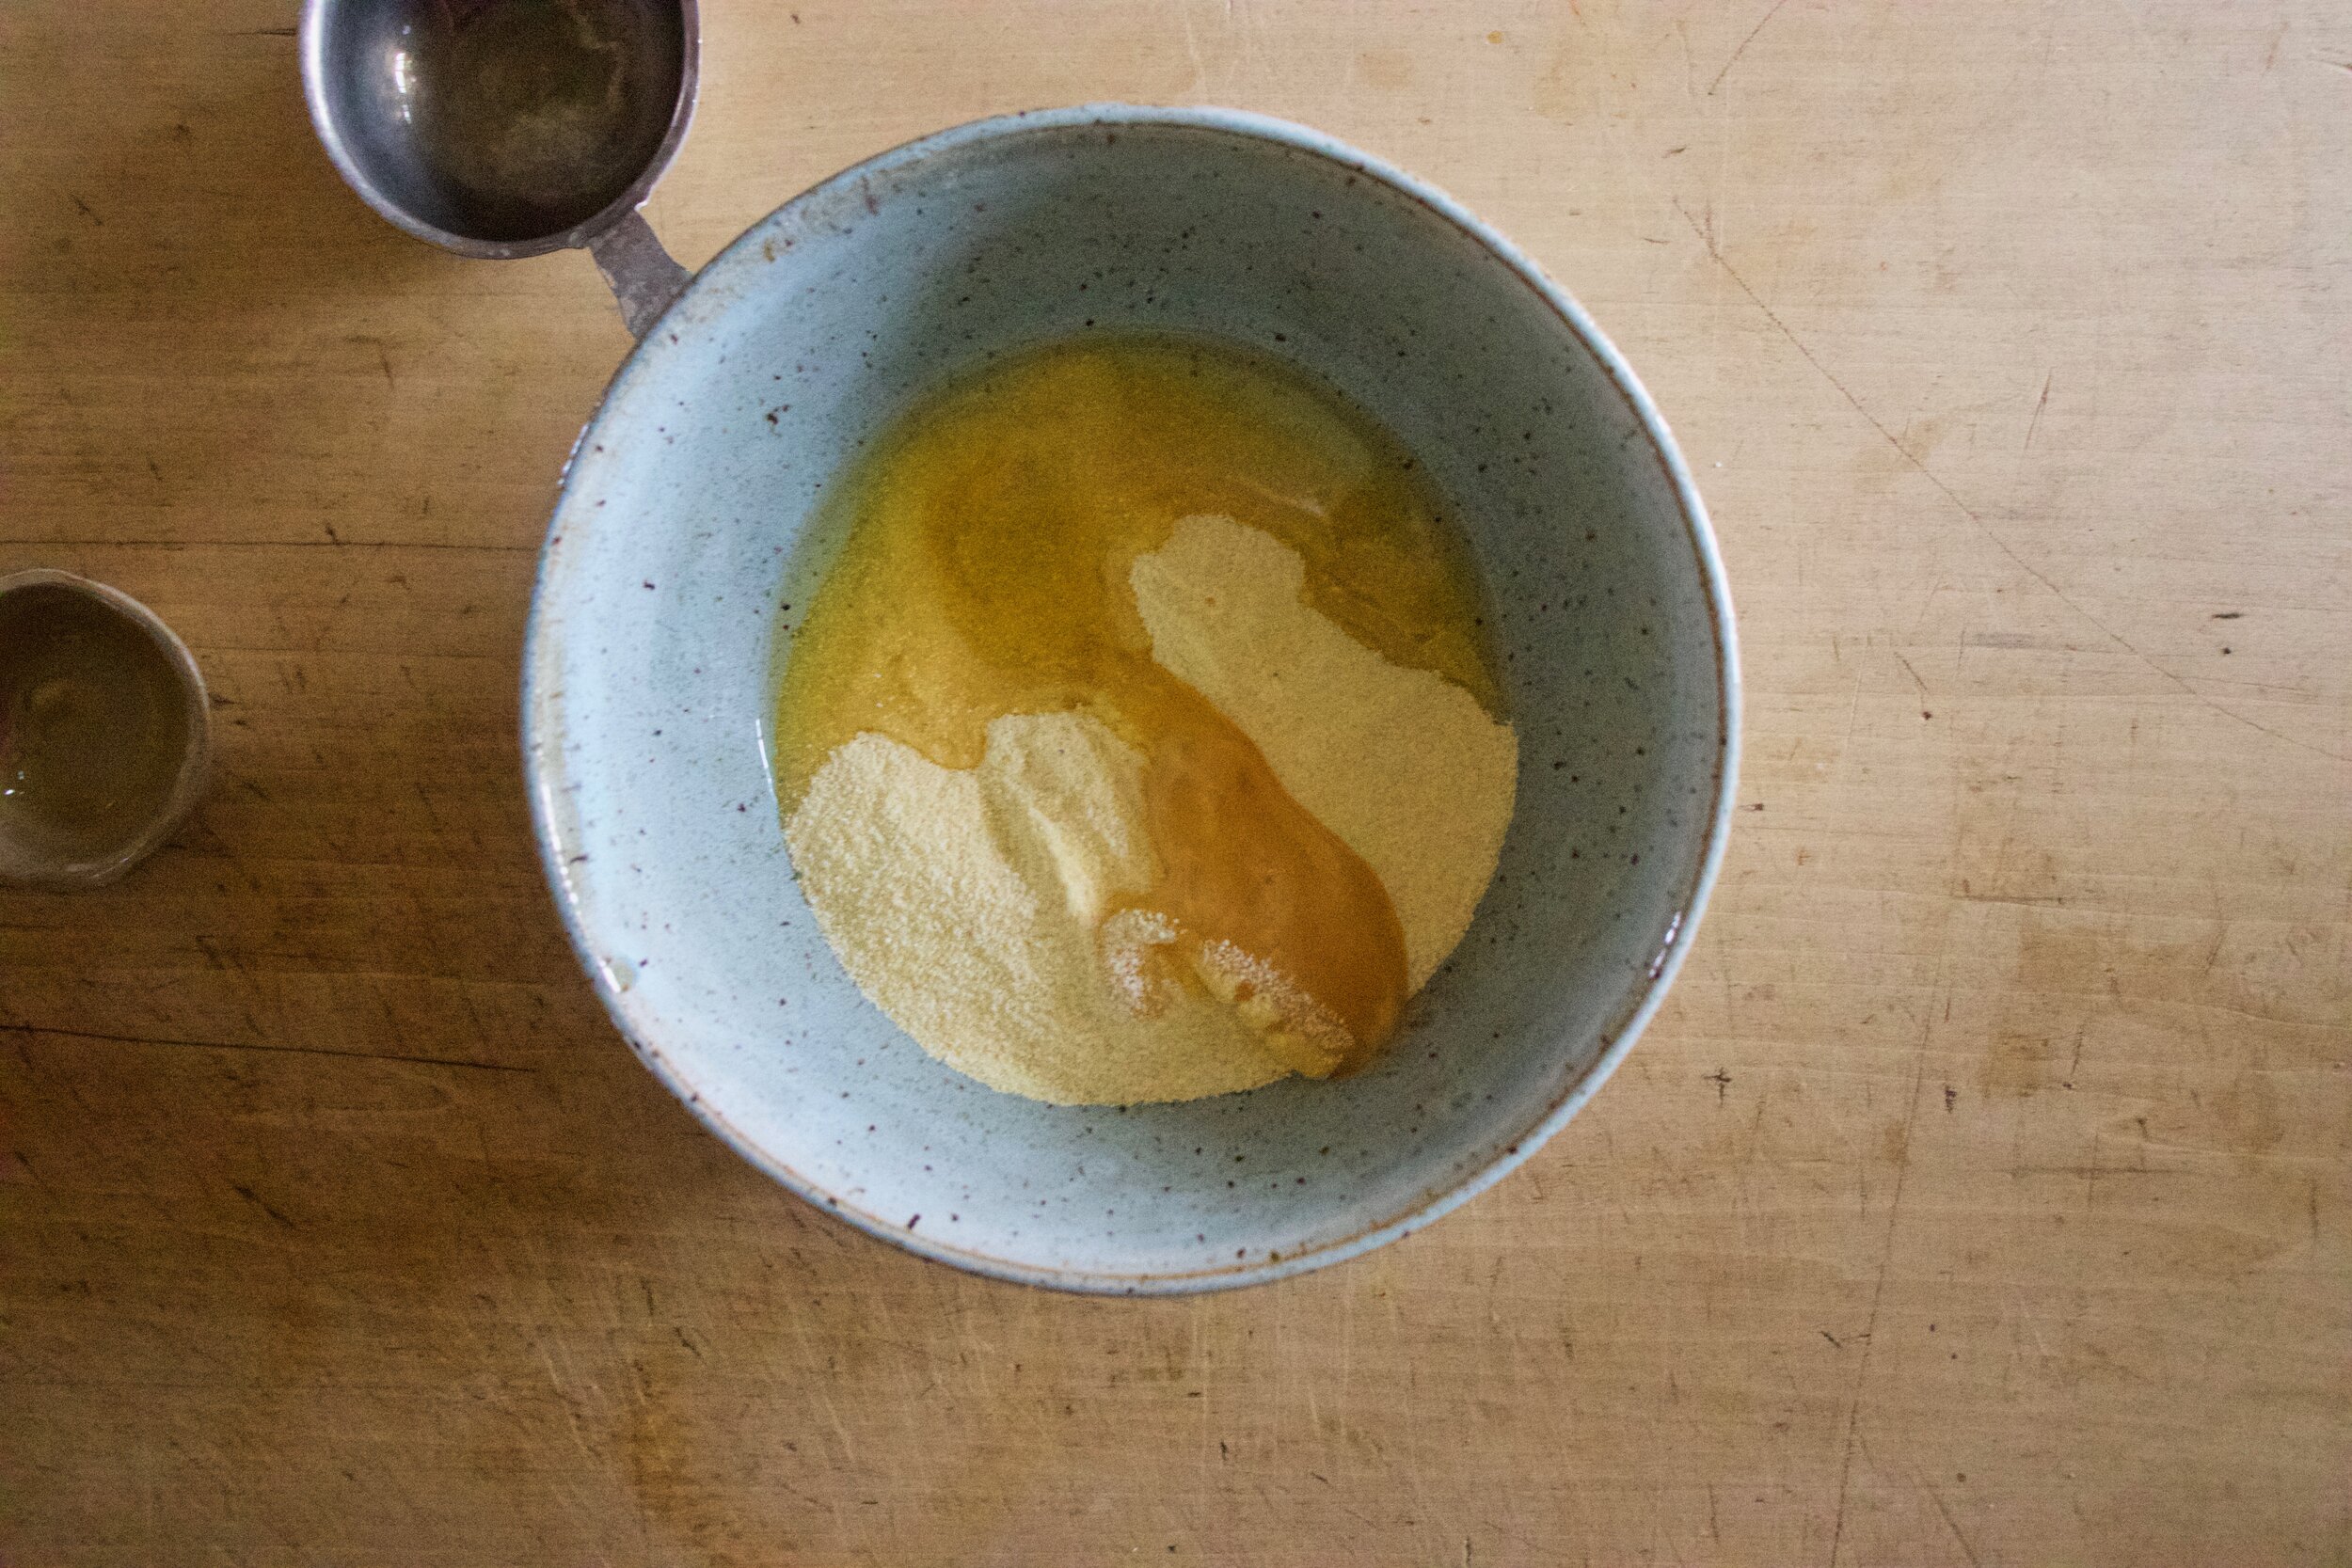
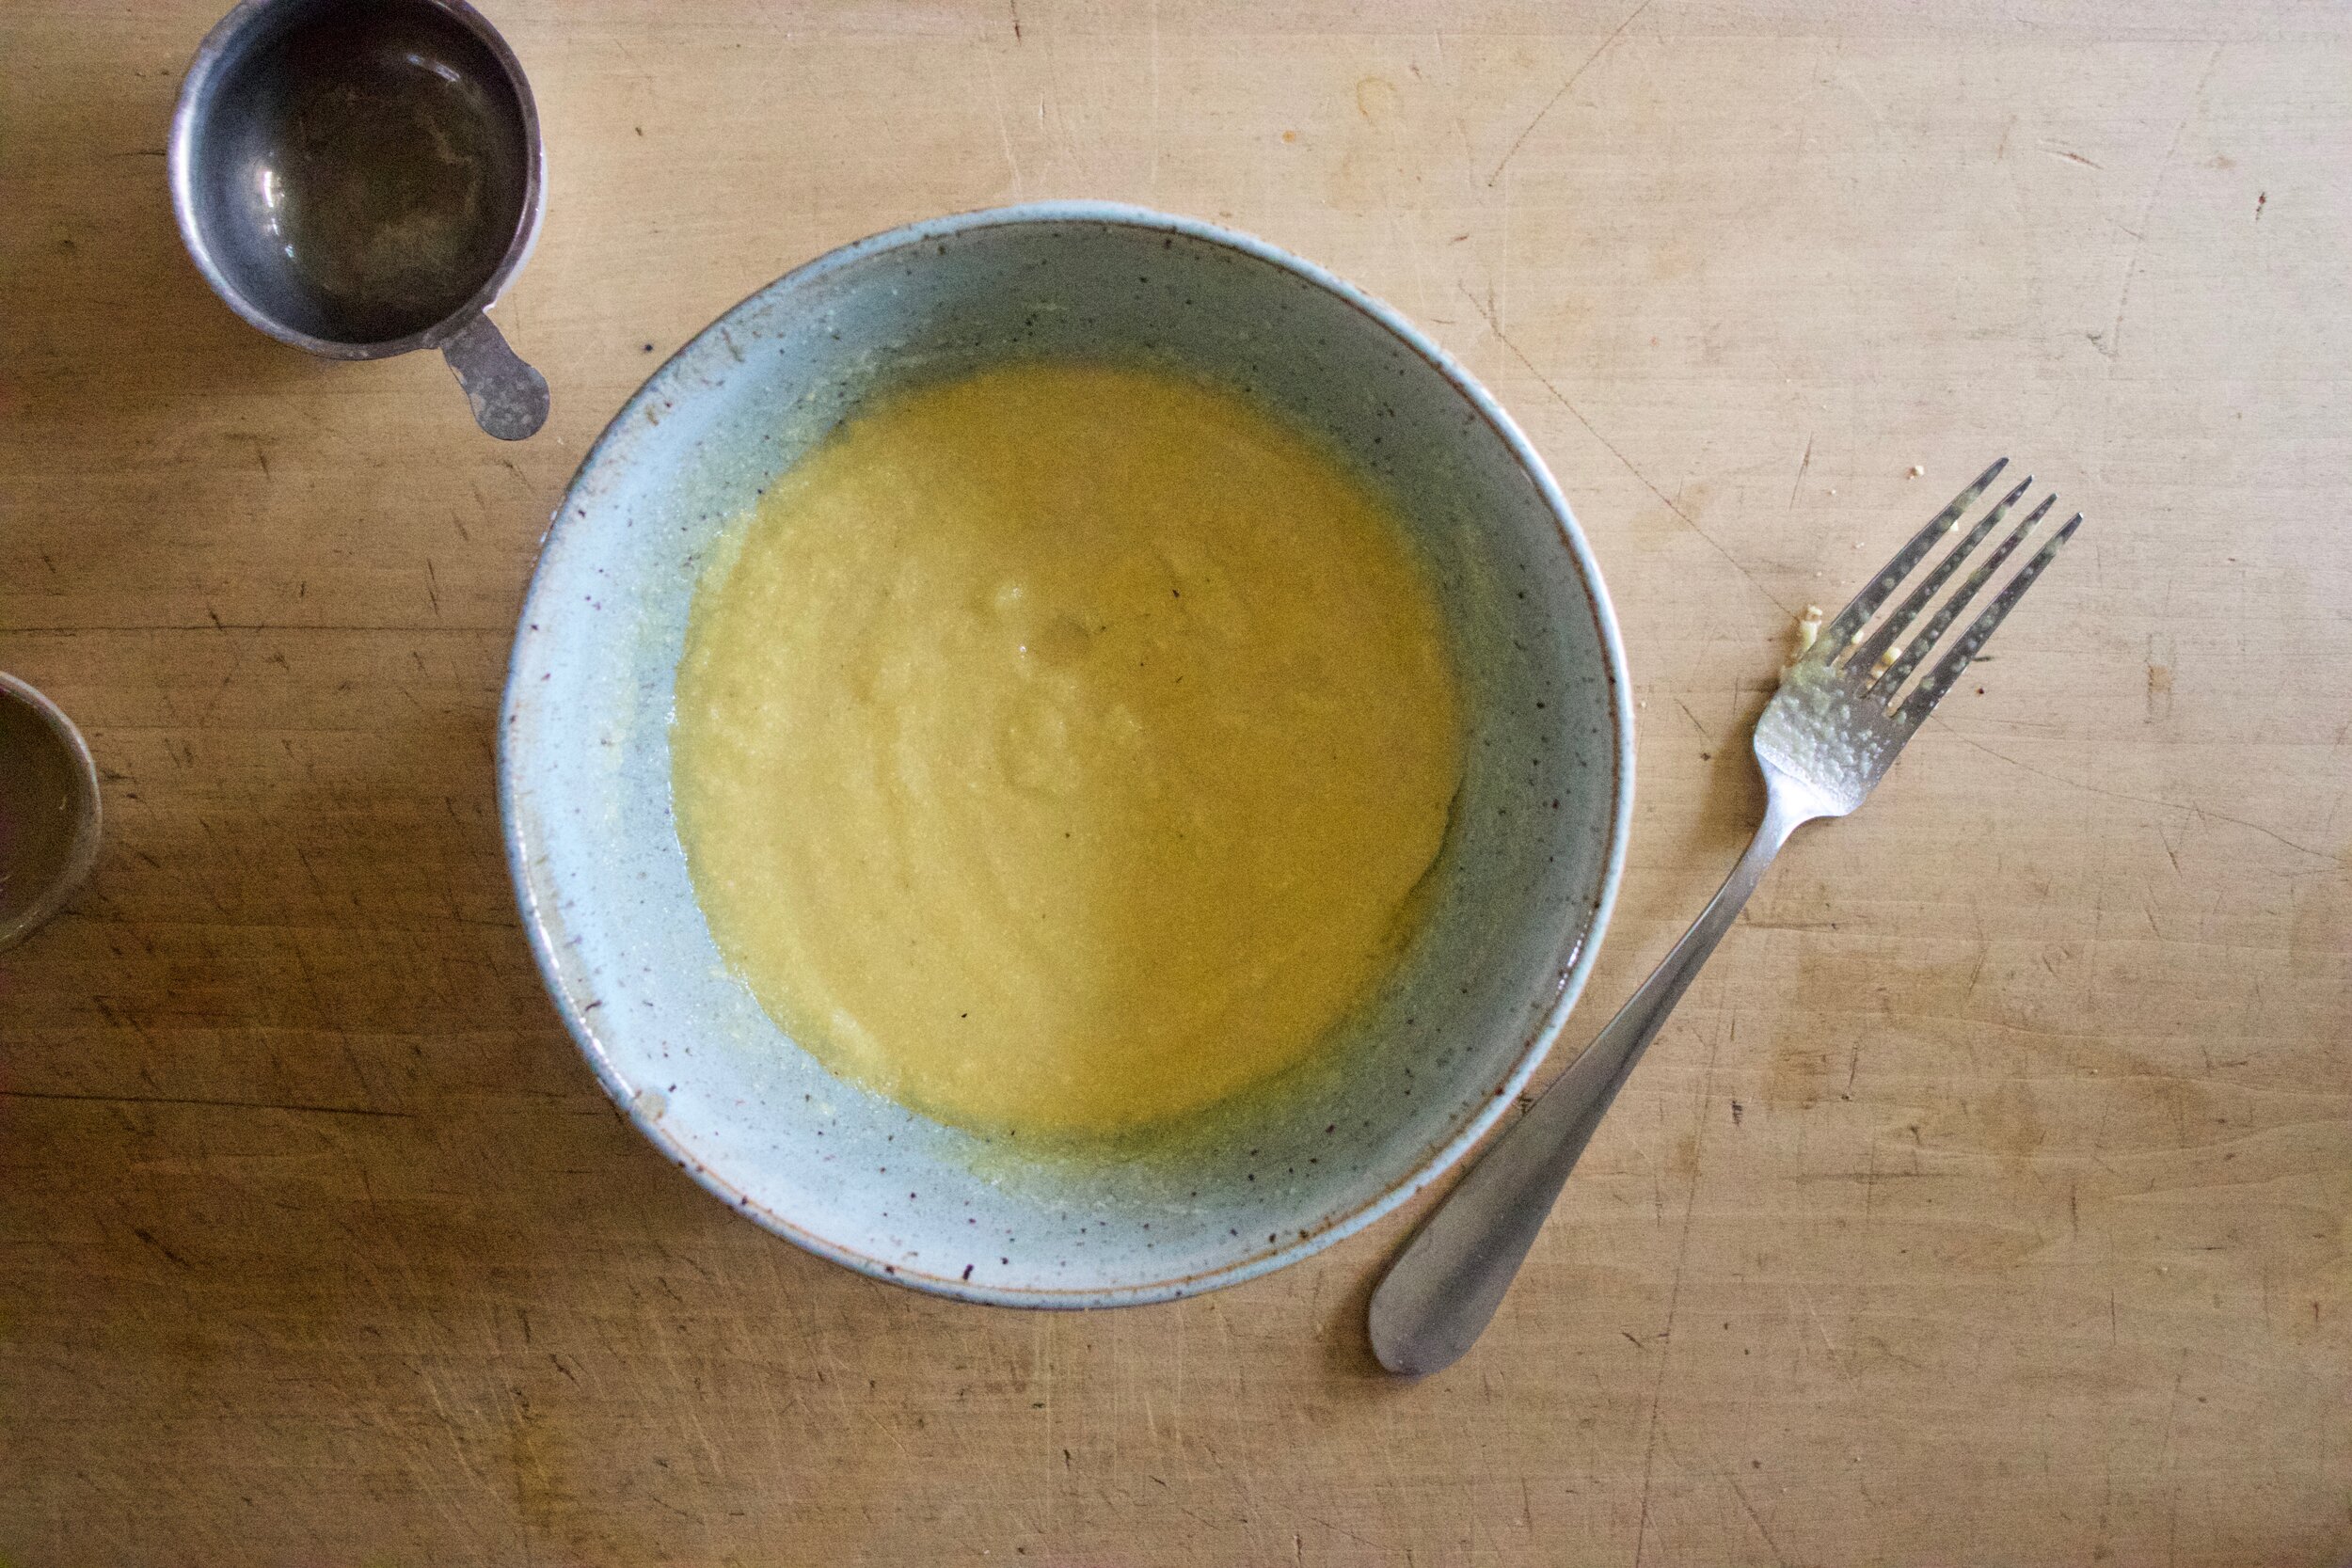
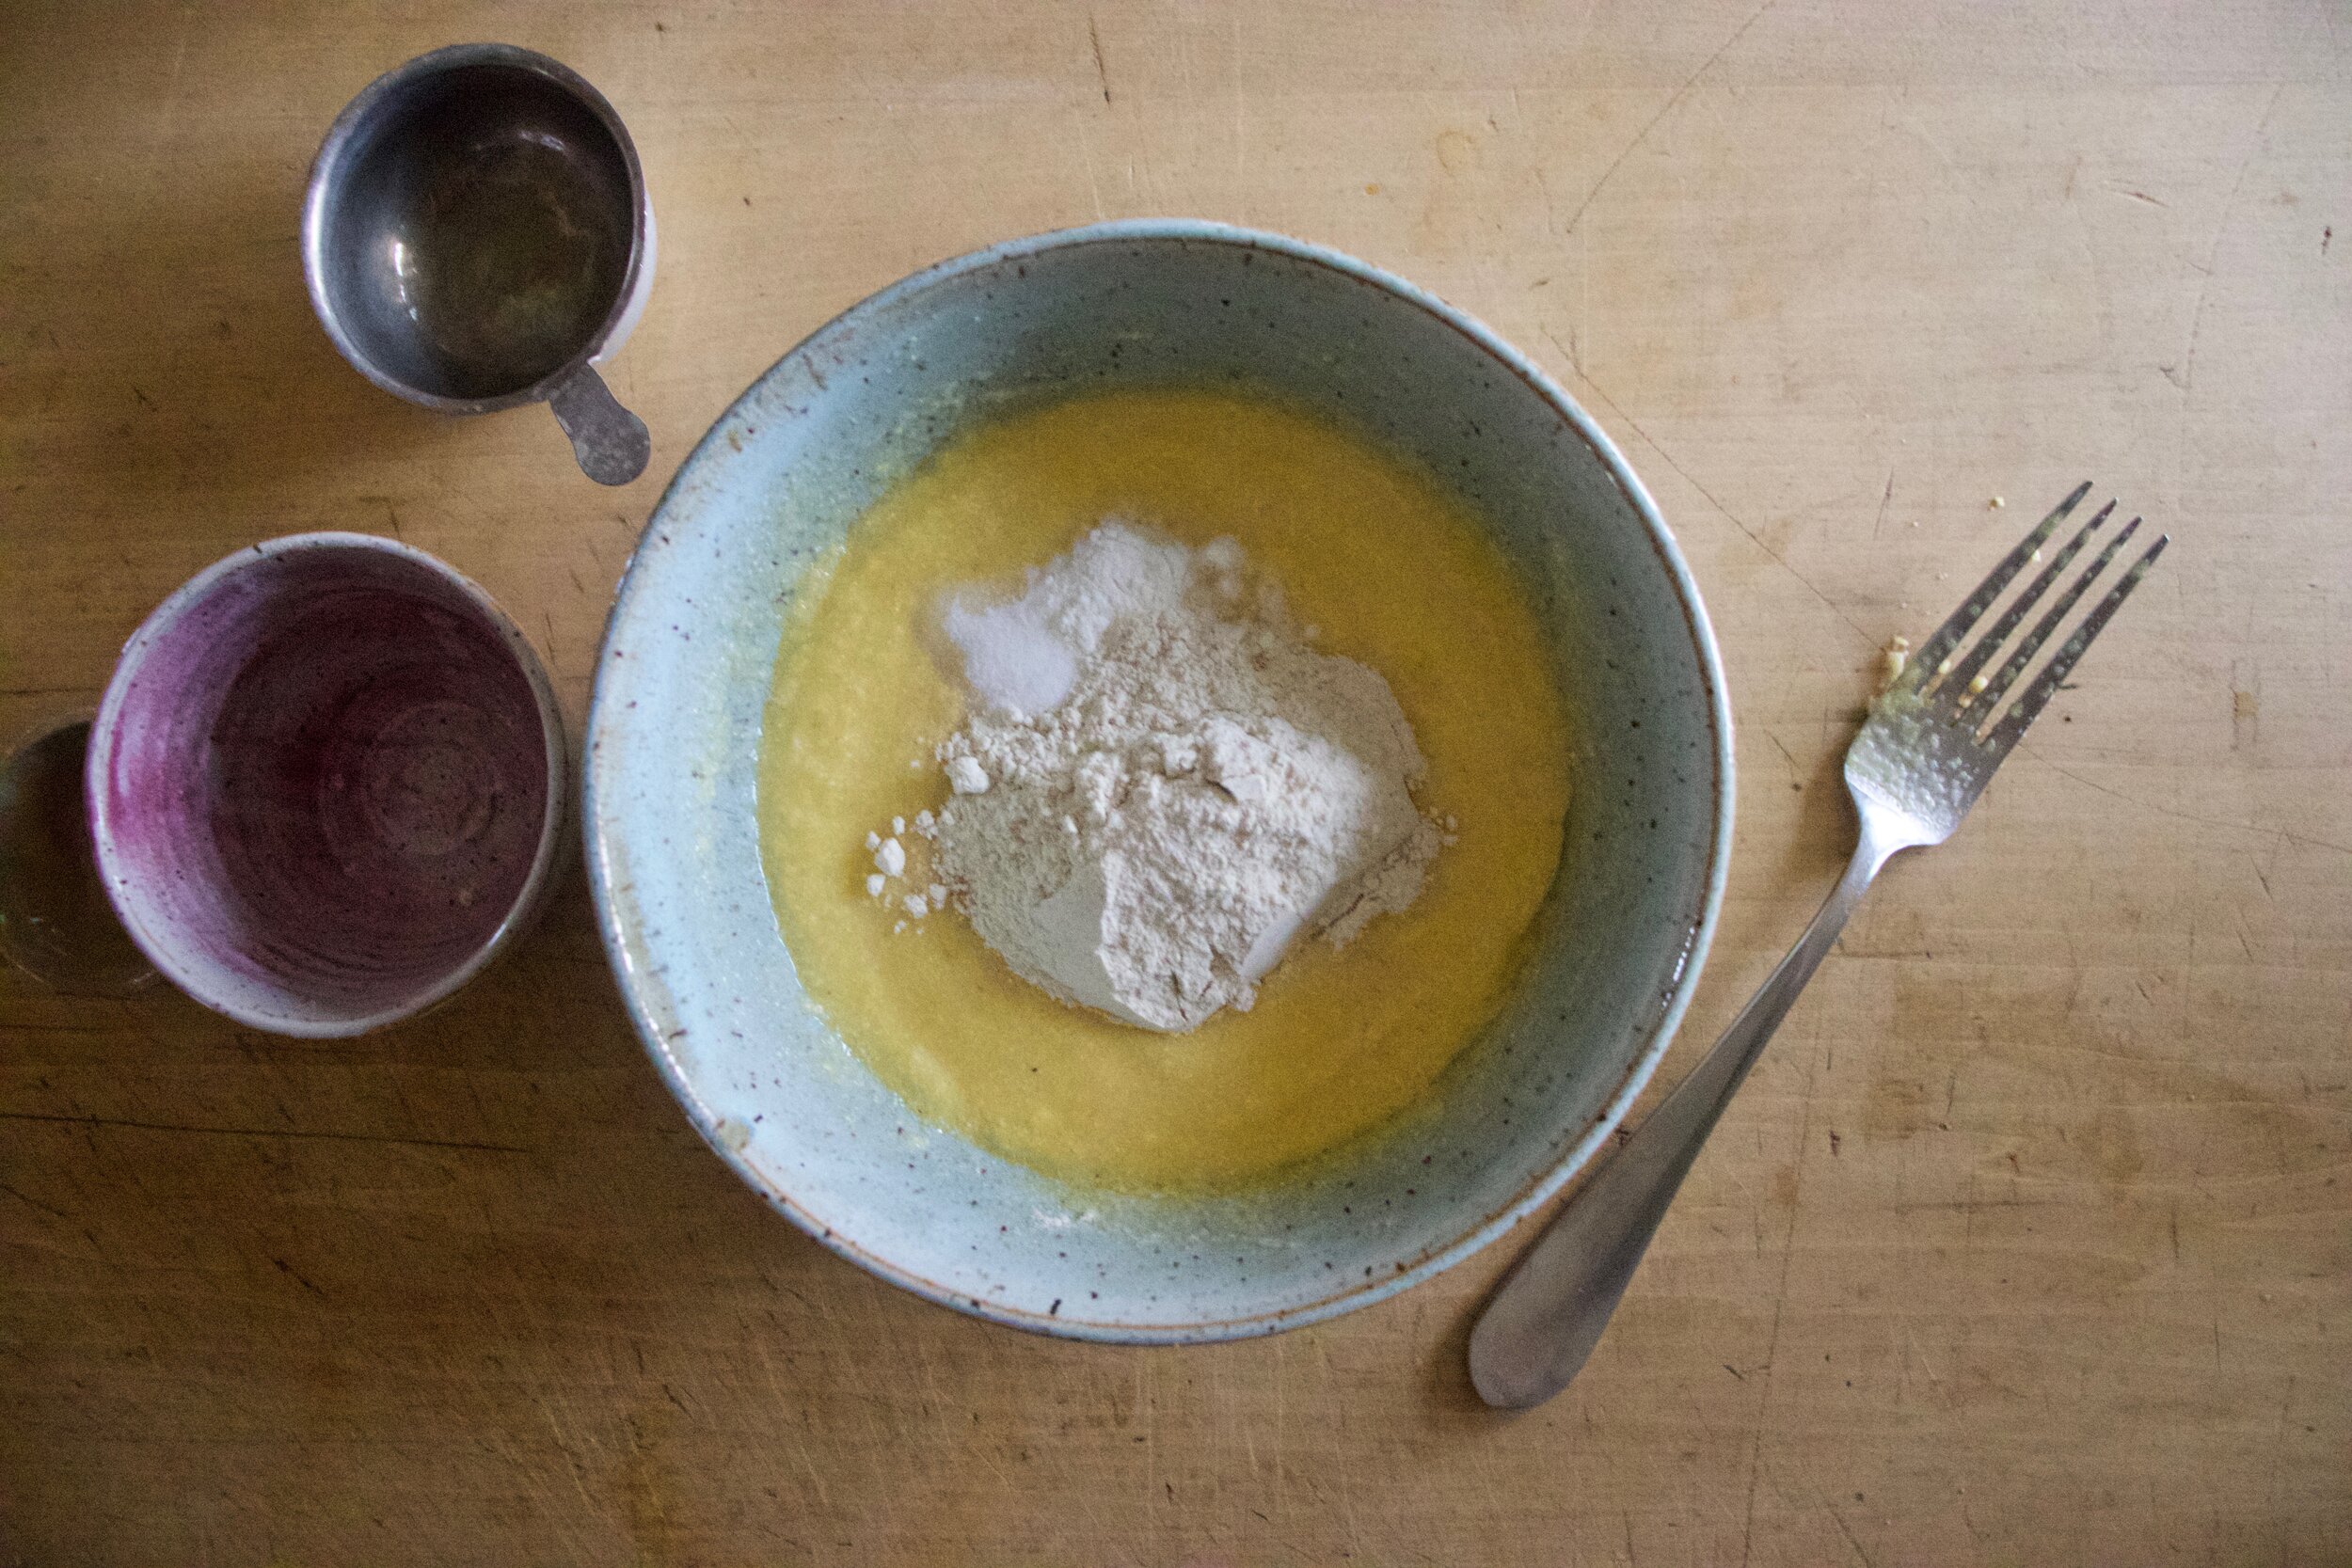
Maple, mustard, and vegan yogurt get mixed together and that is that. Set aside.

IMG_4490.jpg
IMG_4492.jpg

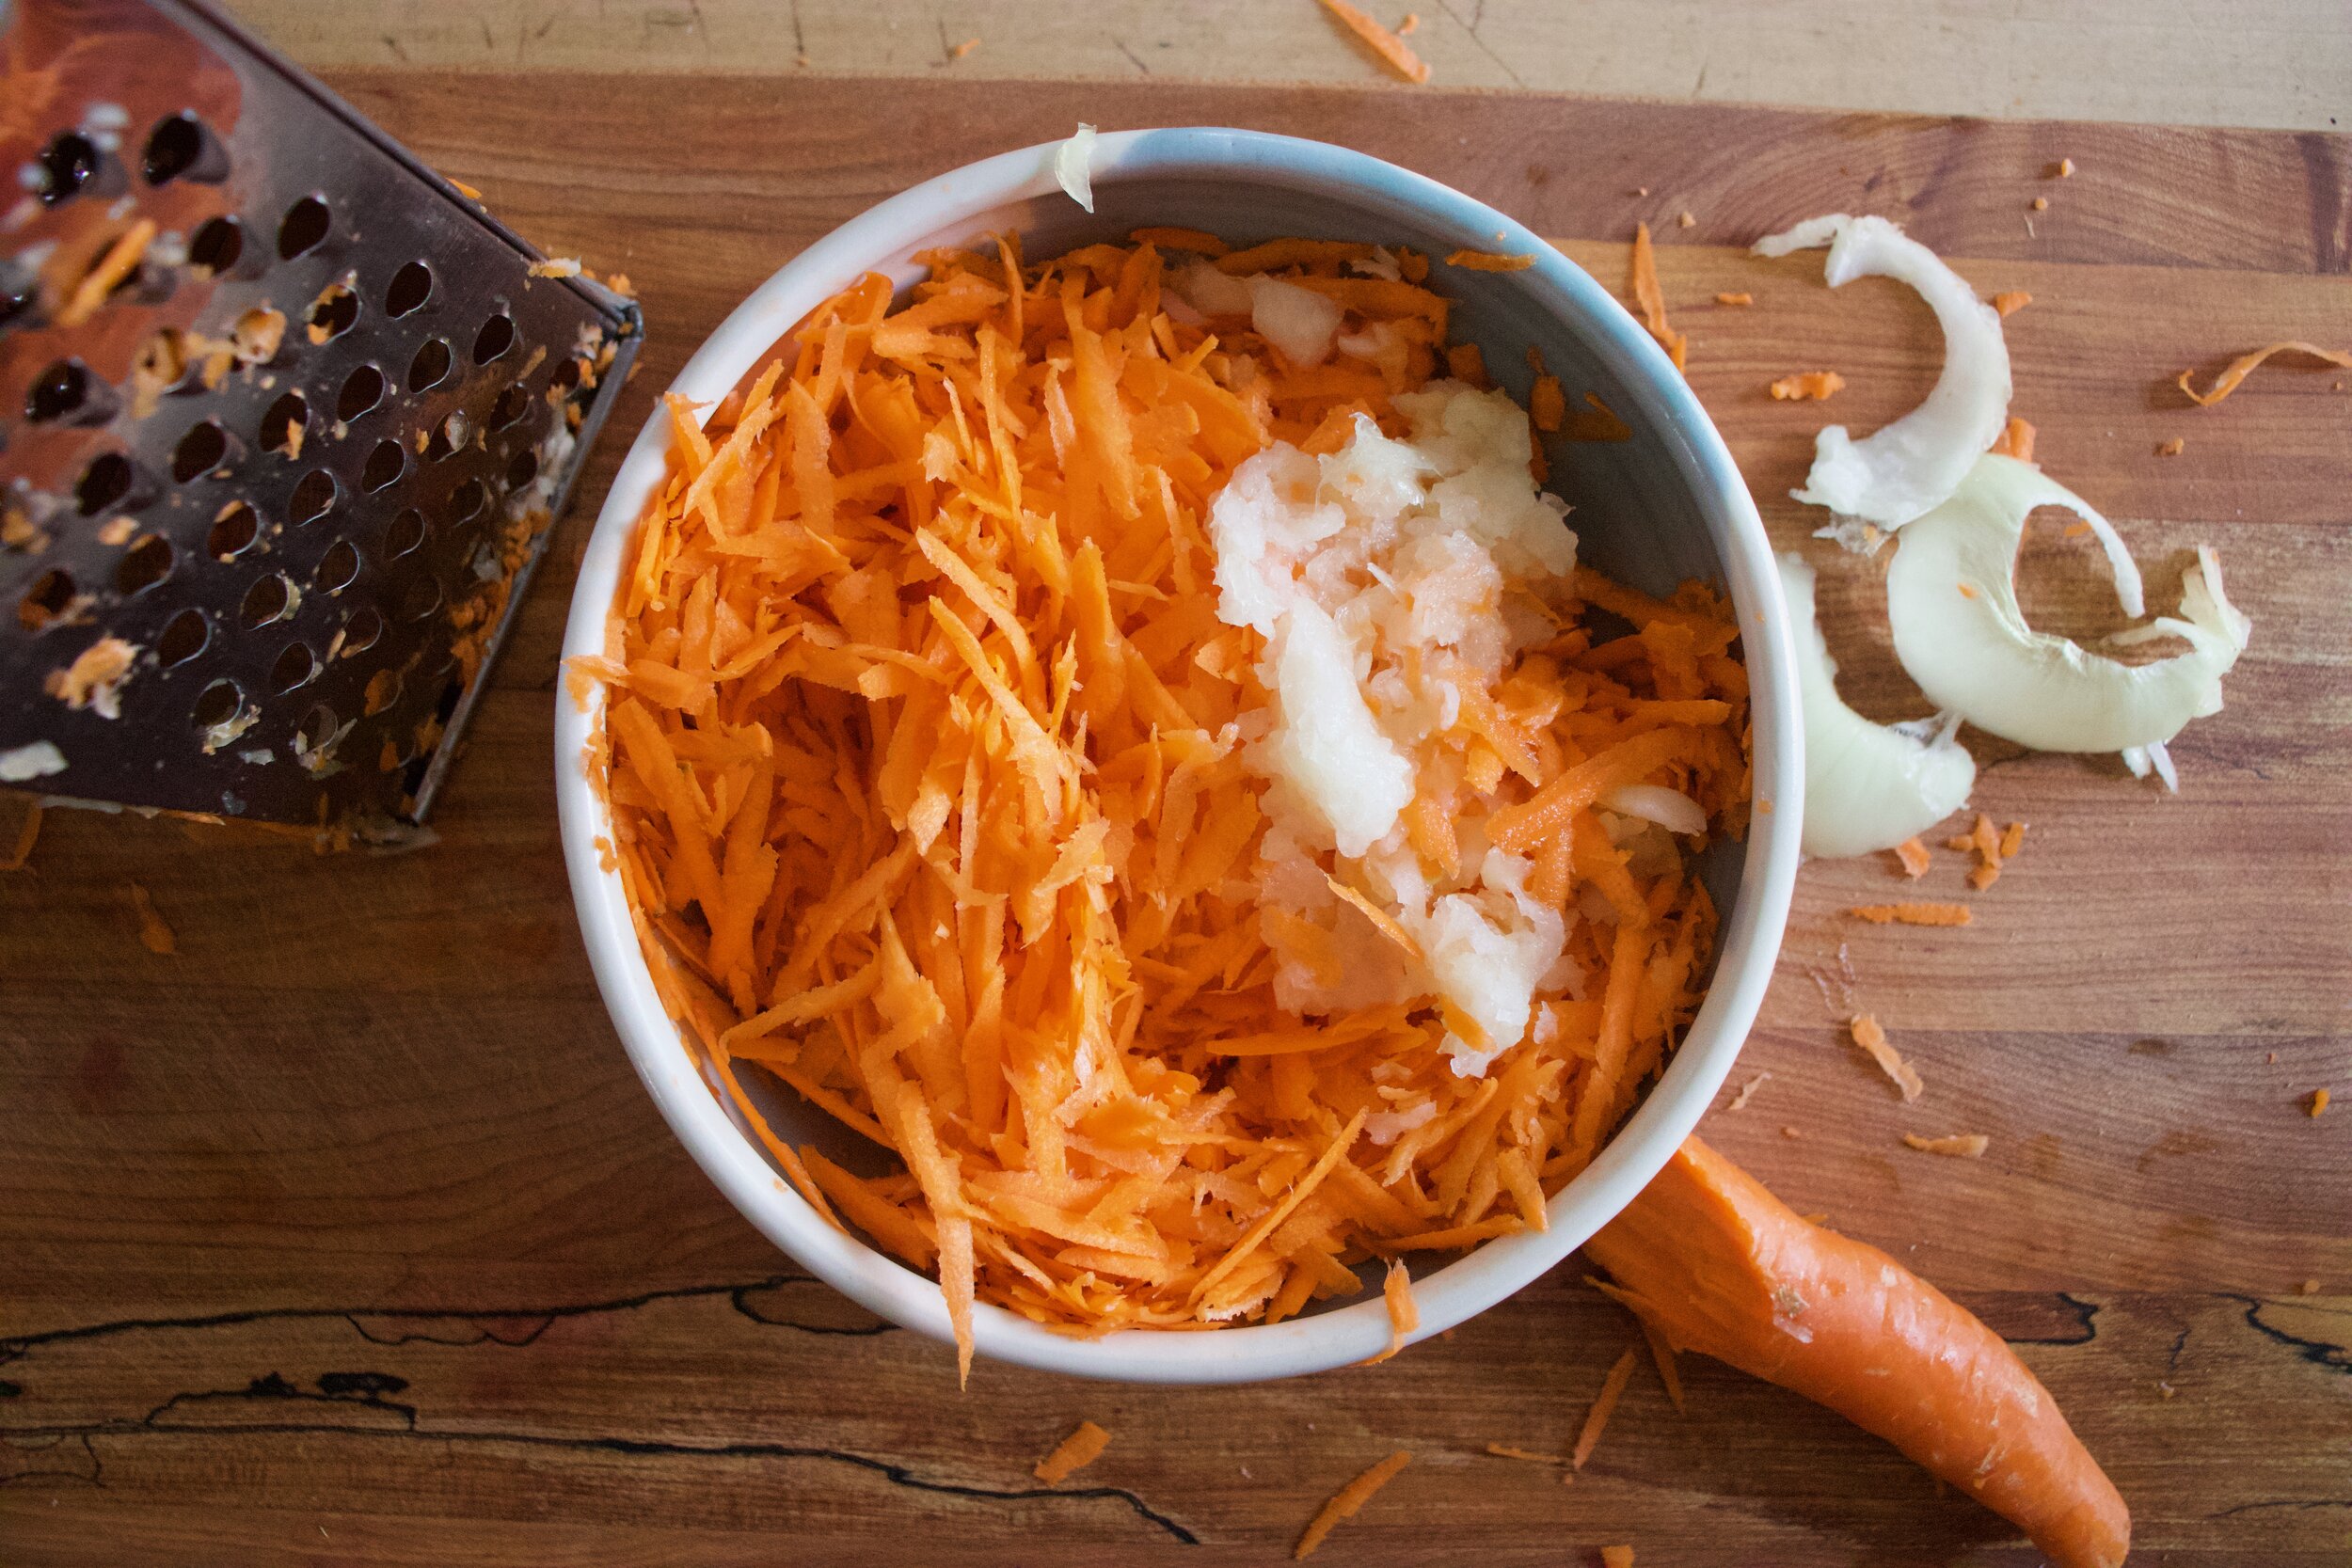
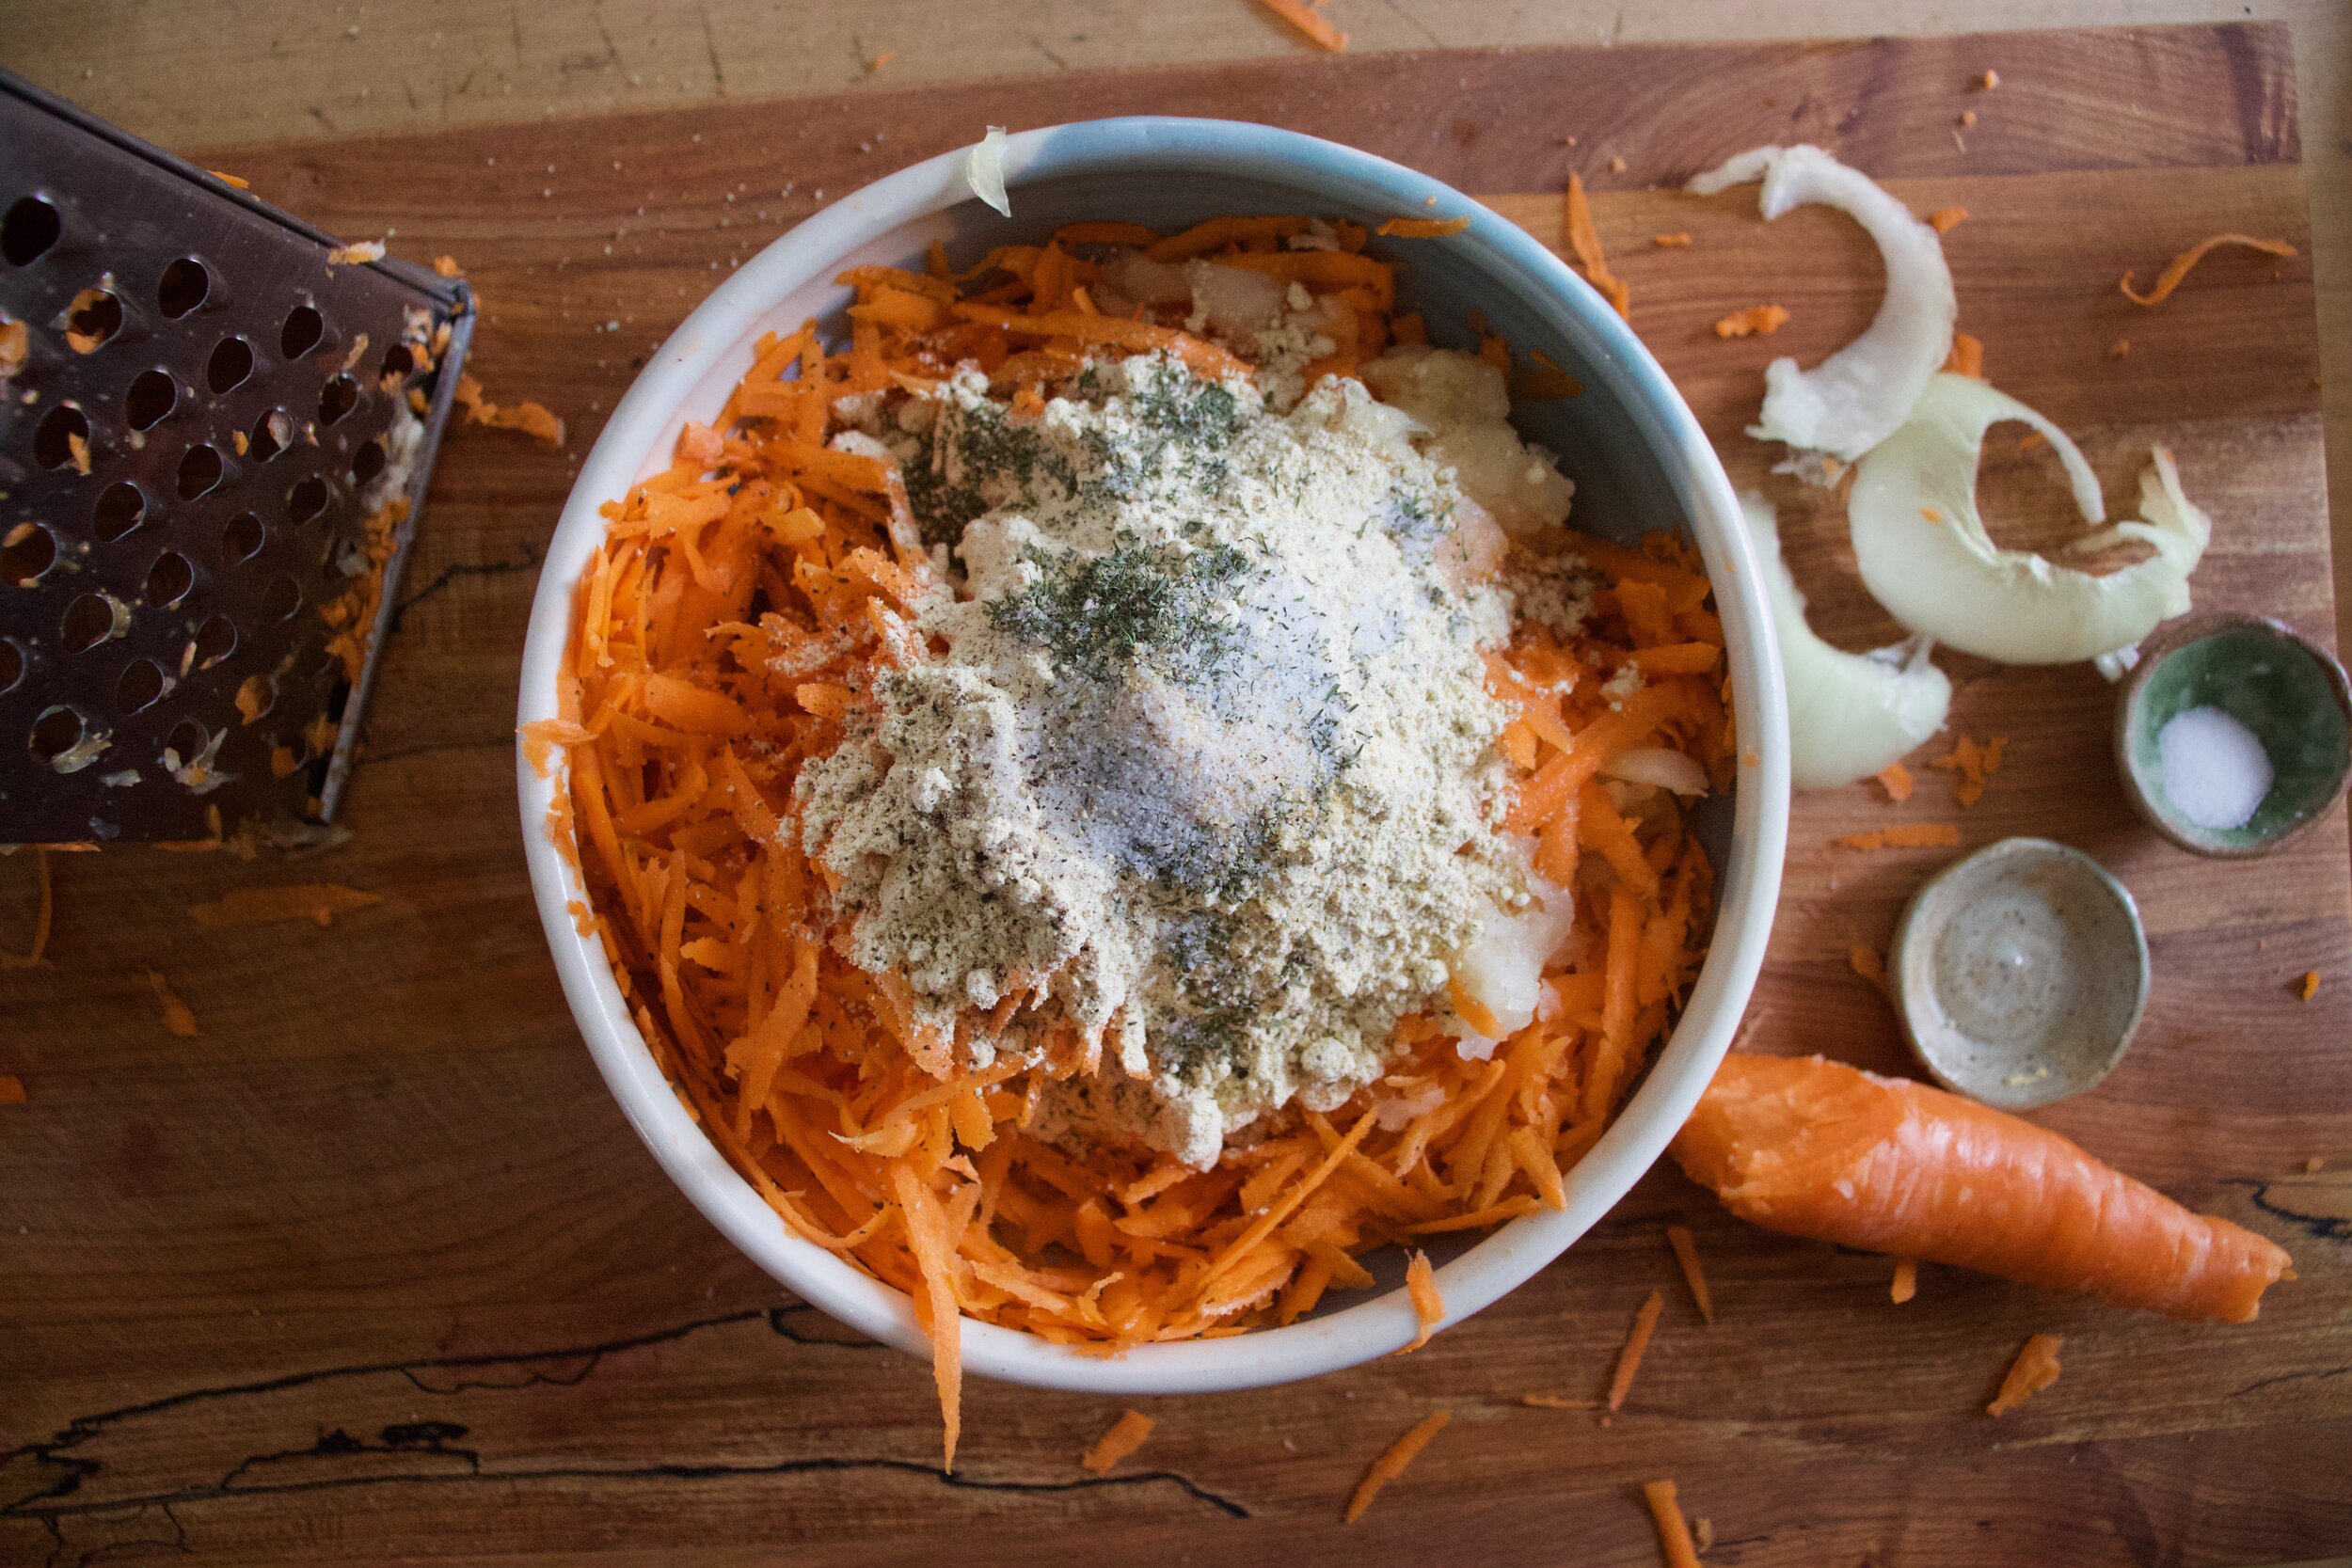
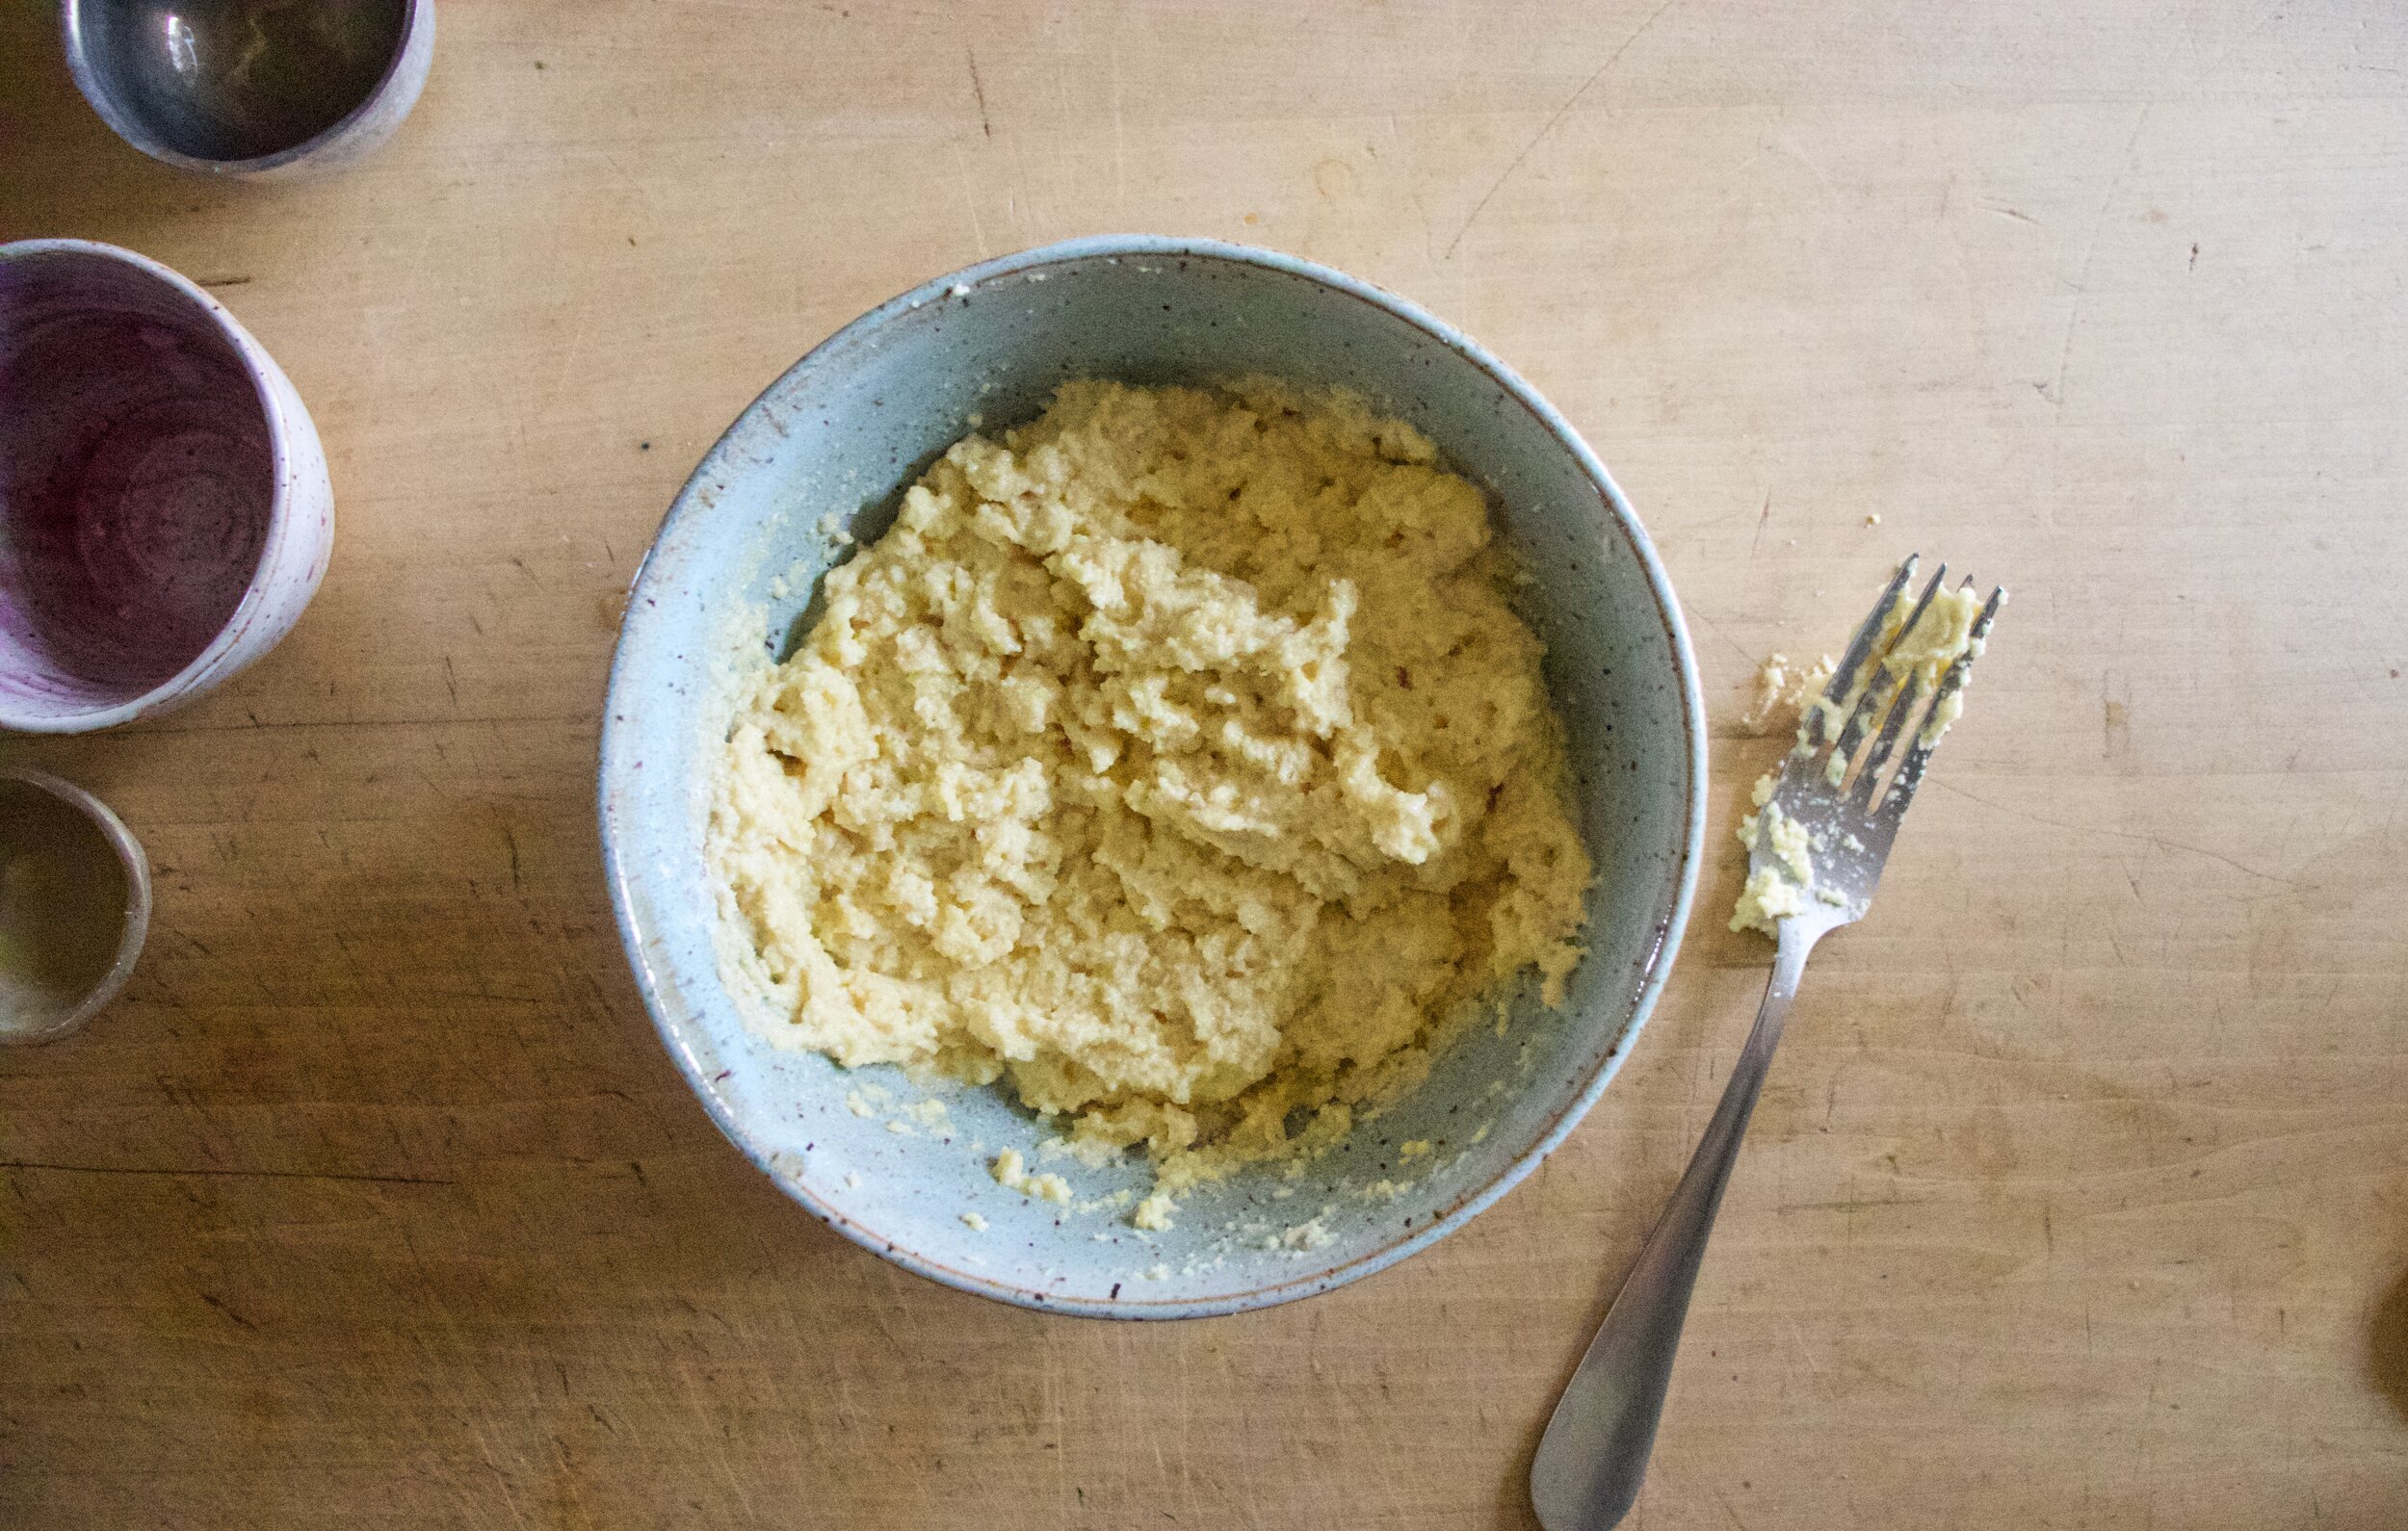
Shred carrots and onion into a bowl. Add in the chickpea flower, spices, a pinch of salt and pepper, and a bit of water and mix until evenly incorporated.

IMG_4496.jpg

Ready to go

IMG_4510.jpg

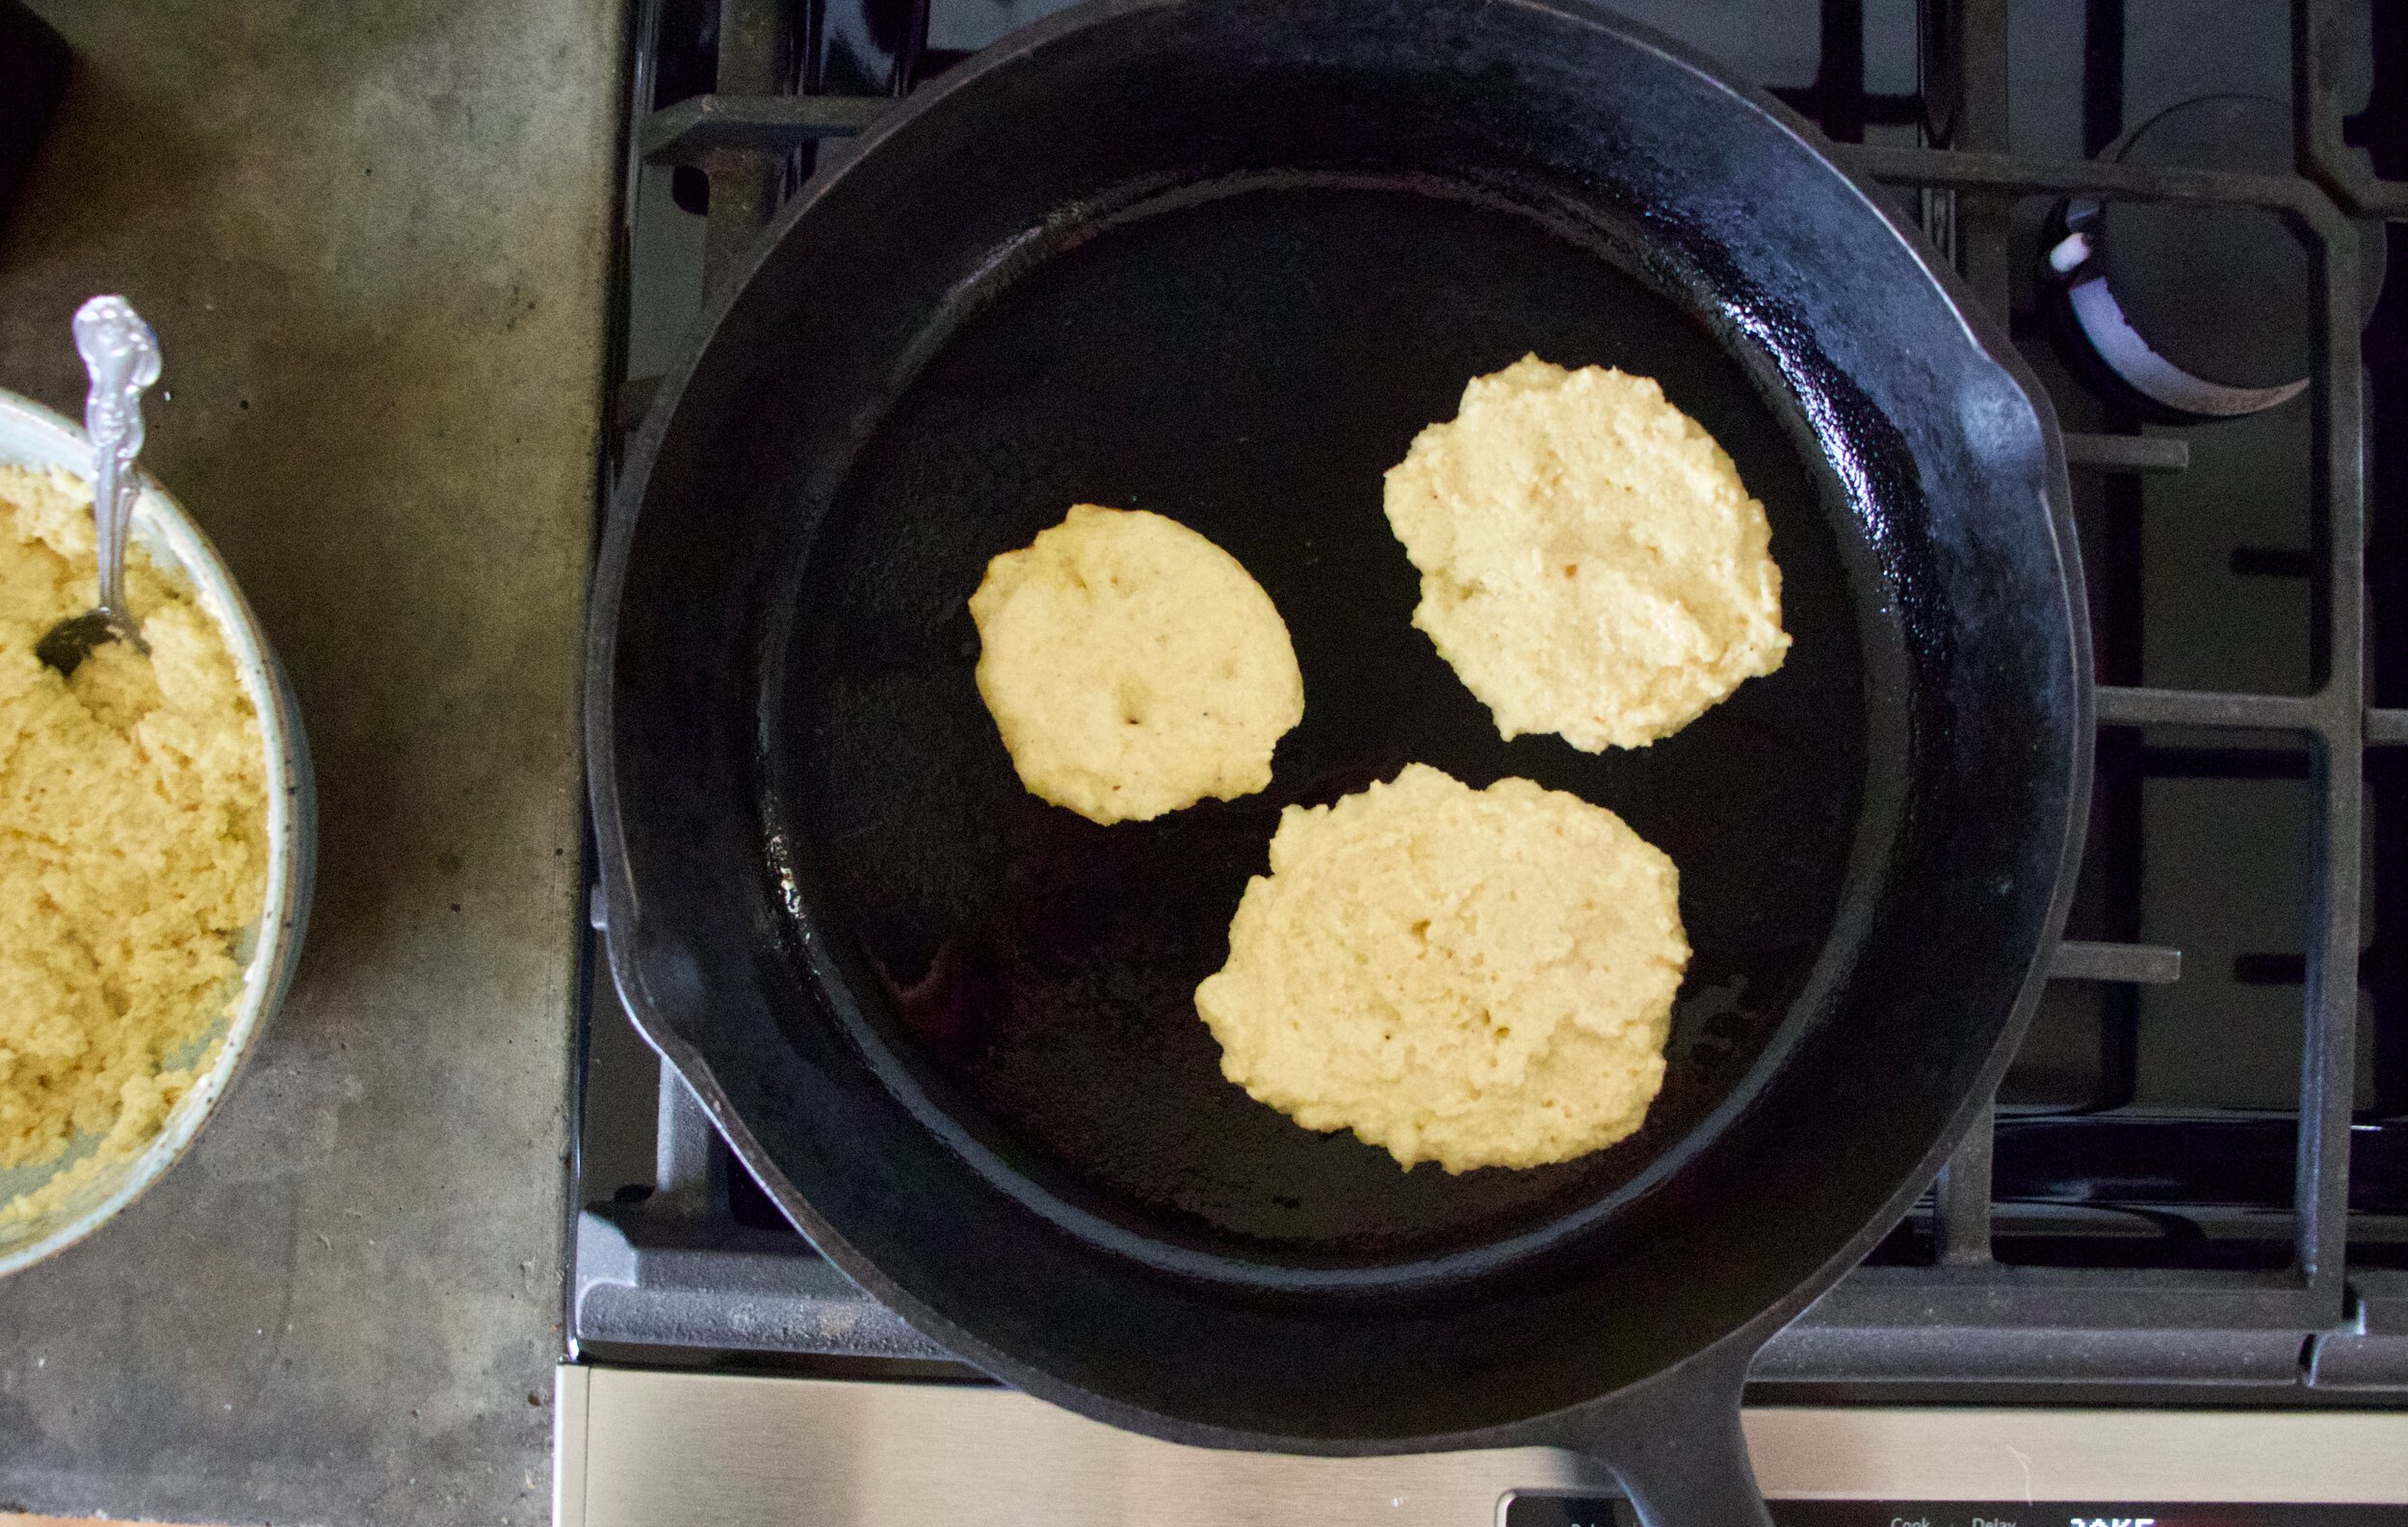
Lighy oil hot waffle iron and scoop a portion of the batter in. CLose iron and cook until the top and bottom are browned and crispy. (Use your iron settings but also check to see how the iron is cooking)

IMG_4514.jpg

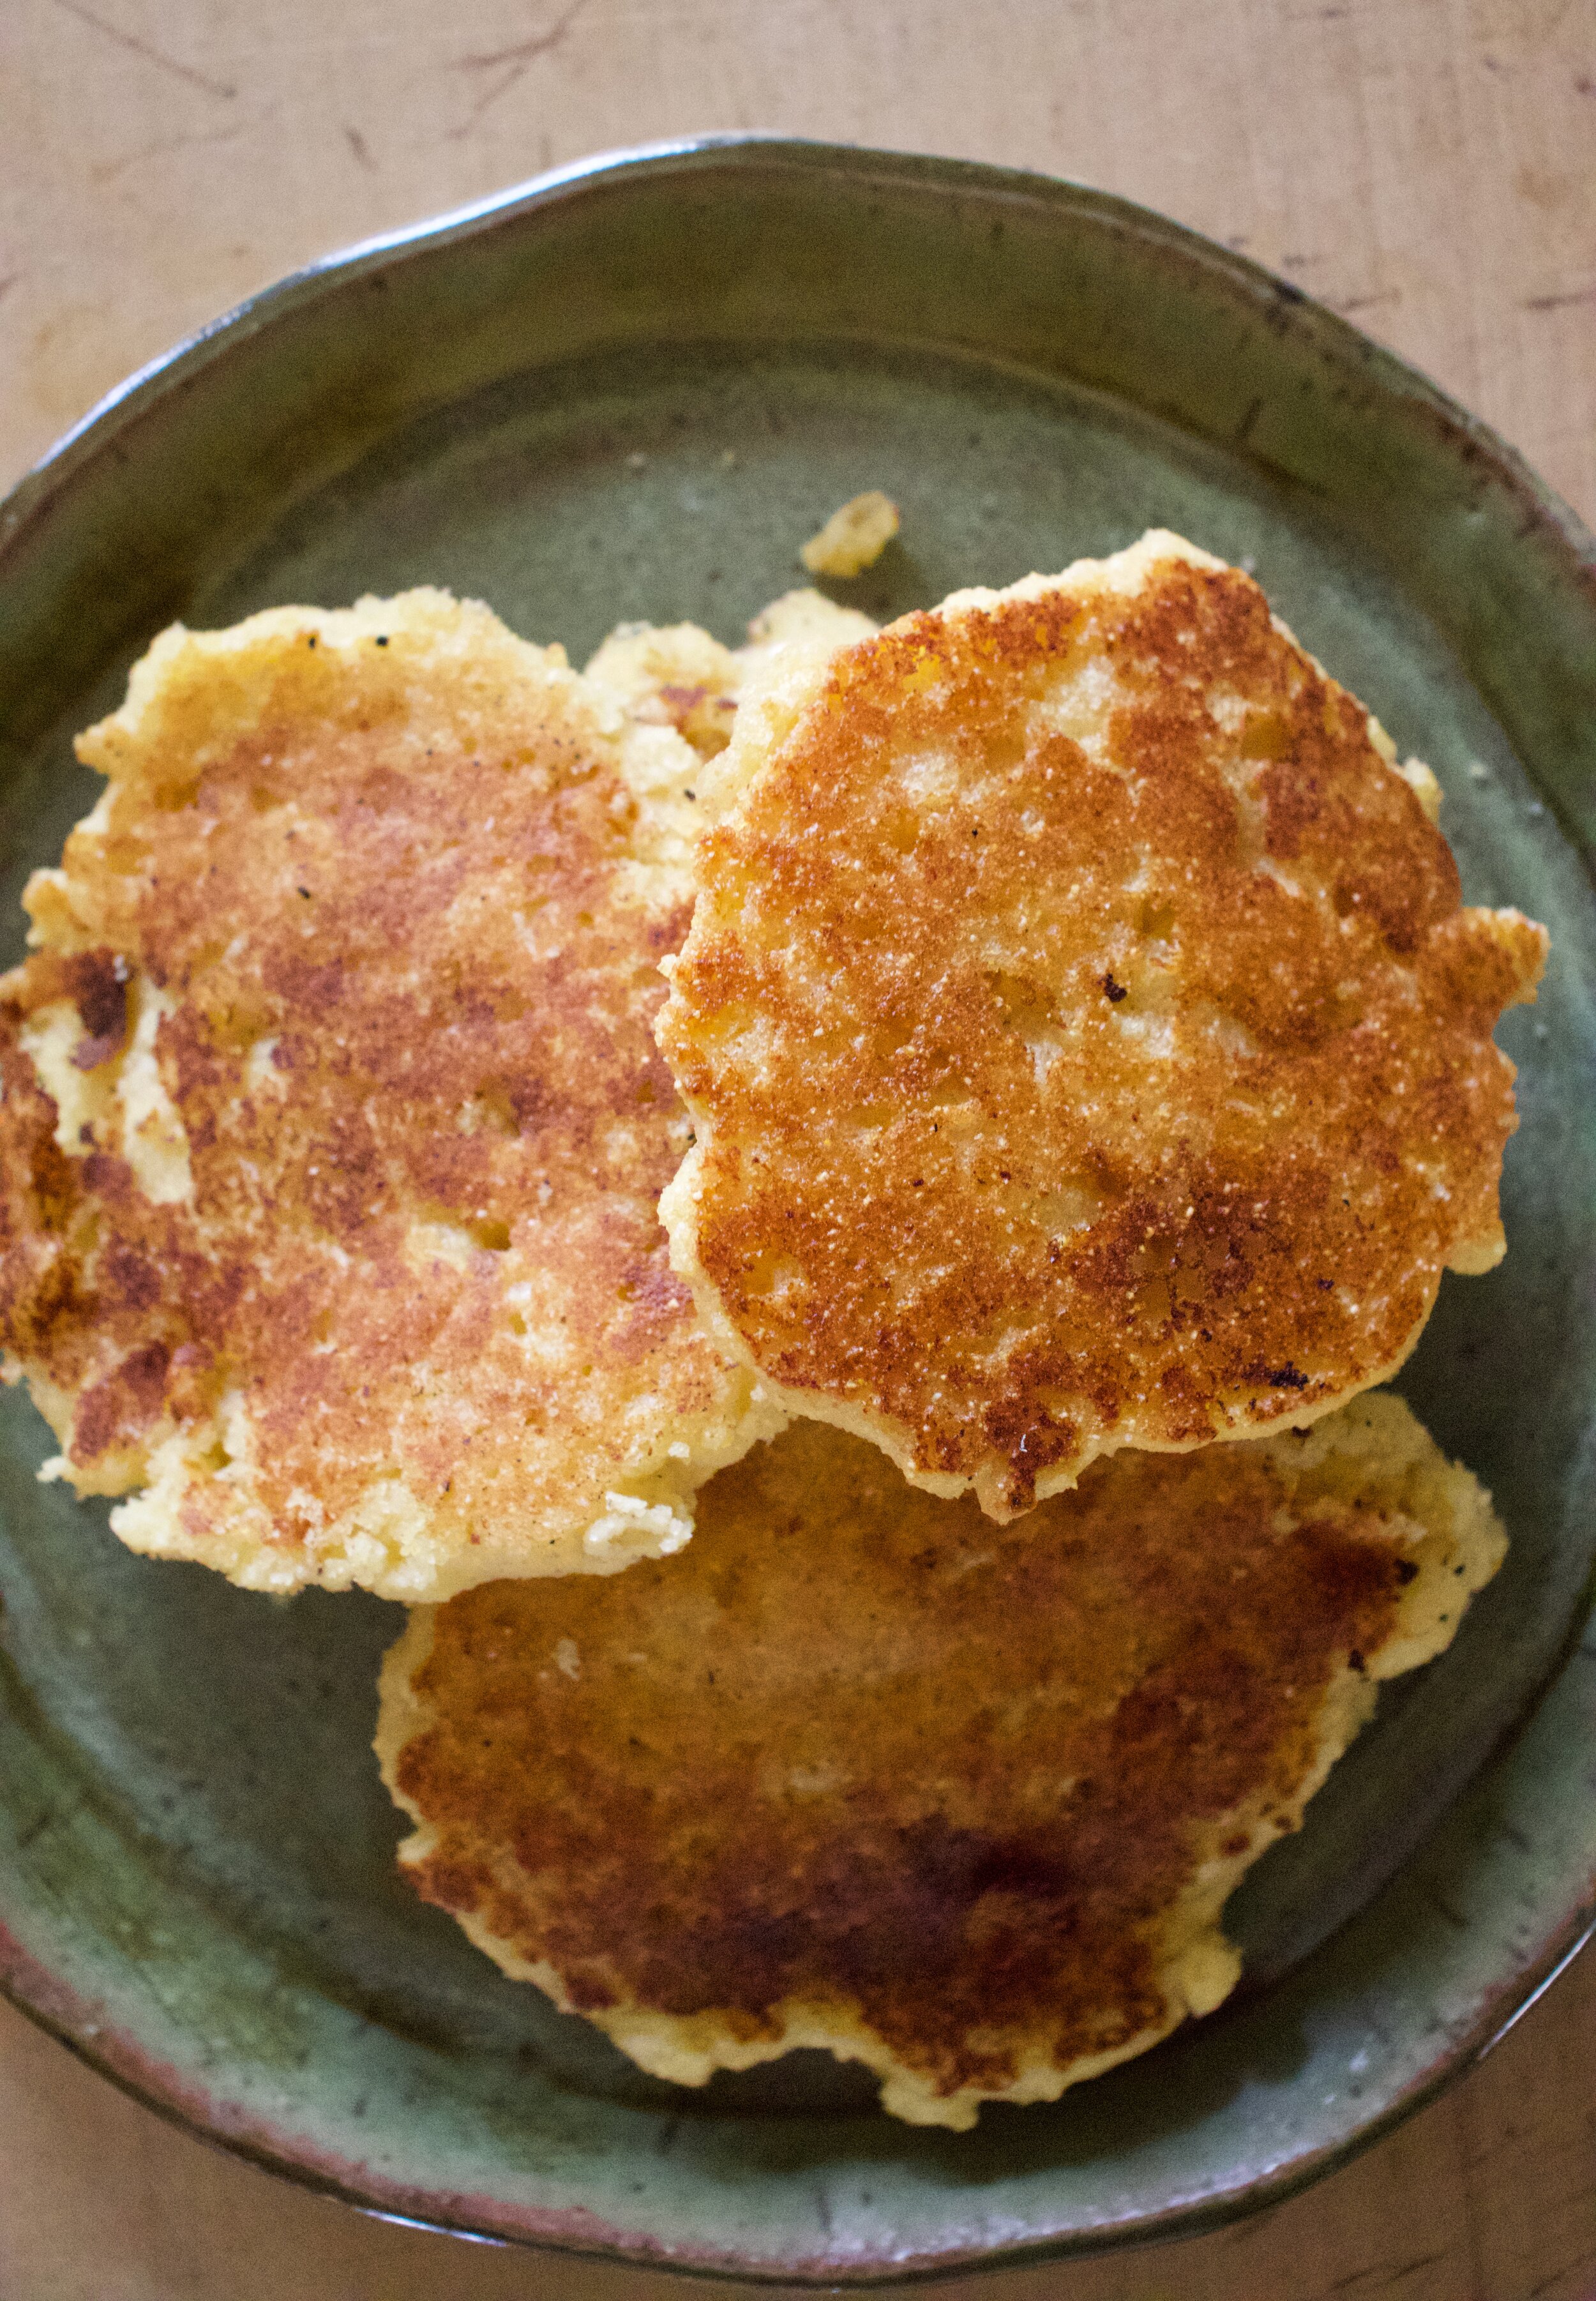
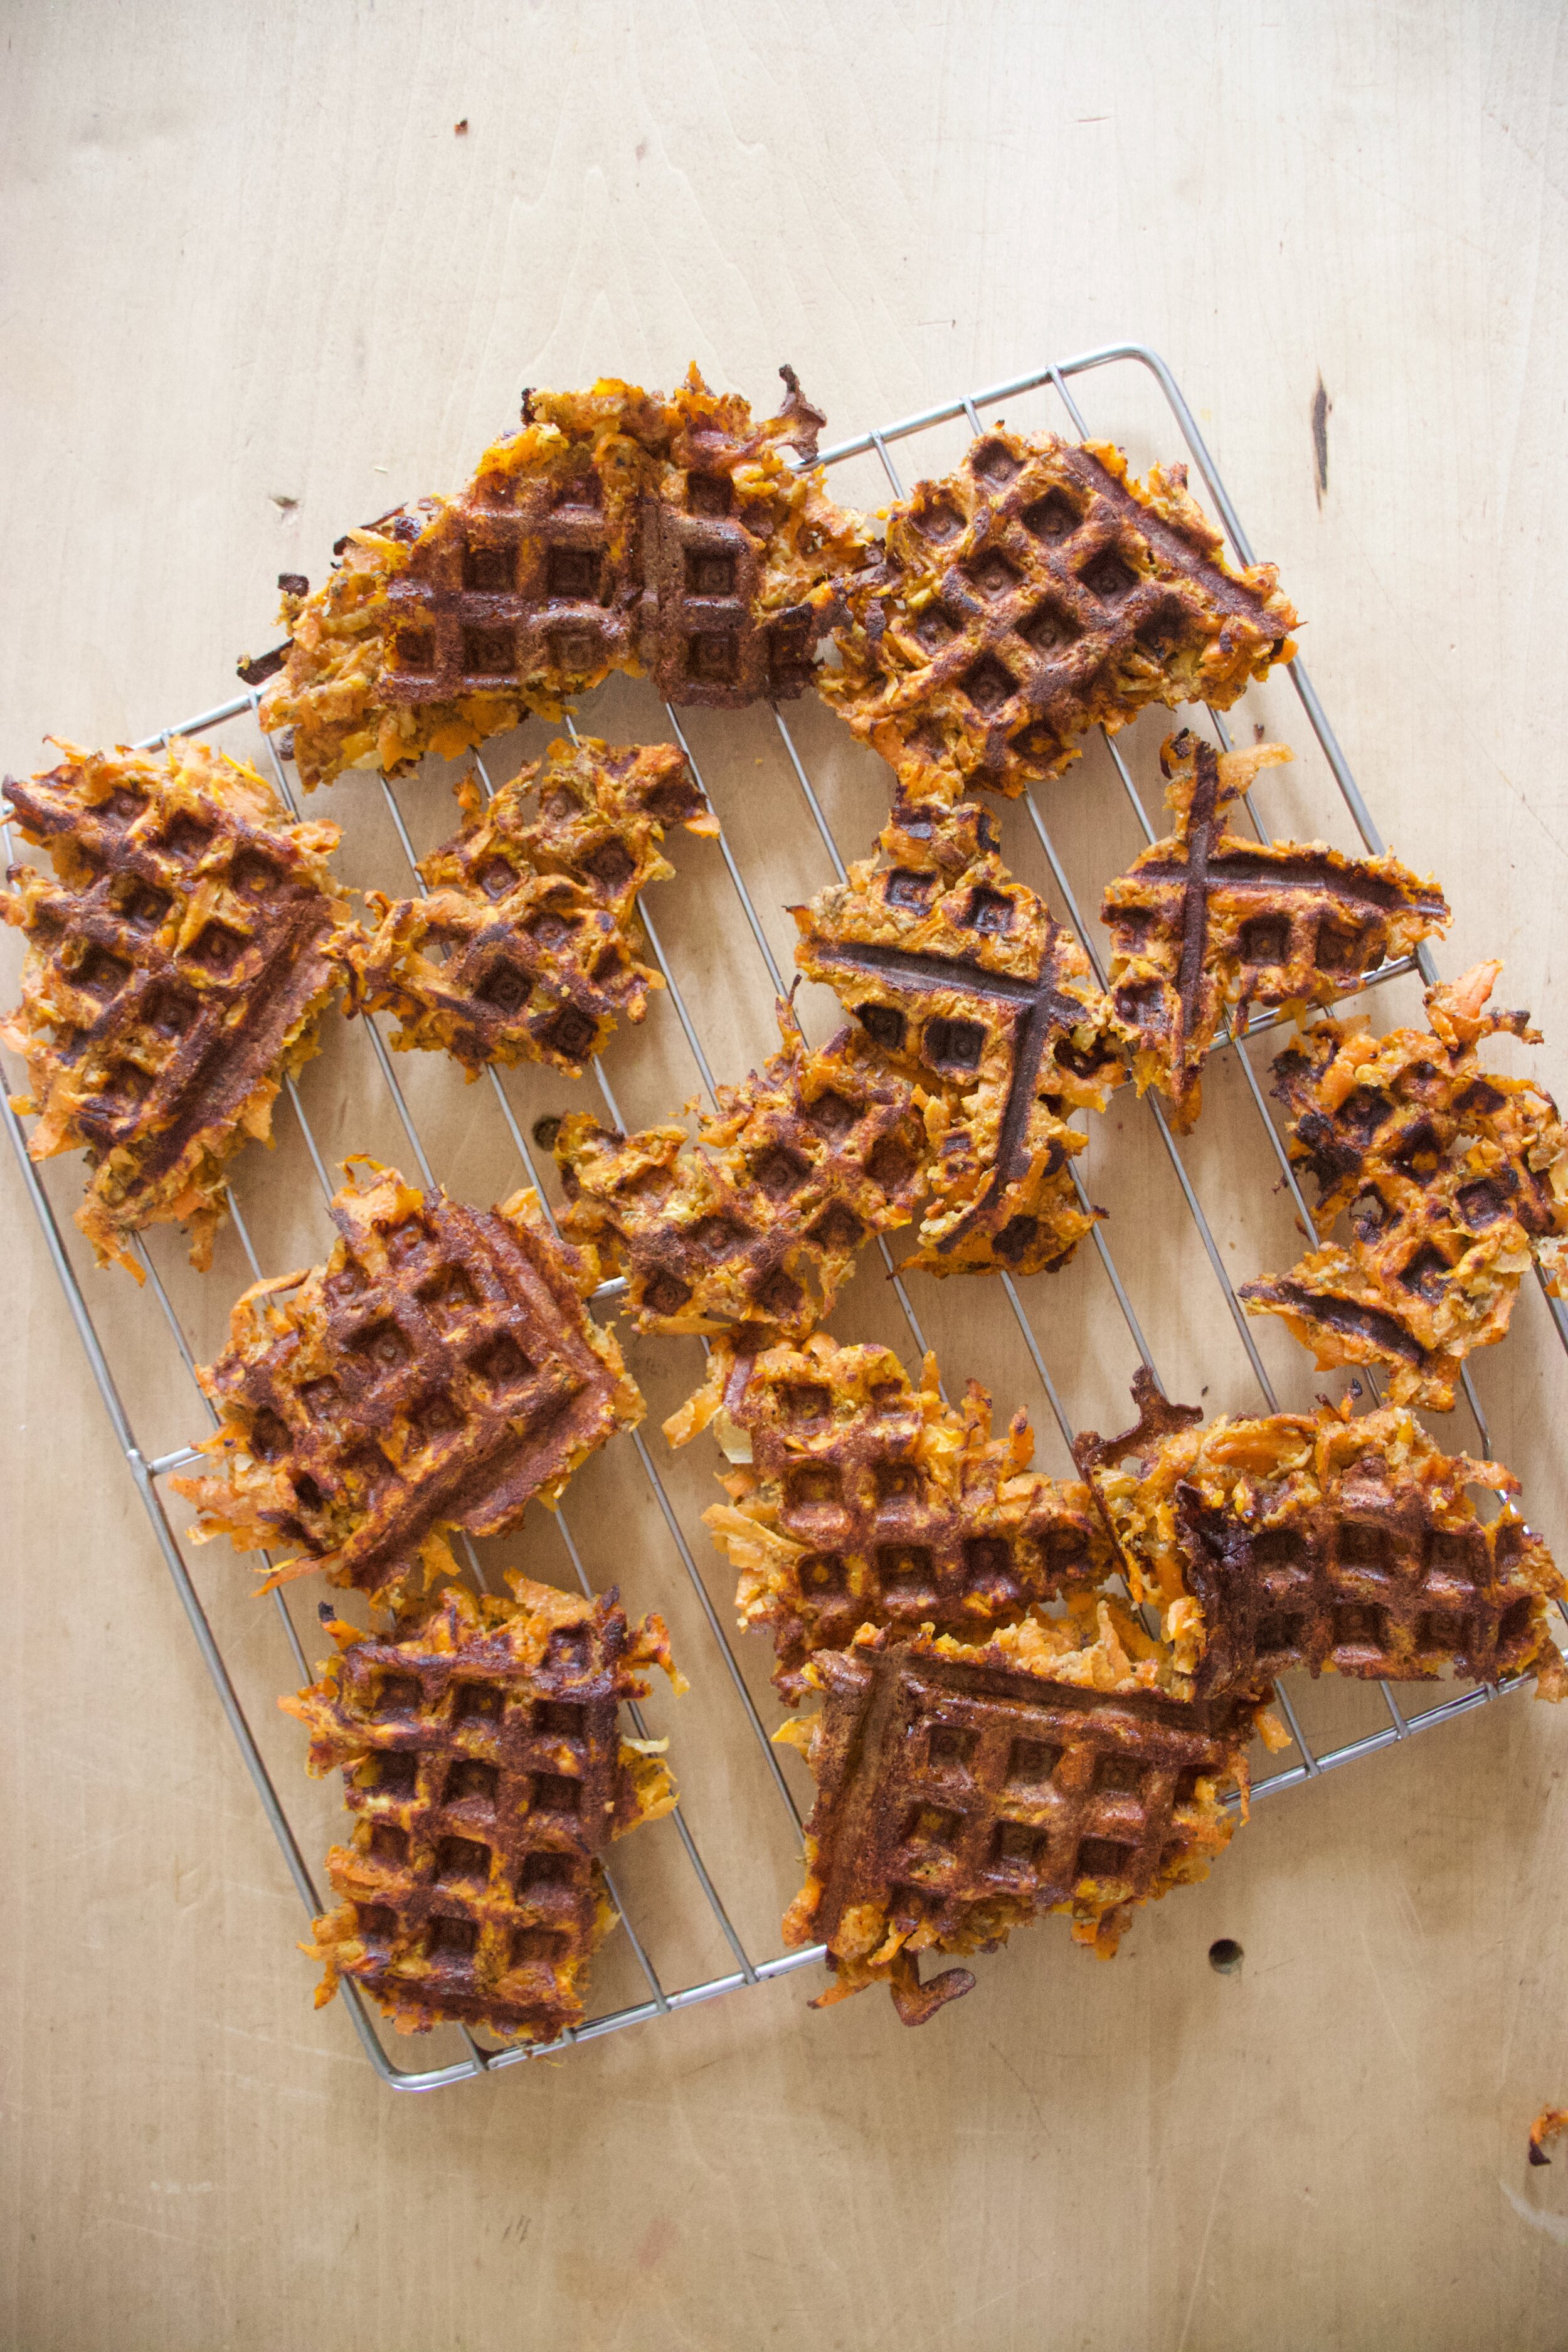
Crispy and brown and smelling so good. Remove form iron.

IMG_4528.jpg

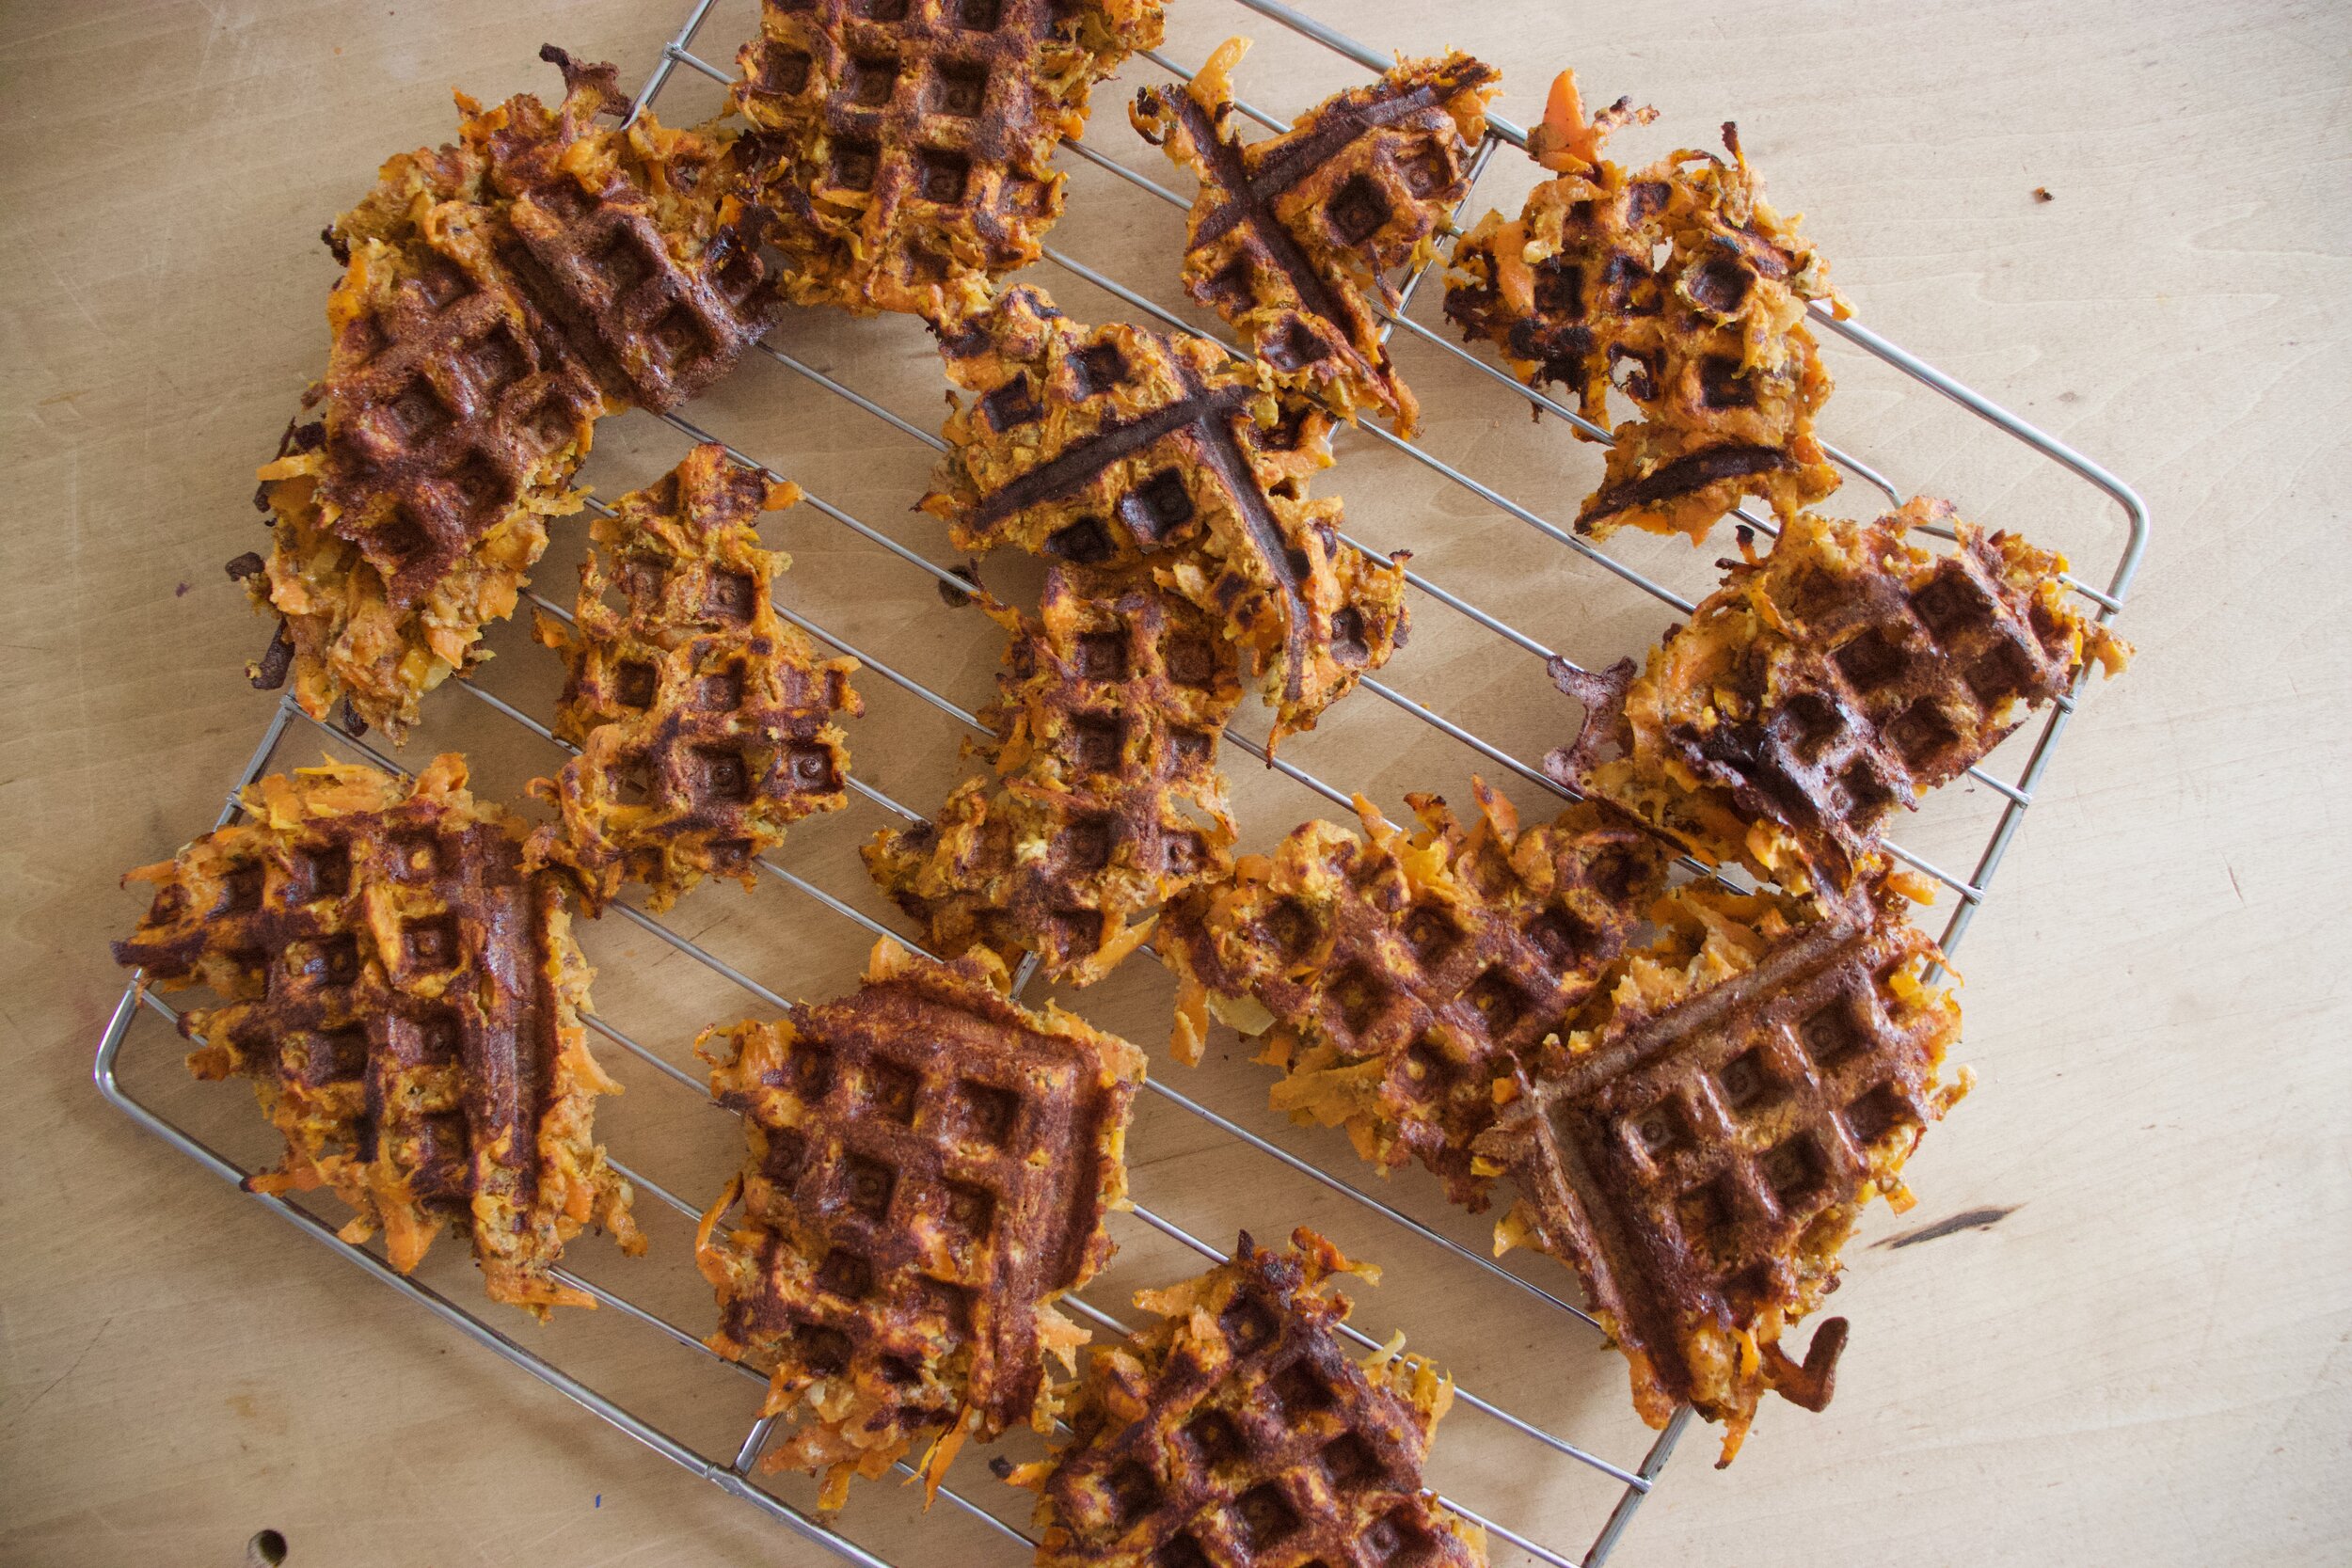
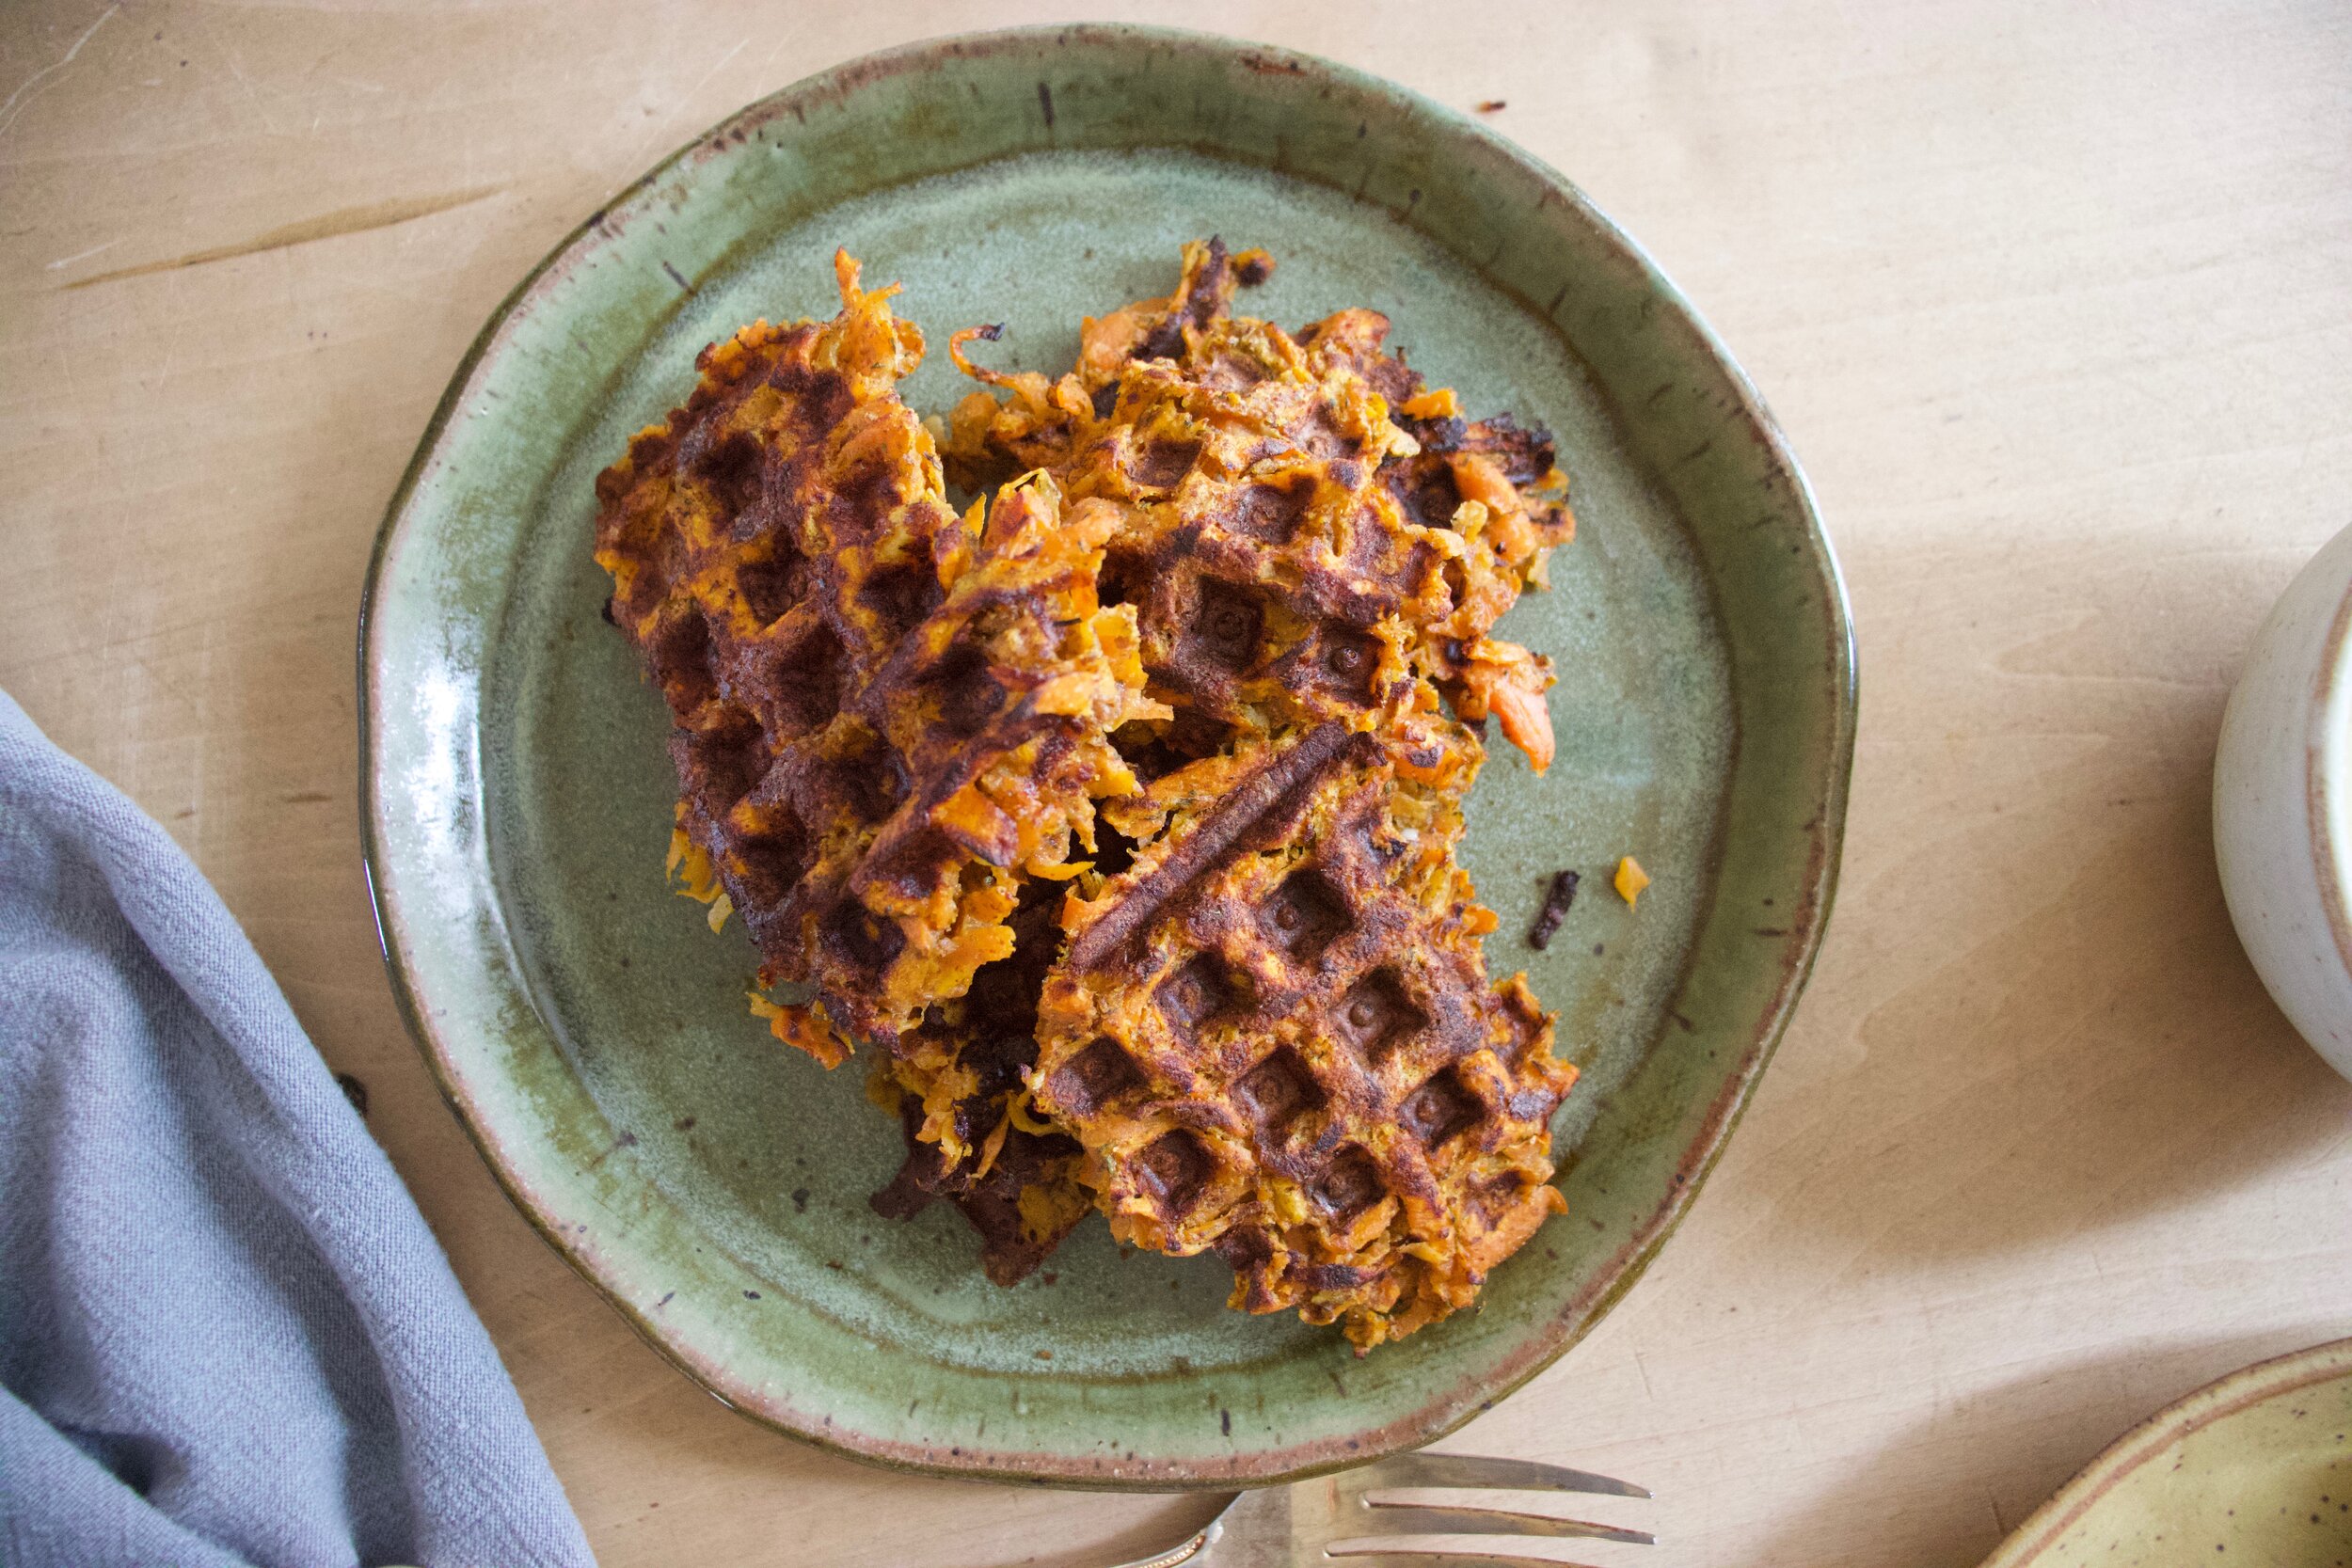
Fritters can go straight to plates or on a rack… Whatever you want.

IMG_4545.jpg

But eat them. Dip or cover them in the maple mustard sauce (it is so good!) and be happy.


Savory Carrot Dill Waffle Iron Fritters with Creamy Maple Mustard

serves 1-3

  • 3-4 carrots ( 2 1/2 to 3 cups shredded)

  • 1 small onion

  • 3/4 cup chickpea flour

  • 1 1/2 easpoon dried dill

  • 1/2 teaspoon garlic powder

  • salt and pepper

  • 1/3 to 1/2 cup warm water

  • 1 tablespoon REAL maple syrup

  • 1 1/2 tablespoons brown mustard

  • 1/3 cup plant based plain yogurt

  • tablespoon or so of high heat oil

Preheat waffle iron.

Mix maple, mustard, and vegan yogurt together in a small bowl and set aside.

Shred carrots into a large bowl until you have 2 1/2 to 3 cups of shedded carrot. Then shred the onion into bowl as well. Mix around then add in a pinch of salt and pepper, the dill, garlic powder, and chickpea flour.Mix tighter with lesser amount of water until everything is completely incorporated. Add a bit more water if the mixture is still dry.

To make the waffle fritters , lightly oil the iron and add a large scoop of the batter to the iron while it is hot then close and cook until the fritters are browned and crispy. Once cooked to you liking, remove the waffled fritters and place on a plate or rack and continue with the rest of the batter until it is gone.

Serve right away or warm and serve with the creamy maple mustard. Dip it in or scoop it on… It’s all good!

In brunch, dinner, Gluten Free, grain free, quick and easy, Vegan, Vegetables Tags savory Carrot Dill Waffle Iron Fritters With Creamy Maple Mustard, vegan, gluten free, dairy free, vegetable, plant based, waffle, fritter, dinner, breakfast, brunch, maple, food, easy, healthy, Brunch, easter
Comment

Watermelon Radish Orange and Pistachios Salad

March 20, 2021 Colleen Stem
IMG_4348.jpg

Have you ever seen a radish as pretty as a watermelon radish?

Is it weird that I got, what’s the word… giddy at the sight of watermelon radishes at my last farm share pick up? I legit did a little jig, yelled out to the farmers that I loved them and that that farm share pick up was the best on ever!

My farmers love me, but I am pretty sure they think I am crazy. (Maybe just a little bit)

Anyways I got me some of these super beauty radishes and have been munching away on them all week. Then I made this salad because sweet and juicy oranges and creamy pistachios go so well with peppery radishes. I added in some red onion for a little more bite and flavor, gave it a simple dressing of salt, pepper, and vinegar, and ate it all up. A big bowl of color and flavors. A bowl of happiness.

Now to the salad!

IMG_4280.jpg

The stuff. A couple watermelon radishes, oranges (I used a navel and and blood orange) a small red onion, a handful of pistachios, red wine vinegar, and salt and pepper.

IMG_4310.jpg

First slice up the radishes and onion very thinly. Use a mandolin if you have one.

IMG_4311.jpg

Toss the radish and onion into a big bowl along with the vinegar and a pinch of slat.

IMG_4303.jpg

Now cut peels from oranges and then cut oranges very thinly as well.

IMG_4313.jpg

Add the oranges to the bowl with the radishes and onion.

IMG_4320.jpg

Rough chop the pistachios.

IMG_4324.jpg

Toast them into the salad. And then top with pepper.

IMG_4346.jpg

Prettiest salad ever.

-C


Watermelon Radish Orange and Pistachios Salad

  • 2 medium sized watermelon radishes

  • 2 small oranges (navel or blood)

  • 1 small red onion

  • a handful of unshelled pistachios

  • 1 1/2 tablespoons red wine vinegar

  • salt and pepper

Start by slicing the rashishes and onion pretty thin. (use a mandolin if you have one) then place into a big shallow bowl. Sprinkle with a pinch of salt and drizzle in the vinegar. Toss around

Grab oranges and cut away peels. Then cut the whole oranges as thinly as you can (You can see the segments who or cut into smaller pieces) then place into bowl with the radishes and onions. Toss around.

Grab pistachios and give the na little rough chop then toss them into the salad. Add a little black pepper to taste then give the whole salad a little toss.

Eat.

In fruit, Nuts, Raw, quick and easy, salad, Vegan Tags Watermelon Radish Orange and Pistachios Salad, salad, vegan, plant based, spring, citrus, healthy, fruit, vegetable, nuts, color
Comment

Black Olive Tapenade

February 6, 2021 Colleen Stem
IMG_3602.jpg

A few weeks ago I bought a tub of hummus that came with a few toppings that you add in yourself. I don’t normally buy that kind of stuff but it was on sale and you know, had to try it. Turns out the hummus was good on it’s own so the toppings never got mixed in. They did get eaten though, just as sandwich spreads. One of the toppings that it came with was olive tapenade and let me tell you, the mr ate the shit out of it. Yes we love olives in this house (I hated olives unit one magical day a few years ago and now I freaking love them) but it has been so long since I have done much more then throw a few on a pizza or into a salad or just eat then straight. Now, well now we have to have olive tapenade on hand at all times. Spreadable, blop-able olives. Good on us.

This olive tapenade is the simplest as simple can get. Basic canned black olives, a little garlic, a splash of oil to make it a little more spreadable, and some lemon juice. I know that some tapenades call for fresh herbs, maybe nuts, or some other stuff, and by all means that is good too, but there is no shade in going simple. Simple taste damn good.

Now to the olive tapenade.

IMG_3526.jpg

The stuff. A can of pitted black olives, a couple cloves of garlic (raw or roasted) a little olive oi, and a lemon.

IMG_3536.jpg
IMG_3555.jpg

Place olives (make sure there are no surprise pits), chopped up garlic, about half a lemons worth or juice, and oil into a food processor or a jar (if using a hand blender) and blend until combined. Keep as chunky or go as smooth as you like. We like smooth with a few little chunks.

IMG_3595.jpg

And that is it. You now eat it, any way you want. The mr really likes his olive bread toast situations, as for me, I like it on salads, used as veggie dip, or eaten straight from jar with a finger. Just living my truth.

-C


Black Olive Tapenade

makes a hefty cup of tapenade

  • 1 can pitted black olives

  • 2 cloves garlic (raw or roasted)

  • 1 teaspoon-1 tablespoon olive oil

  • a lemon (optional)

Stain olives from liquid, check for any stray pits, and place in a food processor or jar (if using a hand blender) along with the garlic, the lesser amount of oil, and a squeeze of lemon. Pulse or blend until spreadable and leave as chunky or go as smooth as you would like. Taste and add more lemon juice and or olive oil to your liking.

Eat it up with chips, bread, on salads or pastas. And yea spoonfuls to the mouth. Any left over store in a airtight jar in fridge for a week or so.

In condiment, quick and easy, Vegan Tags Black Olive Tapenade, vegan, plant based, spreads, topping, olive, gluten free, grain free, simple, easy, party, condiments
Comment

Pickled Ginger Dilly Sprouts

December 5, 2020 Colleen Stem
IMG_2269.jpg
IMG_2289.jpg

What are you even doing if you are not pickling Brussel sprouts?

Ok, I get that you might have some other stuff going on in your life right now so I won’t judge you, but you all really need to get on getting some sprouts in the next few weeks while they are good and seasonal and pickle yourself some. They are truly some kind of amazing. Crisp and crunchy. Vinegary with all the flavors of dill and ginger and the slightly sweetness of the sprouts themselves . Oh jeez, they are just so good. And they are refrigerator pickled so you don’t have to do a hot water bath which means you really have to excuse to not make them.

And while you are at it you might as well just make a bunch of jars to give to people this holiday season. Think about it, wouldn’t you love a delicious jar of deliciousness instead of another stupid whatever or what not? You will be the coolest person with your jars of sprouts. Guarantied!

Now to the pickled sprouts!

The stuff. Brussel sprouts , vinegar, fresh dill, chunks of fresh ginger, mustard seeds, peppercorn, red chili flakes, and salt.

Nice and clean spouts. Cut them in half.

Cut up the dill into smaller pieces and as for ginger, I minced a little and cut some up into larger chunks.. I like to eat chunks of pickled ginger too.

Vinegar and water go into a pot with the ginger, salt, peppercorn, pepper flakes, and mustard seed and brought to a rapid boil.

Once boiling dump in sprouts and dill and keep on heat for about 3 minute so the sprouts tenderize a little.

IMG_2247.jpg

Then dump it all into a clean jar. And that is it. Yes you can eat one, but really, you should wait like a day or two. And after a week.. Perfection.

So yeah, once you got them in a jar, let them cool to room temperature, top with a lid, and place in the fridge.

If you are wise you will make multiple jars because these sprouts will not last.

-C


Pickled Ginger Dilly Sprouts

makes 1 quart sized jar

  • about 20 good sized Brussel sprouts

  • 2 cups white vinegar

  • 2 cups water

  • 3-4 sprigs fresh dill

  • inch of fresh ginger root

  • 1 teaspoon pickling or kosher salt

  • 1 teaspoon peppercorns

  • 1 teaspoon mustard seeds

  • 1/2-1 teaspoon red pepper flakes (more for spicer)

Clean and halve all the sprout. Stick them all into a clean quart sized jar to make sure they all fit then dump them out.

Grab ginger and rough chop it. Cut dil up into smaller pieces.

Dump the vinegar, water, salt, peppercorn, red pepper flakes, mustard seeds, and salt into a pot. Bring to a rapid boil. Add in the halved sprouts and ginger and toss around. Keep on heat for about 3-4 minutes just to give the sprout a little bit of time to soften just a bit. Remove pot from heat and carefully dump all the sprouts and everything in the pot into the clean jar. Pack sprouts down with a wood spoon and make sure they are completely submerged in liquid. If all the liquid doesn’t fit, just dump into a smaller jar and use for a salad or something.

Let sprouts cool to room temperature then stick a lid on jar and place in fridge. Sprouts are good eaten whenever, but are at their best after a few days in the fridge.

They will keep for a month or so but who are you kidding, there is no way they will last that long.

In Vegetables, Vegan, snack, quick and easy, Pickled, holiday Tags dilly sprouts, brussel sprouts, homemade, refrigerator pickles, ginger, dill, quick, easy, fresh, seasonaf, gift idea, vegan, vegetable, food, gluten free, healthy, plant based
Comment

Johnny Cakes (AKA Cornmeal Pancakes)

October 31, 2020 Colleen Stem
IMG_1513.jpg
IMG_1449.jpg

Recently I went through my pantry, did an inventory of what I have, what I am out of, and what needs to be used up.

This is a reminder that we all should be doing this, especially now if you are a cold weather/holiday cook and or baker. Get a head start, make sure you can find flour and sugar, and make sure your baking powder and sodas are active!

My pantry is pretty freaking well stocked if I do say so myself. One thing I like to do though is use up ingredients that are not super staples (like cornmeal) before I buy more. And I was low on cornmeal so I figured I would just use the rest up for dinner and pick up a fresh bag during the next grocery shop. I was planning on making a pan of baked cornbread but time got away from me and it was too close to dinnertime for me to bake. So I grabbed a skillet and made cornmeal pancakes instead.

Just as good, if not better (I would say better) then cornbread. Crispy, soft, rounds of perfection. Eaten by the mr who claims he doesn't like cornbread( he really liked these🤷‍♀️) and took all of 8 minutes from start to finish for dinner. And now I will probably be making these way more often now because these little pancakes are perfect for serving with soup and chili. And I did get a fresh bag of cornmeal so I am all good to go!

To the cornmeal pancakes.

The stuff. Cornmeal, white whole wheat flour, salt, baking powder, honey or maple, olive oil, and boiling water.

IMG_1349.jpg
IMG_1362.jpg
IMG_1366.jpg
IMG_1373.jpg

Simple here. Cornmeal, honey or maple, and oil into a bowl. Mix in hot water until completely incorporated. Let sit for a minute or two then add in the flour salt ,and baking powder. Mix til combined.

IMG_1378.jpg

Batter into a hot skillet to cook, just like you would expect. Each side cooked until golden brown.

IMG_1417.jpg

Look at that color. Cooked to perfection.

IMG_1536.jpg

Place them on a wire rack instead of a plate as you make them, if you care about keeping them crispy.

Then you eat them. Anyway you like. You can go the sweeter route and pour some maple on a stack or smear some jam on top. Or savory like I did here, topped with tomato stewed chick peas and avocado mousse. OR just eat them straight up hot, warm, or cold.

They are good all the ways.

-C


Johnny Cakes (AKA Cornmeal Pancakes)

makes 8-10 pancakes

  • 3/4 cup cornmeal

  • 1/4 white whole wheat flour

  • 1/2 teaspoon salt

  • 1 teaspoon baking powder

  • 1 teaspoon honey or maple syrup

  • 2 tablespoons oil plus more for skillet

  • 1 cup boiling water

Place the corneal, honey or maple, and oil into a medium sized mixing bowl. Dump in the boiling water and stir until everything is combined. Let sit for 2 minutes. Add in the baking powder, salt, and flour and mix install incorporated.

Grab a skillet and heat to medium on stove.

Once skillet is hot, add a touch of oil to evenly coat the bottom. Scoop batter into pan with a spoon and spread into a round that is no thicker then 1/2 inch. Cook for 3-4 minutes of until the bottom is golden brown. Flip and cook other side until golden brown. Place cooked cakes on a wire rake to keep crispy.

Eat right away, sweet of savory or plain as they are. Left overs are great, just place them in an airtight container for up to 4 days. Can be reheated to crispy perfection in the oven or in a toaster!

In biscuits and such, pancakes and such, quick and easy, Vegan Tags cornmeal pancakes, corn pancakes, Johnny cakes, hoe cakes, sweet, savory, vegan, dinner, dairy free, eggless, skillet bread, easy
Comment
← Newer Posts Older Posts →
 

https://thelovelycrazy.squarespace.com/config#/|/about/

Me. Food Maker.Food eater. Woo HOO!

STEM+NODE  SMALL BATCH AND ONE OF A KIND POTTERY

stem+node ceramics


____________________

Subscribe

GET NEW POSTS IN YO EMAIL

You are AWESOME!!!


@thelovelycrazy 2014-2025